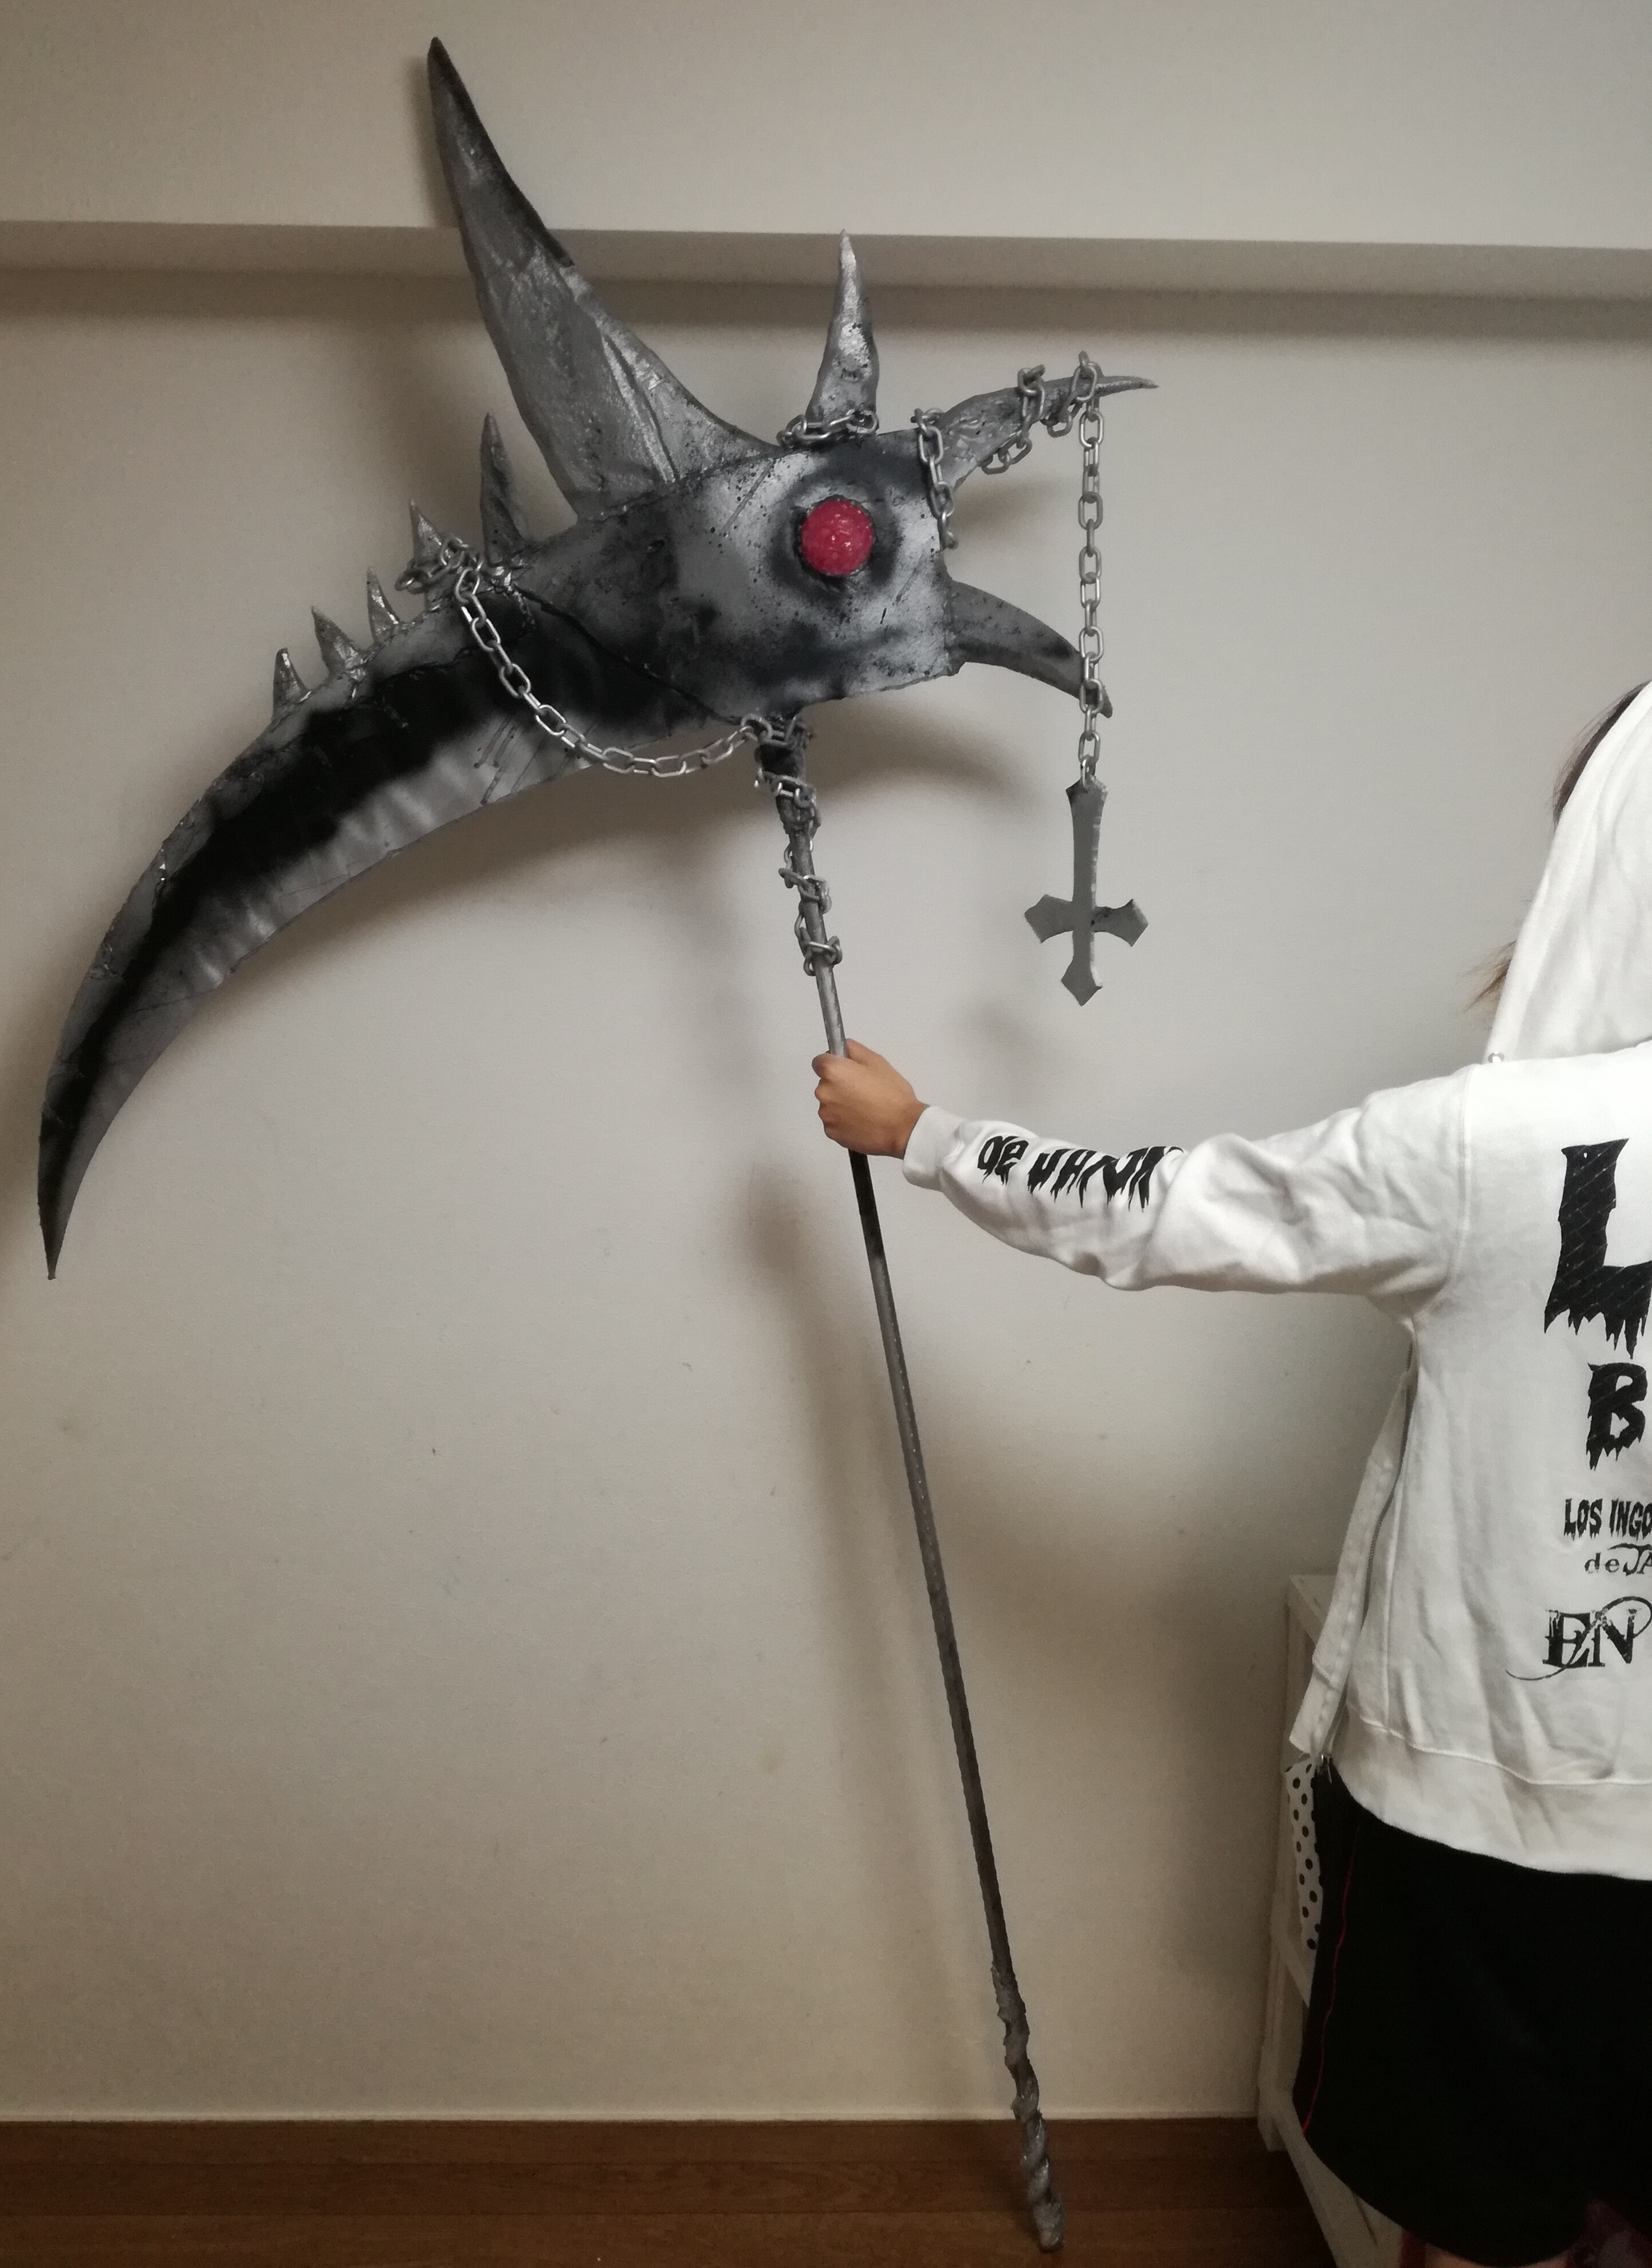
“King of Darkness” EVIL’s Sickle
 お父ちゃん
2018.10.5
お父ちゃん
2018.10.5


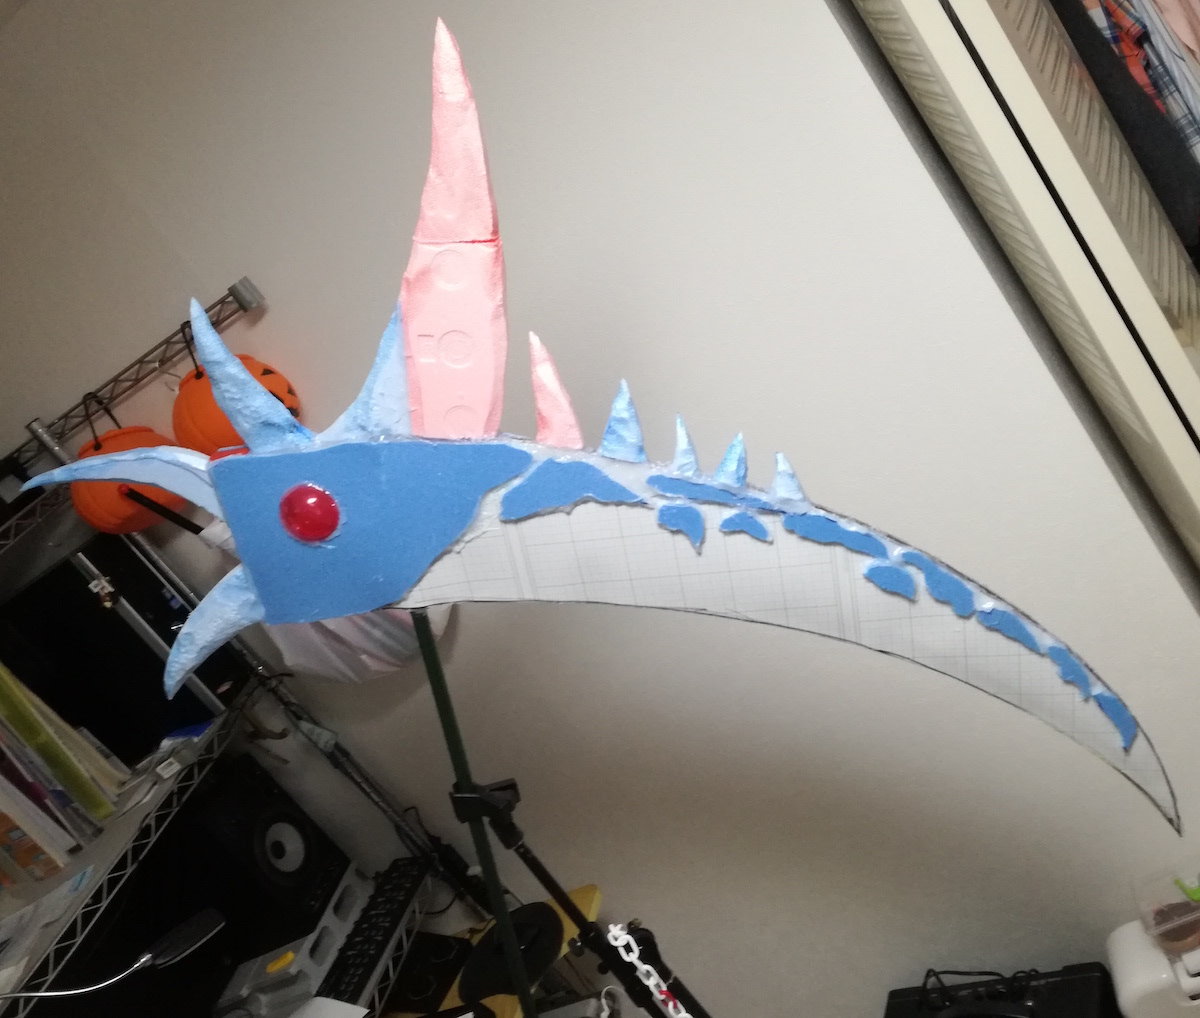
I made “King of Darkness” EVIL’s Sickle in New Japan Pro Wrestling.
I want to make such a kettle or to attach to the face.Do I have to harden the Styrofoam?#ハロウィン #njpw Pic.twitter.com/4Tbhm6vzRk
— Homemadegarbage (@H0meMadeGarbage) September 1, 2018
目次
Reference
The following video was very helpful.
EVIL’s Sickle production process
Sickle Base Preparation
Emulate a reference video to make the base of the sickle.
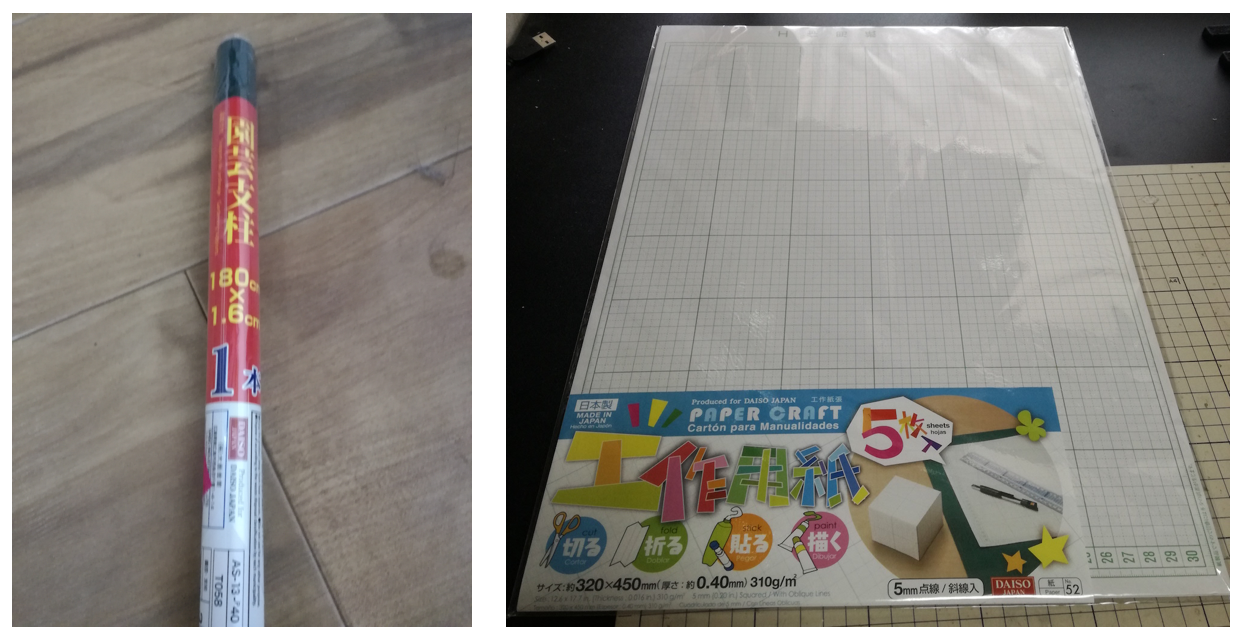
A garden prop of 180cm φ 1.6 cm in the handle, the blade uses the machine paper.I purchased it by a Daiso respectively.

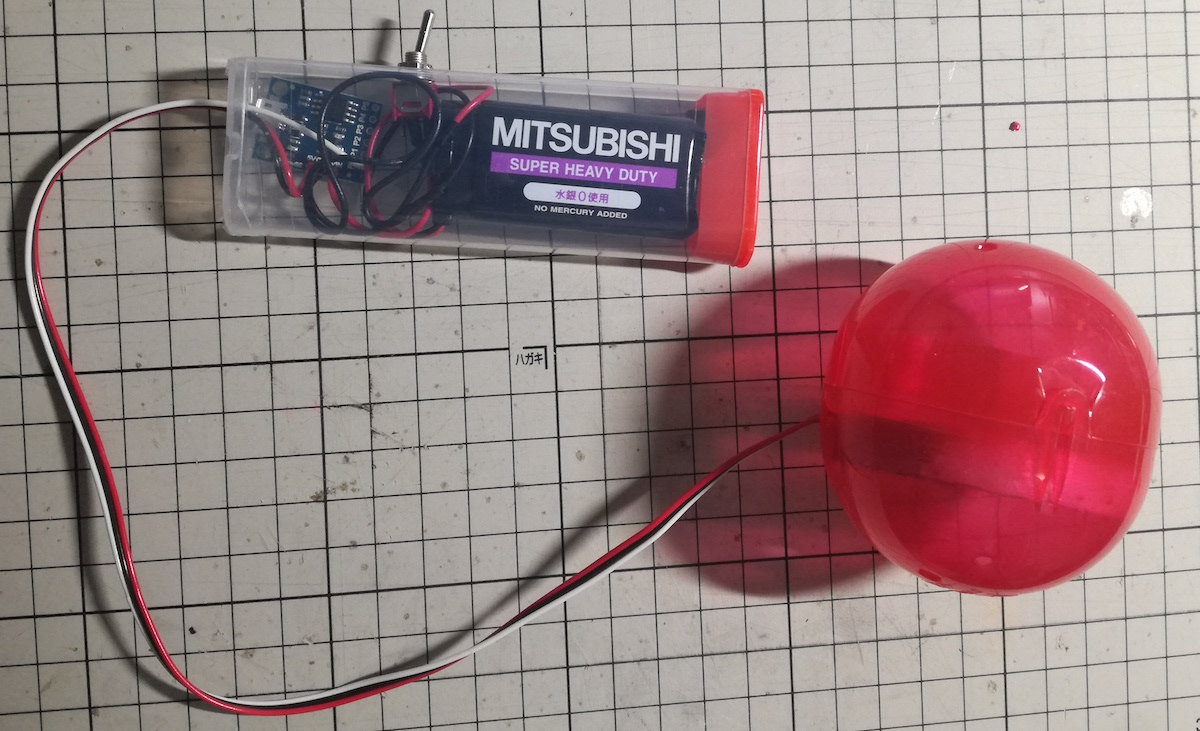
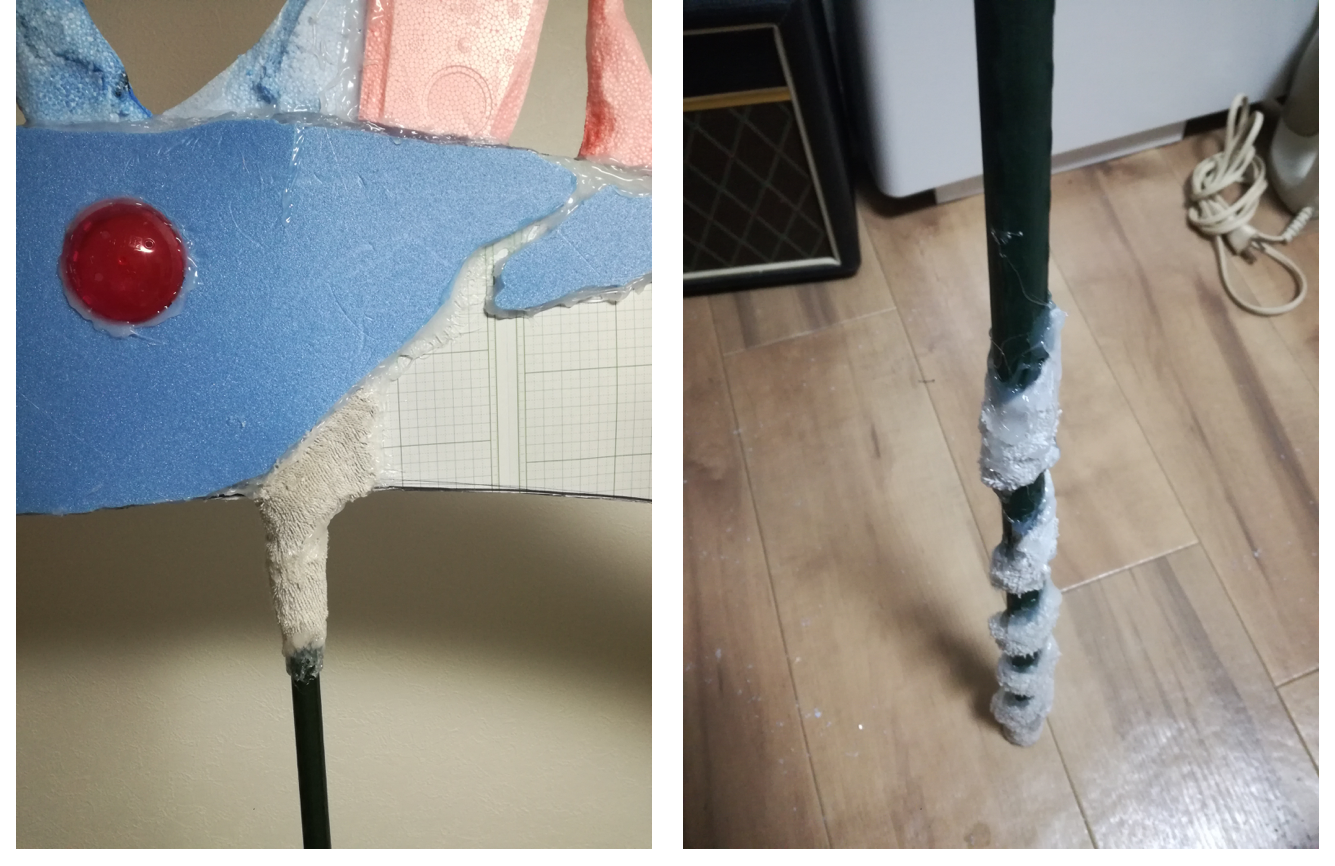
Cut two pieces of paper in the form of sickle.Because I want to shine the root of the Kamamoto body, I embed the capsule.The photograph is a blue capsule, but I actually used a red capsule (I got it from the garbage box of the nearby supermarket Gasachgacha corner.)。
Making a sickle-emitting part
The tape LED is charged in the red capsule.

Circuit configuration
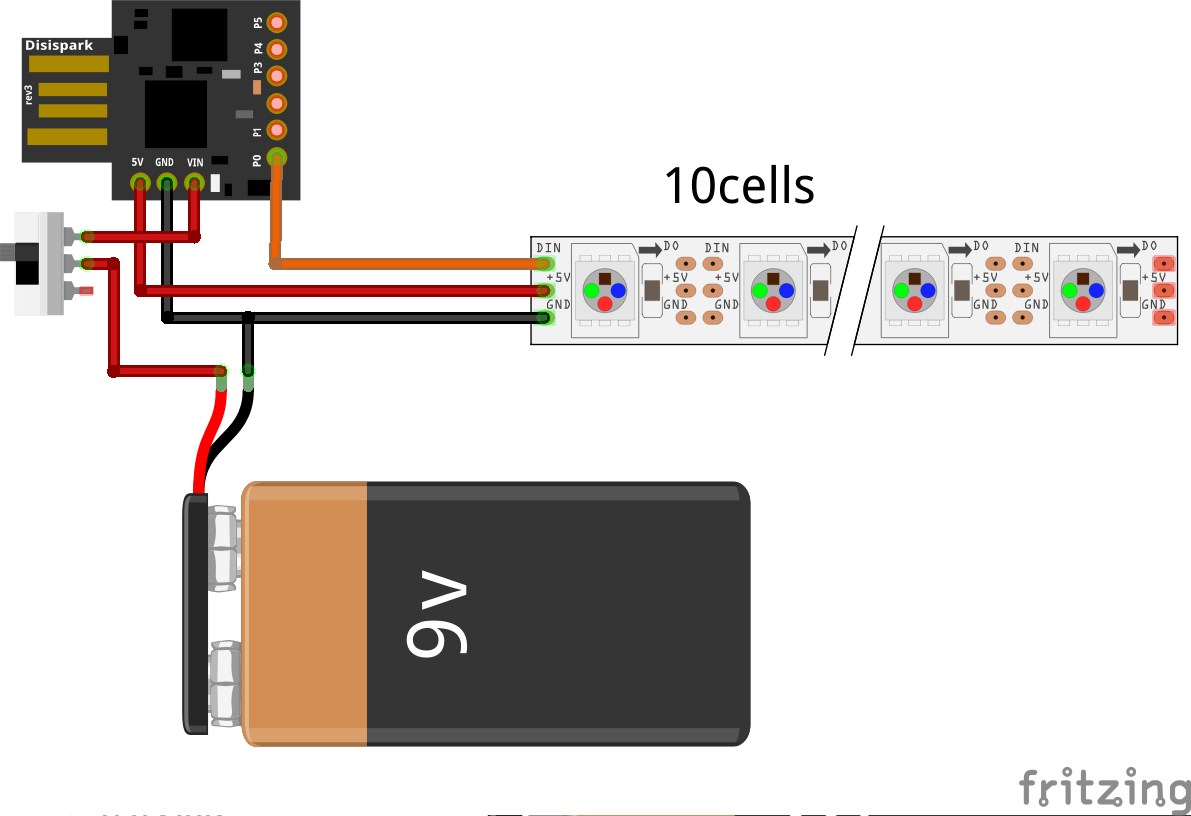
Parts
- Microcomputer Digispark Micro USB Develo
pment Board
- LED Tape Neopixel
- ON/OFF Switch
Light Emitting section
I put it in the case of the chocolate Baby by wiring respectively.
![[商品価格に関しましては、リンクが作成された時点と現時点で情報が変更されている場合がございます。]](https://hbb.afl.rakuten.co.jp/hgb/172ecaee.36dc8d33.172ecaef.0a0c342e/?me_id=1220468&item_id=10085947&m=https%3A%2F%2Fthumbnail.image.rakuten.co.jp%2F%400_mall%2Fmoris-dg%2Fcabinet%2Fi0050%2F45173653_1.jpg%3F_ex%3D80x80&pc=https%3A%2F%2Fthumbnail.image.rakuten.co.jp%2F%400_mall%2Fmoris-dg%2Fcabinet%2Fi0050%2F45173653_1.jpg%3F_ex%3D240x240&s=240x240&t=picttext "[商品価格に関しましては、リンクが作成された時点と現時点で情報が変更されている場合がございます。]")

Arduino code
I made a dimly lit led tape glow in red purple.
|
1 2 3 4 5 6 7 8 9 10 11 12 13 14 15 16 17 18 19 20 21 22 23 24 25 26 27 28 29 30 31 32 33 |
#include <Adafruit_NeoPixel.h> #ifdef __AVR__ #include <avr/power.h> #endif #define PIN 0 Adafruit_NeoPixel strip = Adafruit_NeoPixel(10, PIN, NEO_GRB + NEO_KHZ800); void setup() { // This is for Trinket 5V 16MHz, you can remove these three lines if you are not using a Trinket #if defined (__AVR_ATtiny85__) if (F_CPU == 16000000) clock_prescale_set(clock_div_1); #endif // End of trinket special code strip.begin(); strip.show(); // Initialize all pixels to 'off' } void loop() { for(int j=0; j<256; j+=4){ for(int i=0; i<strip.numPixels(); i++) { strip.setPixelColor(i, strip.Color(j,0,j/2)); } strip.show(); delay(40); } strip.clear(); strip.show(); delay(500); } |
Base creation
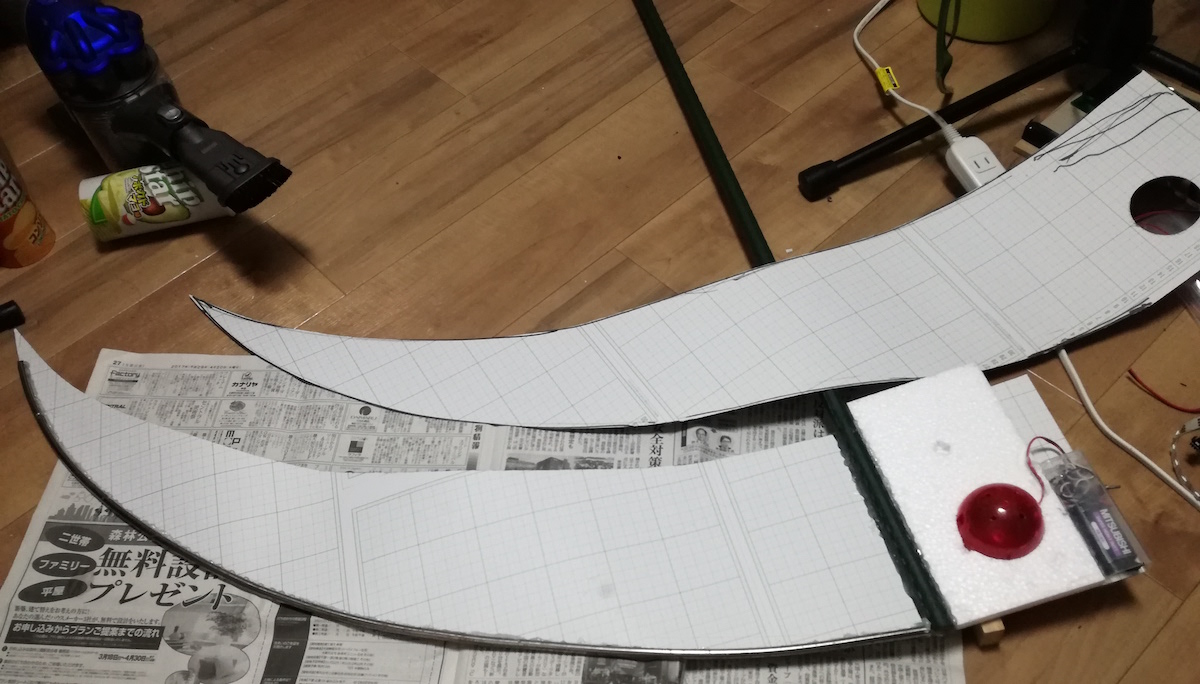
The capsule is put in the hole of the Styrofoam board and glued to the machine paper, and the top of the sickle is reinforced with the glue gun while bending the gardening prop to bend.The sickle of another piece of the machine paper also adheres.The prop part was bonded with a glue gun and the paper used Bond G17.
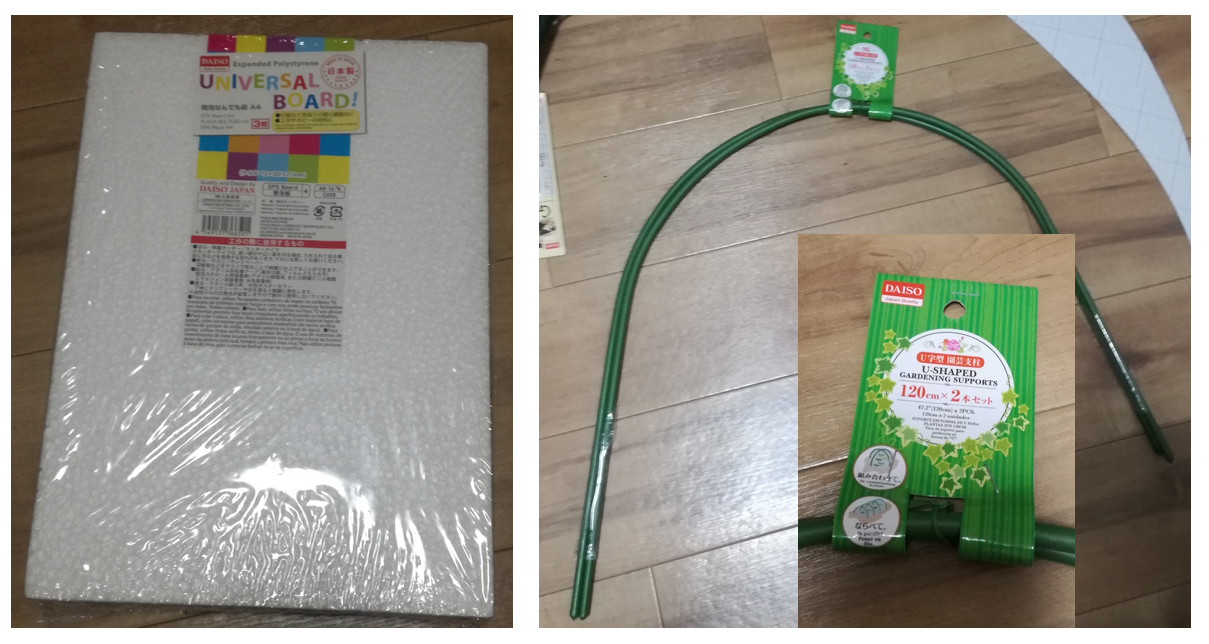
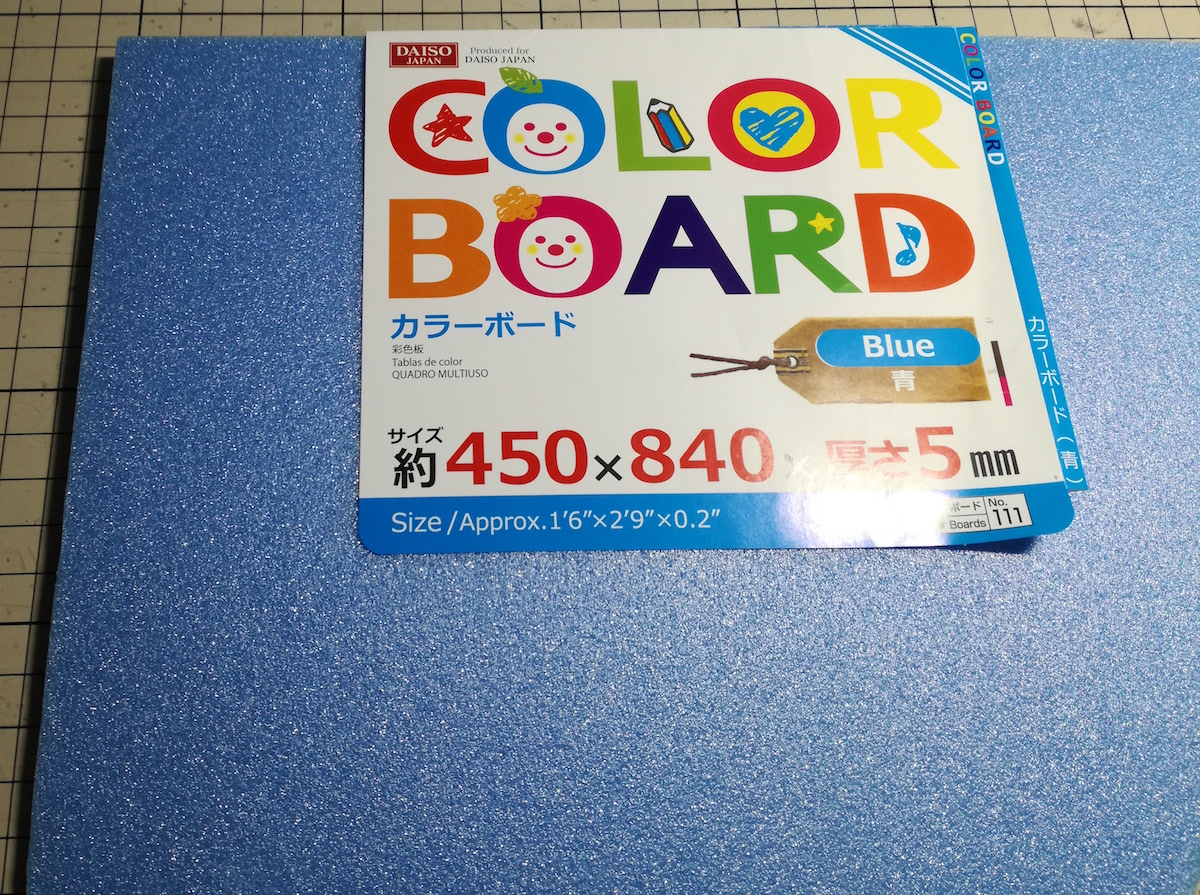
The Styrofoam board and the bending gardening prop were purchased by Daiso.
Operation
The LED flashes.
I was able to base.#俺たちのEVIL #鎌 #ハロウィン Pic.twitter.com/dOe7A3iCEe
— Homemadegarbage (@H0meMadeGarbage) September 16, 2018
Creating decorative Parts
Horn mounting
I make the horn with Styrofoam.I cut it out with a cutter and a styrofoam cutter.
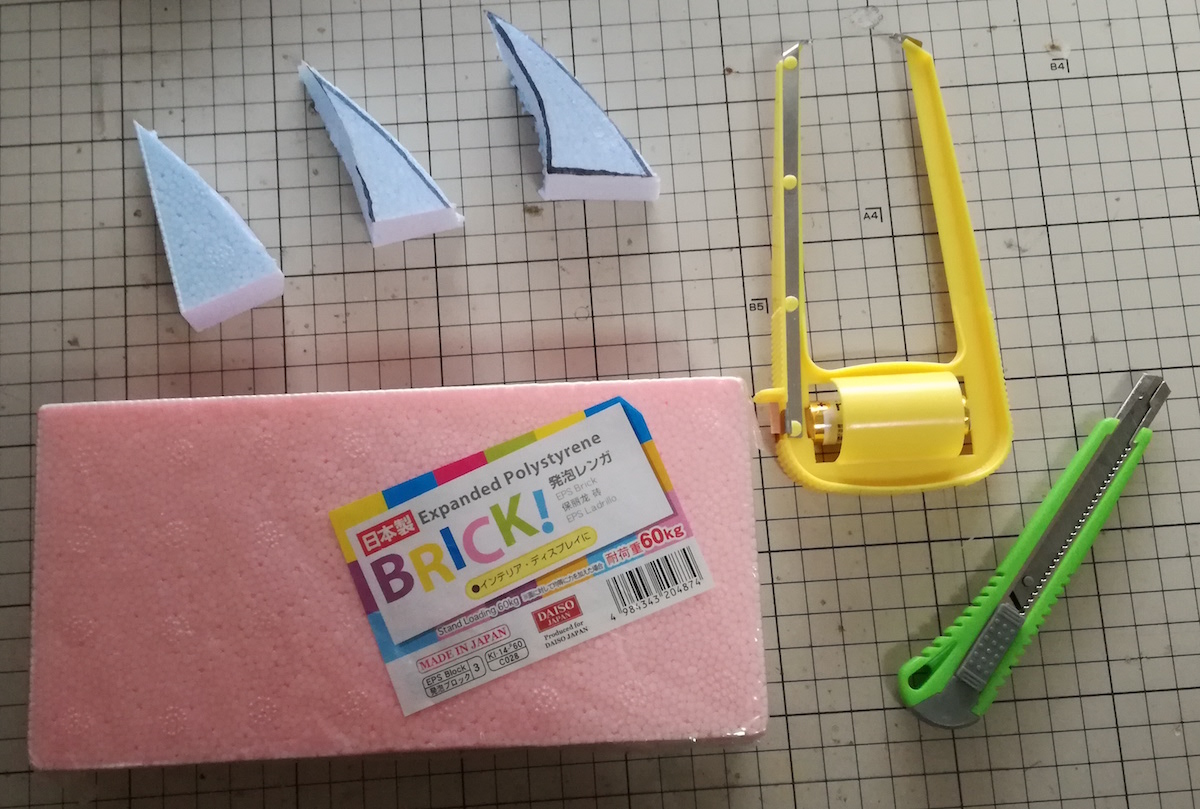
Styrofoam cutters were also sold to Daiso.Really useful for anything!
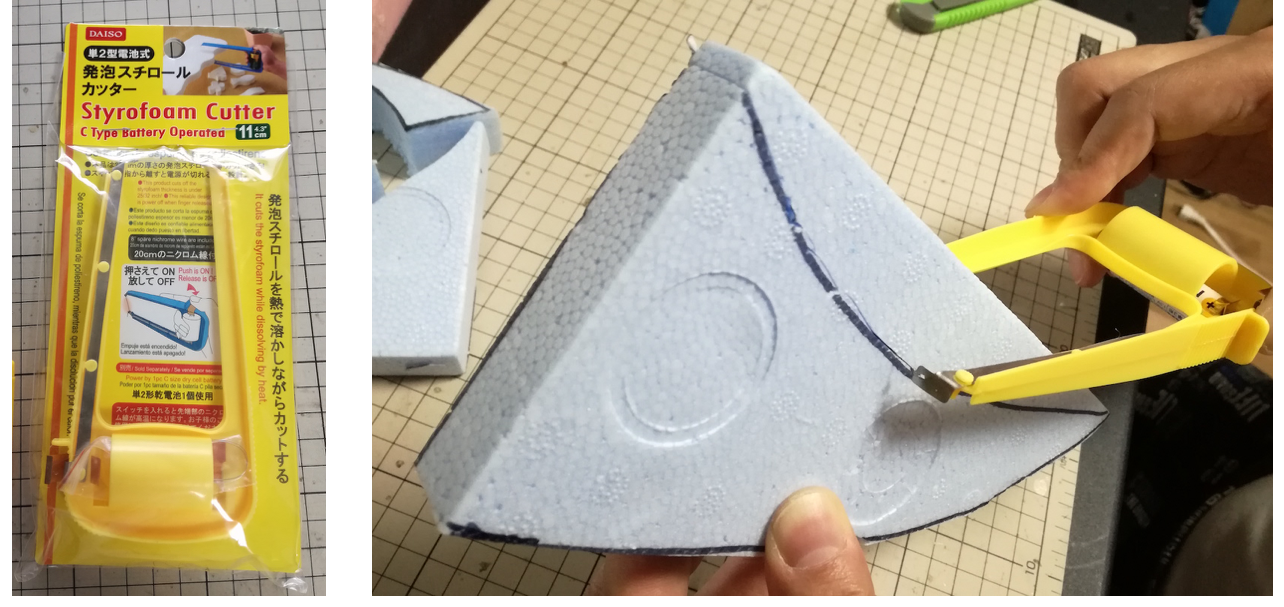
The sharpened horn is toasted lightly on the surface and smooth.Attach the horn to the sickle with glue gun.
Moreover, the color Board of the Daiso is cut at the top of the surrounding of the light emitting part and the sickle and it is applied and decorated.
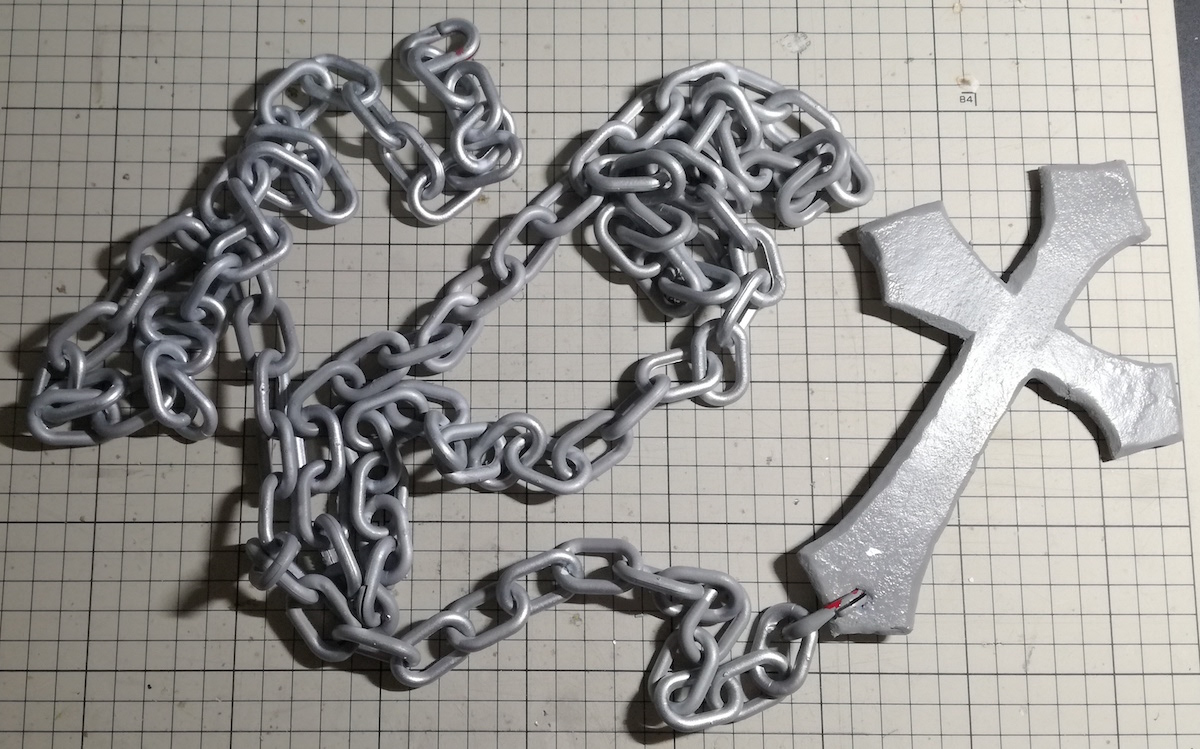
Chain and Cross Creation
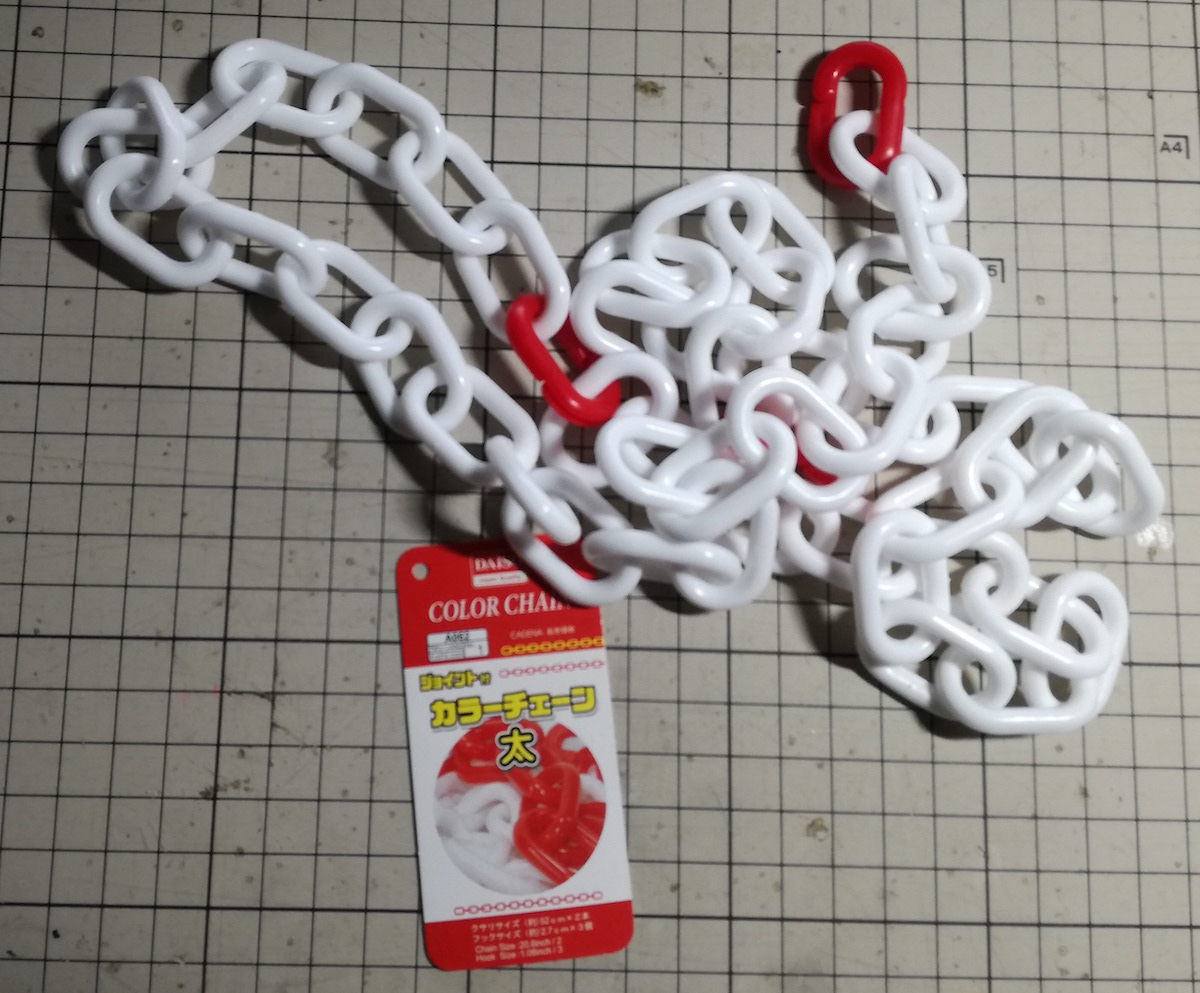
The sickle is decorated with two color chains of Daiso.
Create a cross with a color board.The edges are angled at an angle.
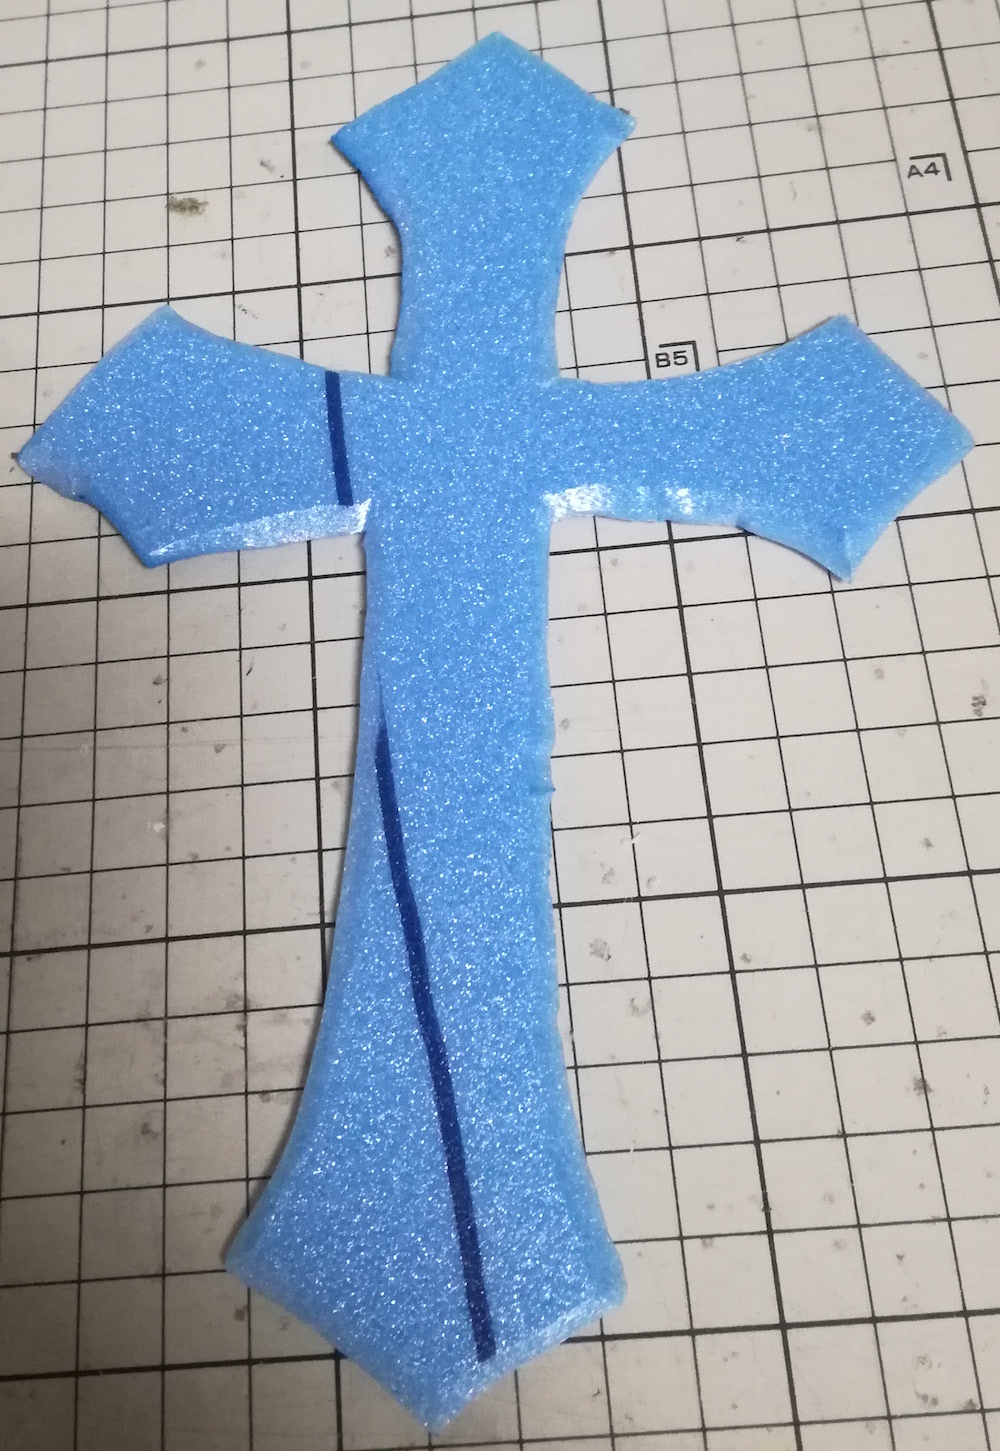
I was painted with silver acrylic spray of Daiso.
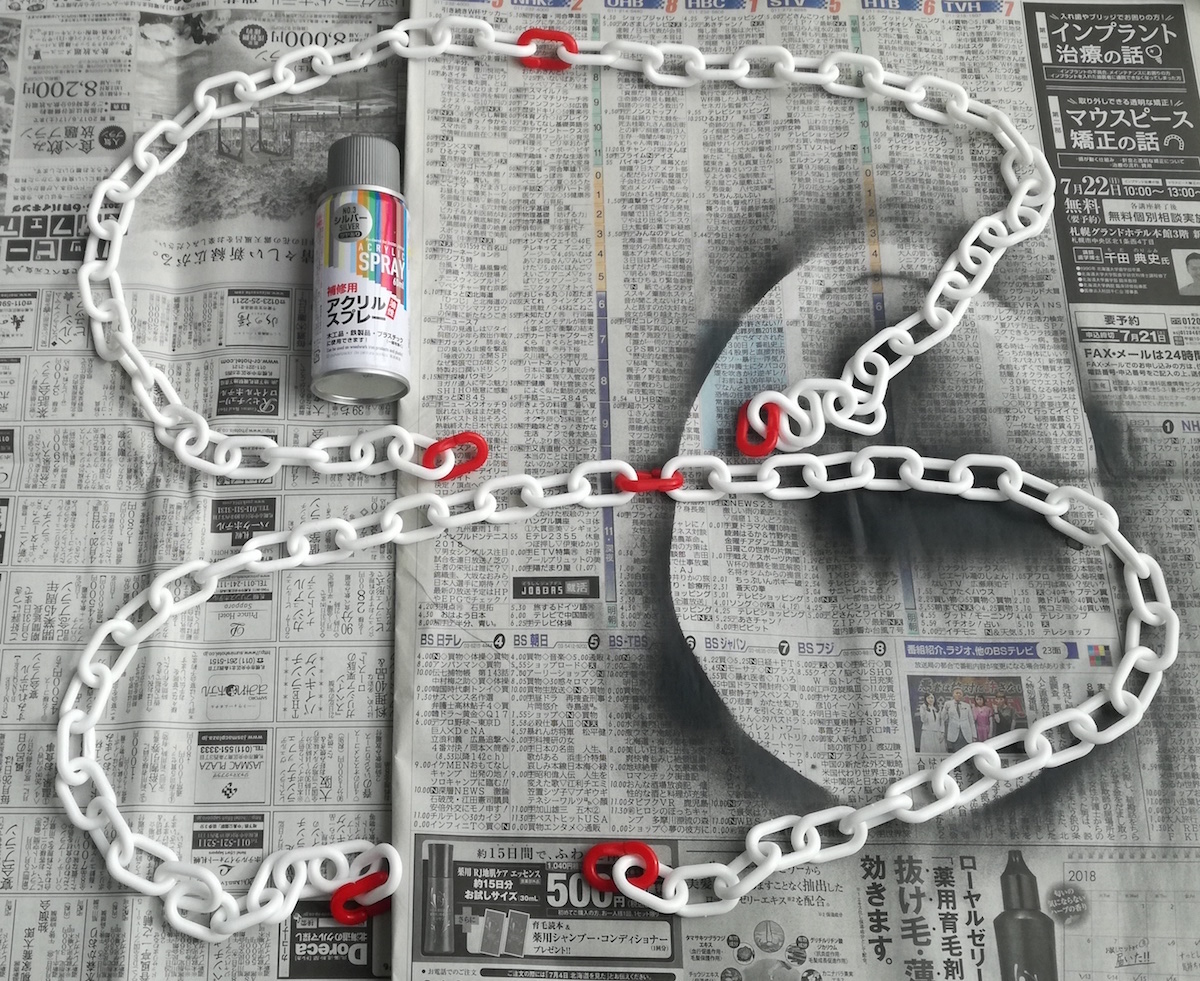
A hole in the cross is completed through the chain.
Handle Decoration
I put out the atmosphere by winding the cloth out to the end and the tip of the handle!
Sickle painting
I put a masking tape in the capsule, and painted the bond for woodworking which included lightly water on the whole sickle.I painted it thinly when I dried it about three times.
I used a silver, a black, and a gray spray.
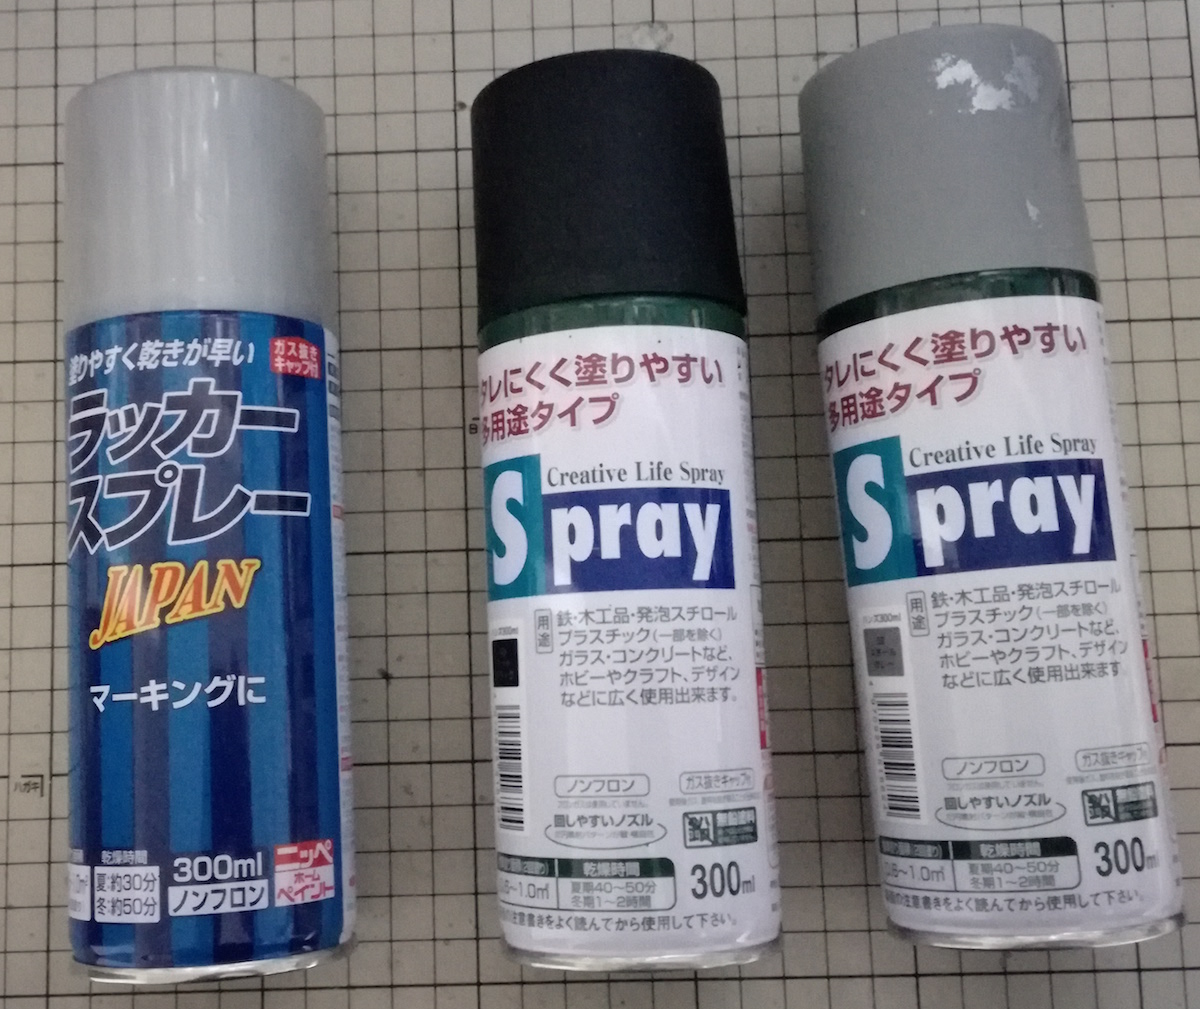
I’m not used to hanging out quite…Experience is necessary.Well done somehow!
I peeled off the masking tape of the capsule and coated it with a milky glue gun to diffuse the light.

It flashes dimly with the switch on.
Completed!
The chain is wrapped in a good feeling and fixed with glue gun.Completed in!
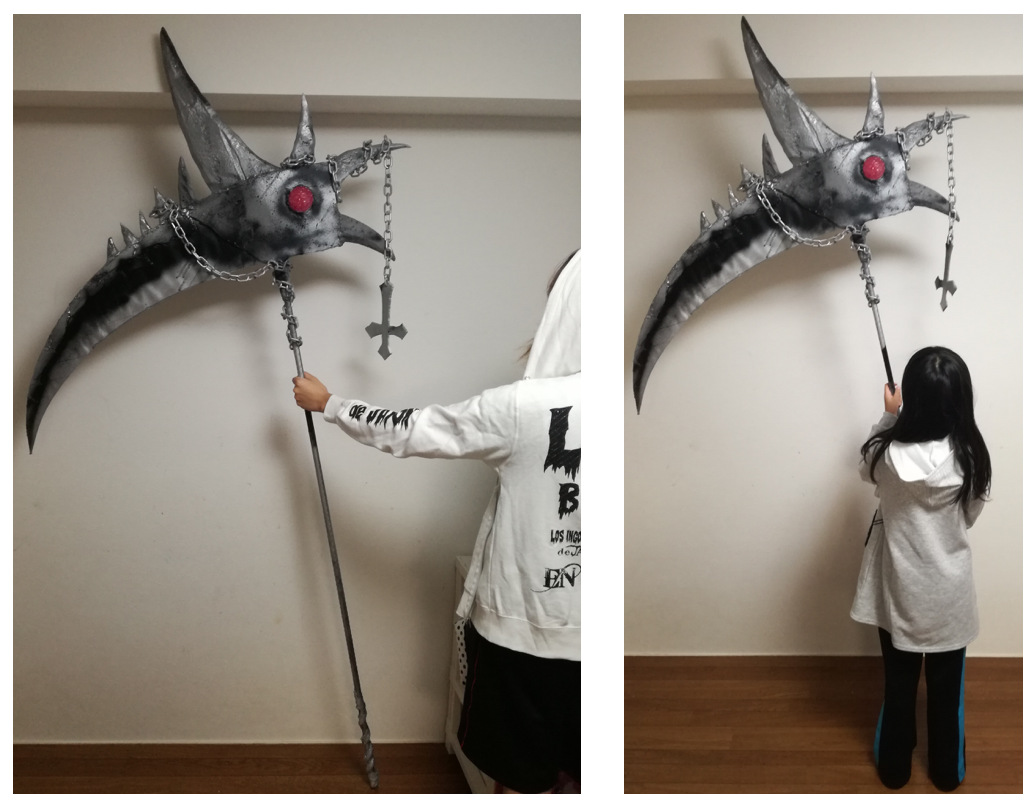
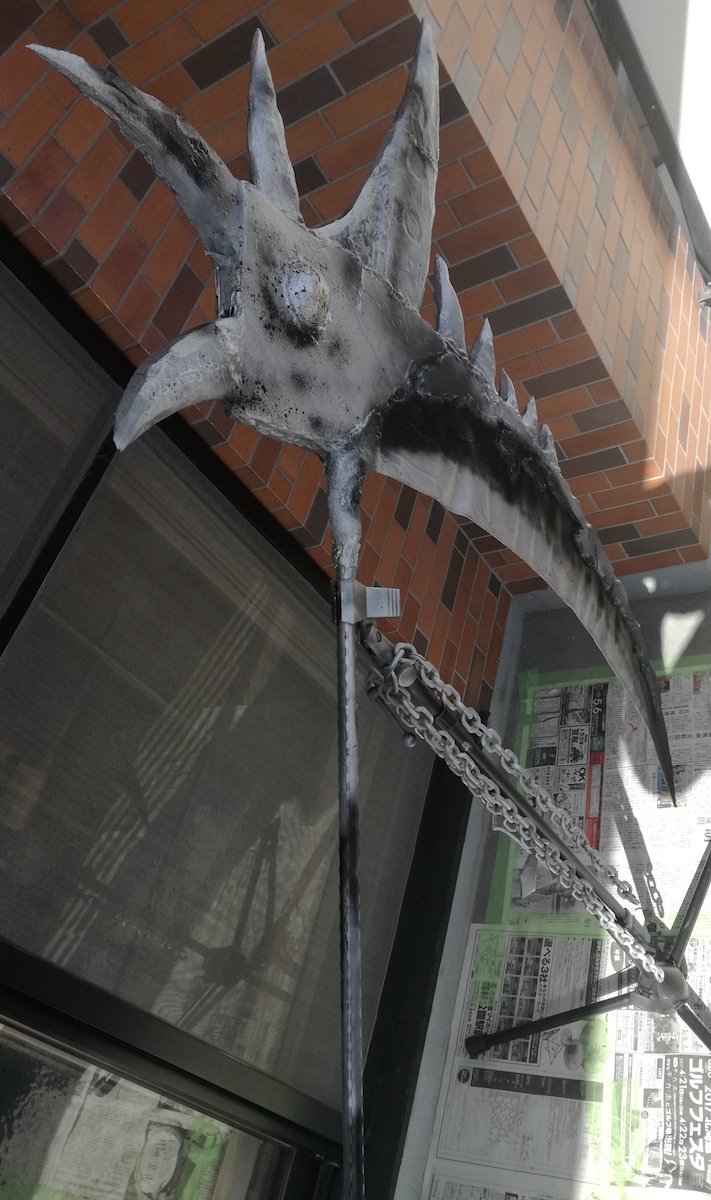
Height 216cm, blade 80cm, Weight 1.0 kg…Big!
Handle and joint processing
Follow the reference video to remove the handle and connect it to the joint.In order to make even a little compact!
Cut the hand of the gardening prop with the pipe cutter.The inside is a steel pipe.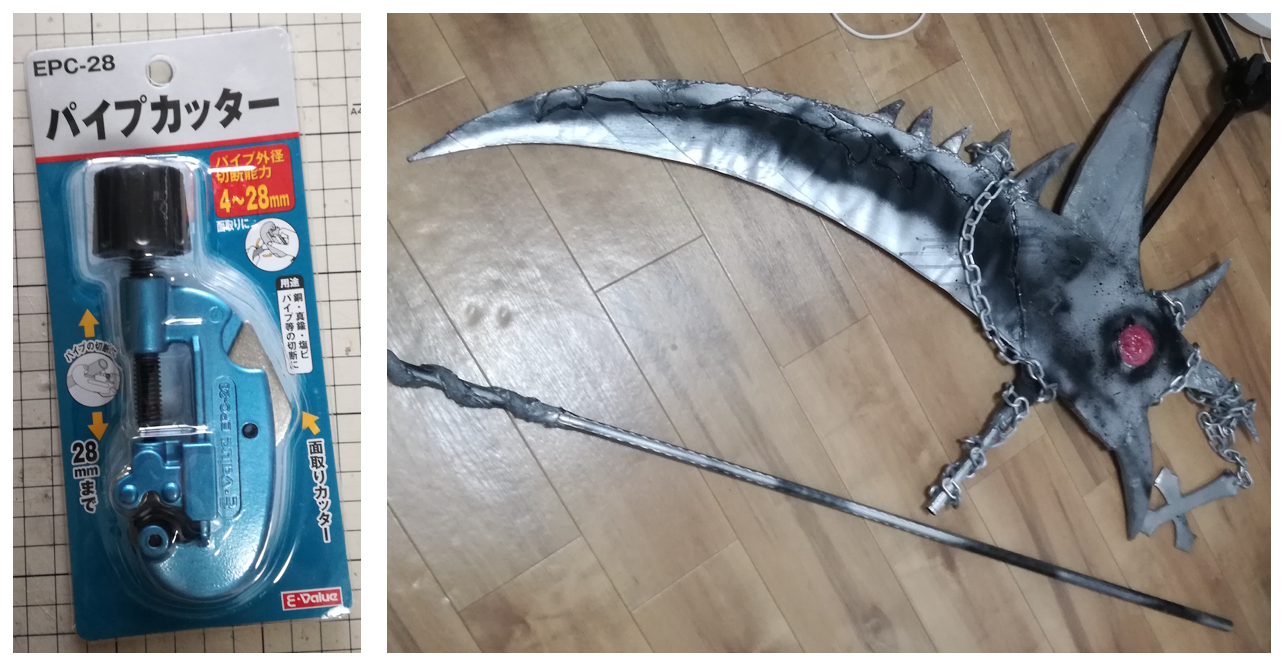
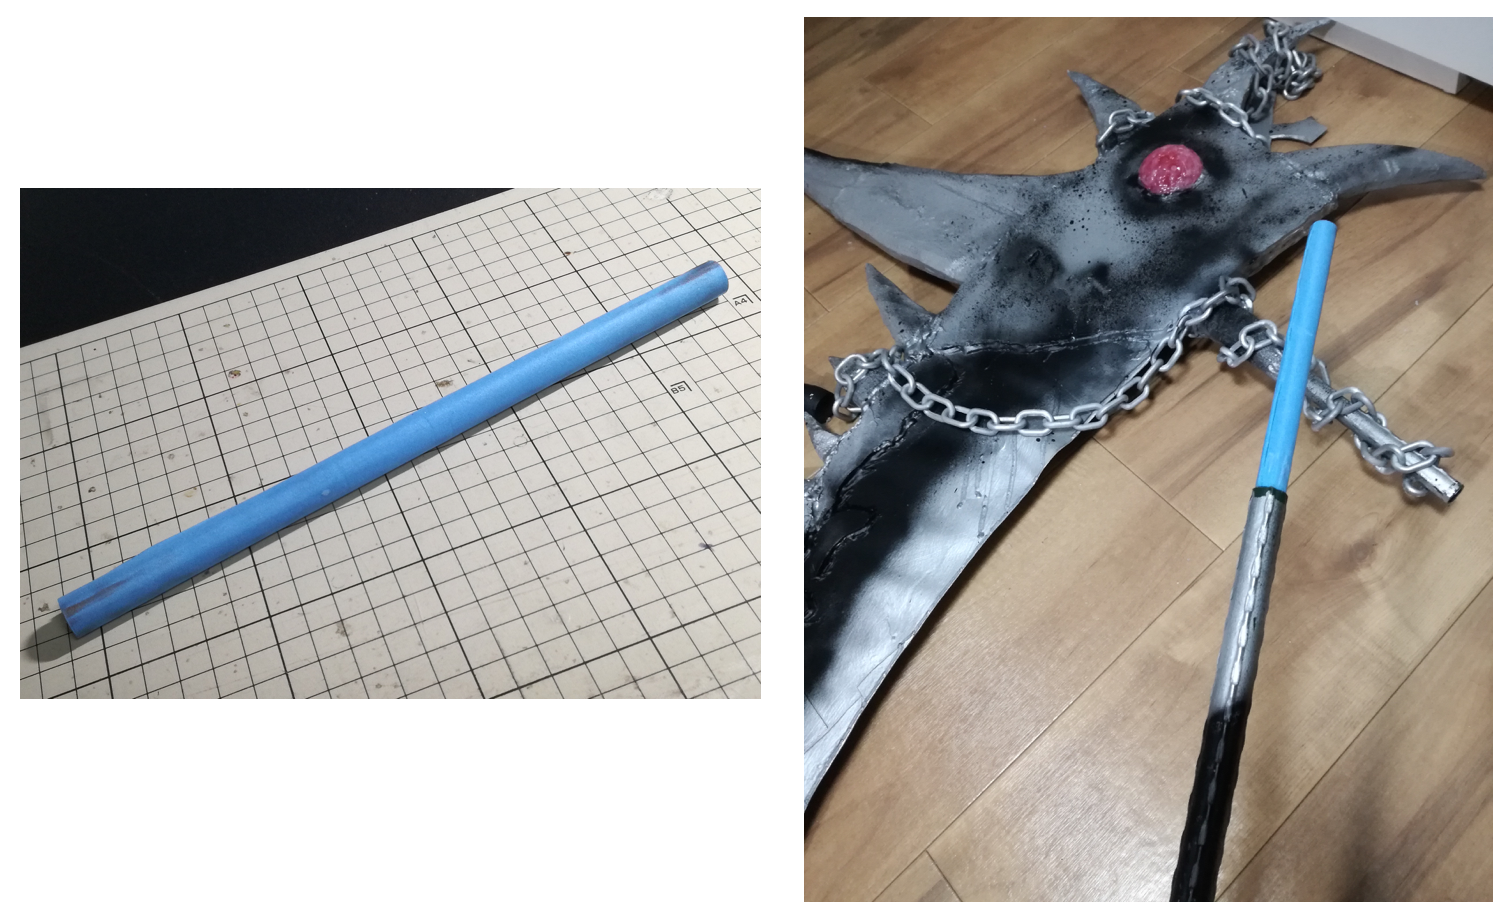
The core of the joint is rolled a sponge sheet (1.5 mm thickness) to a narrow gardening prop (φ11mm).Both are also daiso.
Cut the post to about 25cm and wrap it around the sponge sheet with instant adhesive.It is bonded to the possession which cut this.If you put the other sickle in this, OK!!
You will be able to put it in the car now!
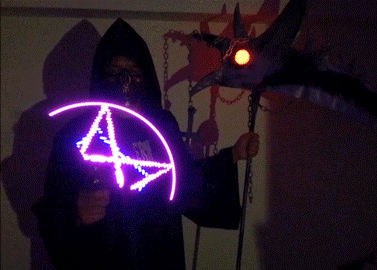
Operation
I wonder if cosplay is so much fun. # losingobernablesdejapon #njpw #ハロウィン #neopixel pic.twitter.com/ZiOjI11AO2
— Homemadegarbage (@H0meMadeGarbage) October 3, 2018
This is evil sickle… Everything is evil sickle…
By the way, the mask is purchased in 100 uniform, and the shiny glove is the guy who made it before.
Is this EVIL? #100円ショップ #Seria pic.twitter.com/ZN3gSmeS64
— Homemadegarbage (@H0meMadeGarbage) September 2, 2018