Arduino MKR WiFi 1010 をソーラで楽しむ 1 -ベランダ気象データ測定-
本記事にはアフィリエイト広告が含まれます。
今夏 Arduino MKR WiFi 1010が国内でも購入できるようになりましたね。
2, 3年前にでた製品だと思うのですが技適で発売が遅れに遅れたんでしょうね。恐らく。
目次
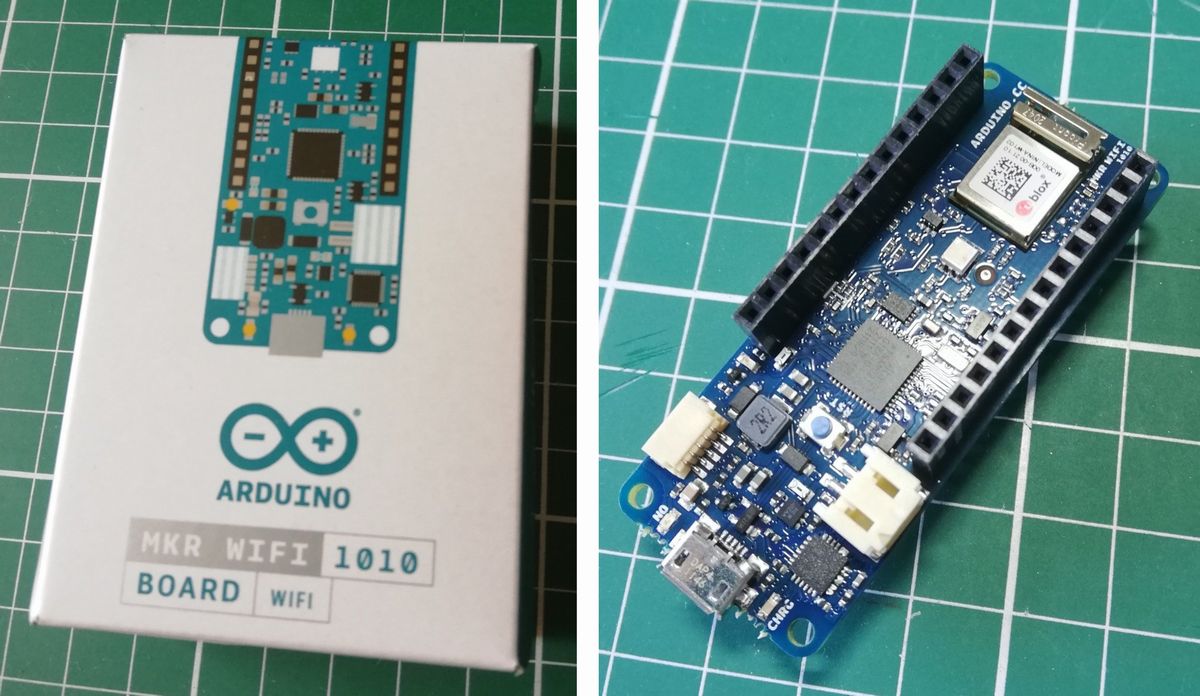
Arduino MKR WiFi 1010 を購入
Arduino MKR WiFi 1010はWiFi/Bluetooth接続可能なArduino公式のマイコンです。
いまどきはWiFi/Bluetooth内蔵マイコンは珍しくなく強く欲しいとも思わなかったのですが、構成を紐解くと非常に興味深いパワーマネージメントICが載っていることがわかり購入に至りました。
Arduino公式マイコンなんて何年ぶりに手にしたことでしょう。
技適マークは箱にシールで貼ってあるだけでした(そんなんでいいんだ。。)
PMIC : BQ24195L
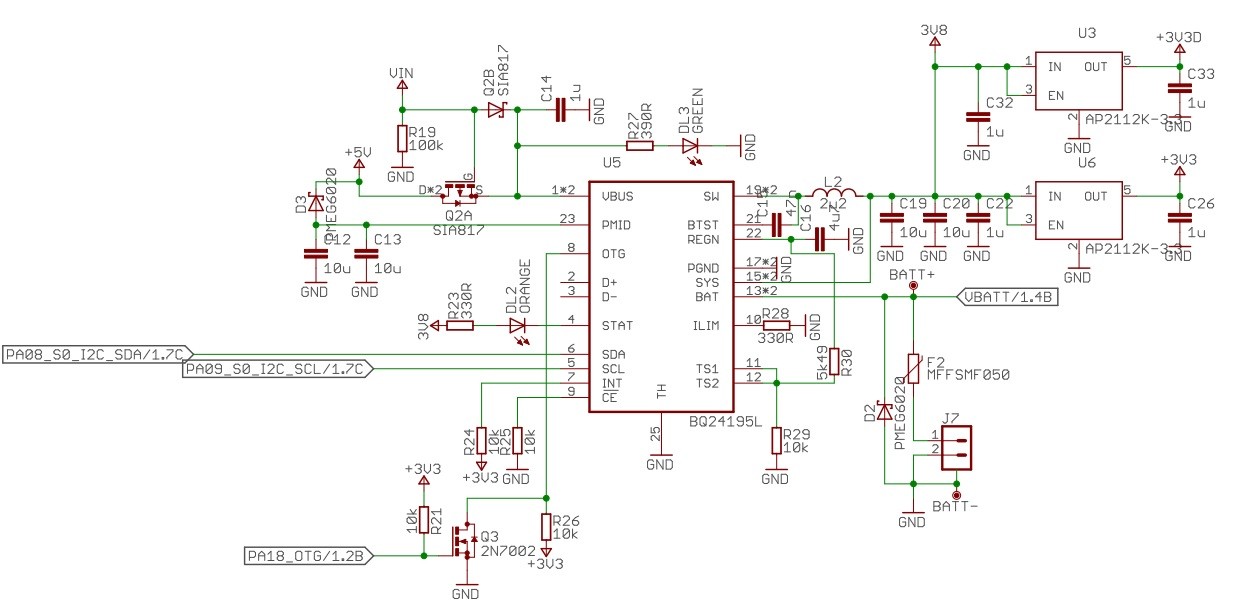
Arduino MKR WiFi 1010にはパワーマネージメントIC BQ24195Lが搭載されていました。
BQ24195Lはバッテリチャージコントローラとチャージ電圧を生成するDCDCコントローラが内蔵されたシステム電源です。
BQ24195Lの入力電源 (VBUS) の定格が22Vと高く可能性を感じArduino MKR WiFi 1010購入の決め手となりました。
(しかしArduino MKR WiFi 1010の電源入力推奨定格は6Vとなっております。)
参考
ソーラー発電で運用
入力耐圧が高くバッテリチャージ機能のあるシステム電源が載っているということで
ソーラー発電による運用を思い立ちました。
(前述の通りArduino MKR WiFi 1010のオフィシャルVin最大定格は6Vです。
実施の際は自己責任で宜しくお願い致します。)
構成
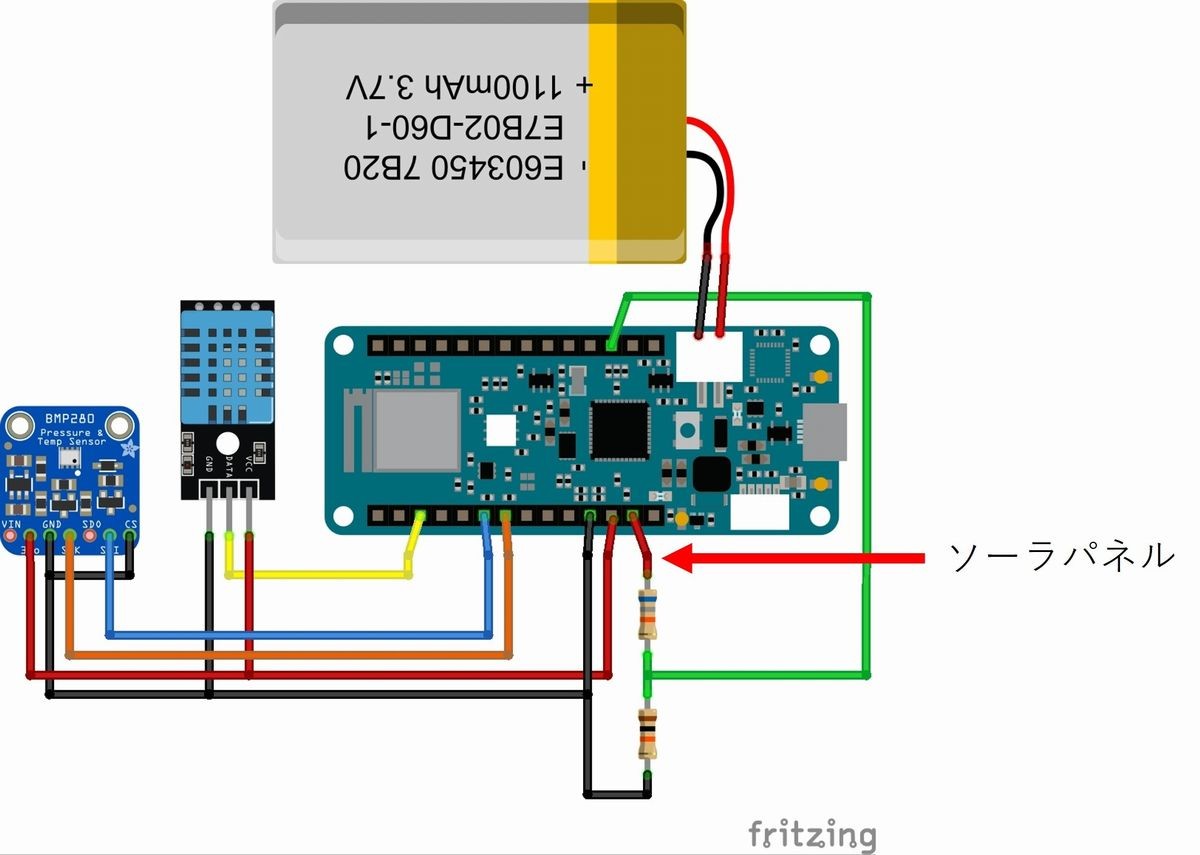
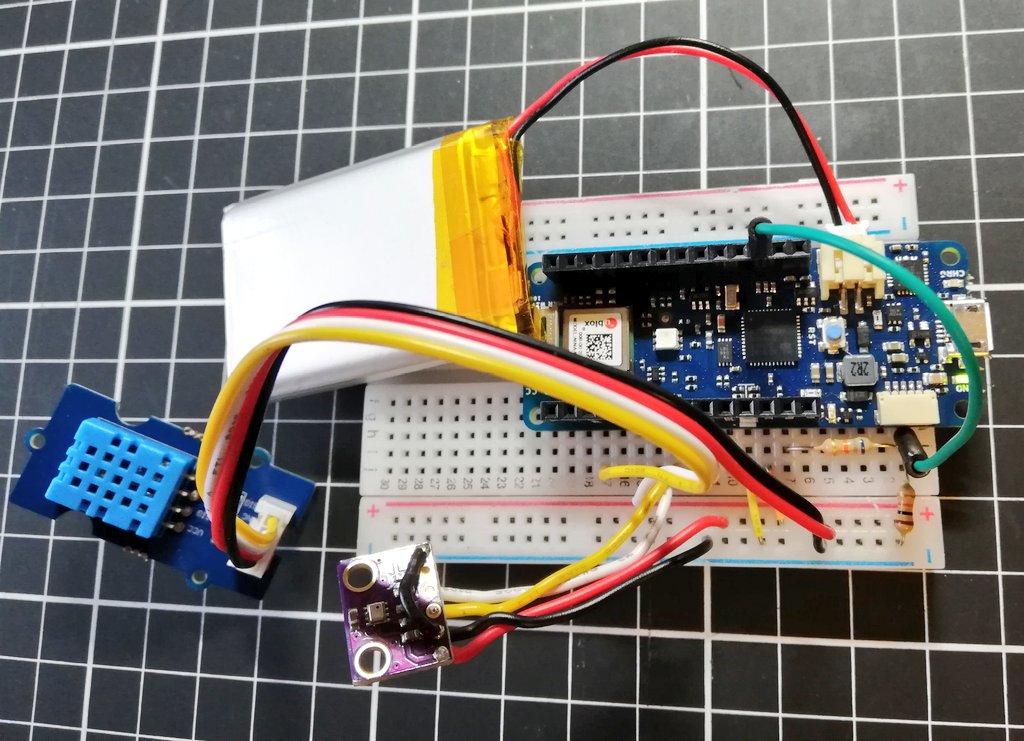
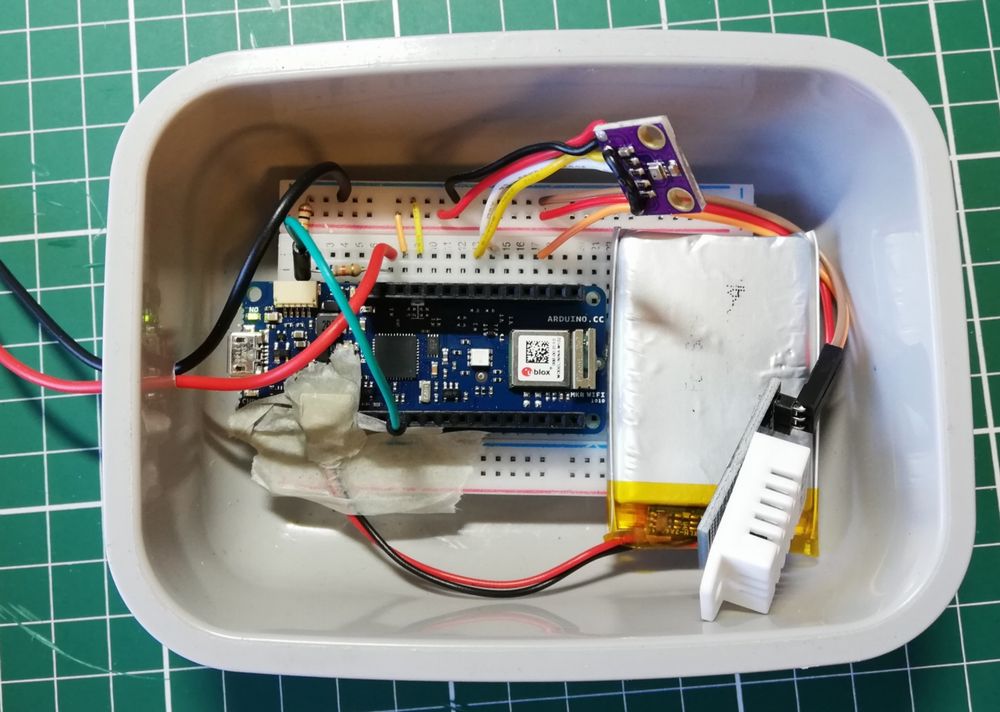
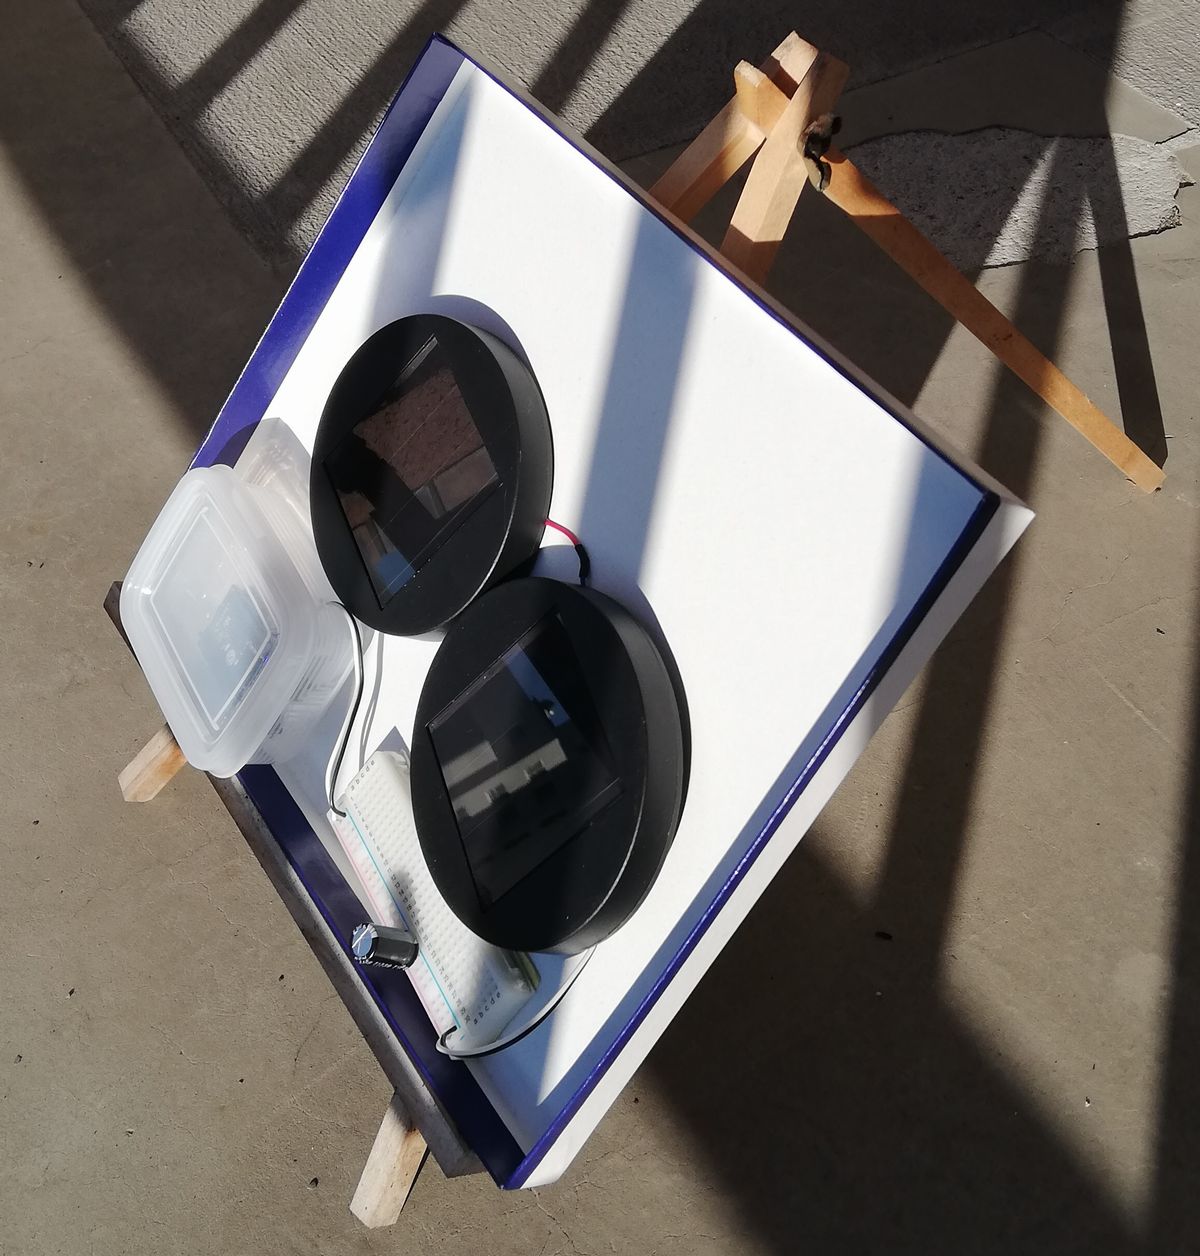
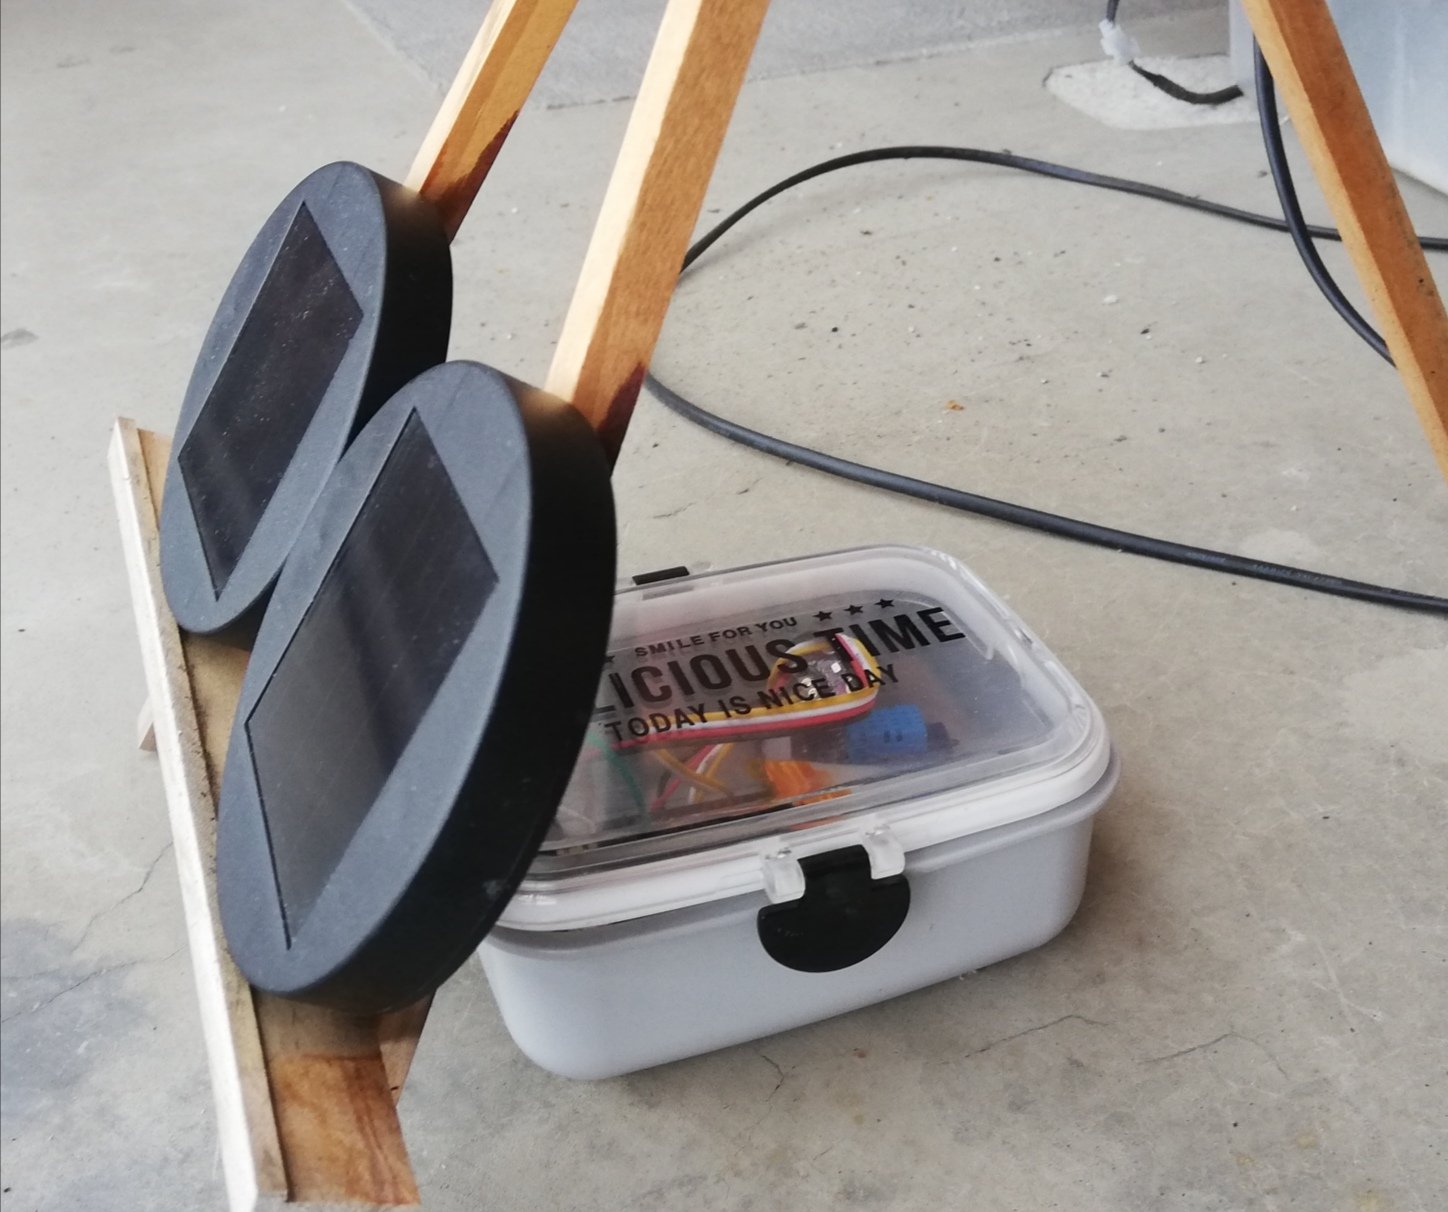
Arduino MKR WiFi 1010 に温湿度センサ、気圧計を接続しました。
- Grove – 温度および湿度センサー (DHT11)
- 大気圧センサーモジュール BMP280
- LiPoバッテリ 1200mAh
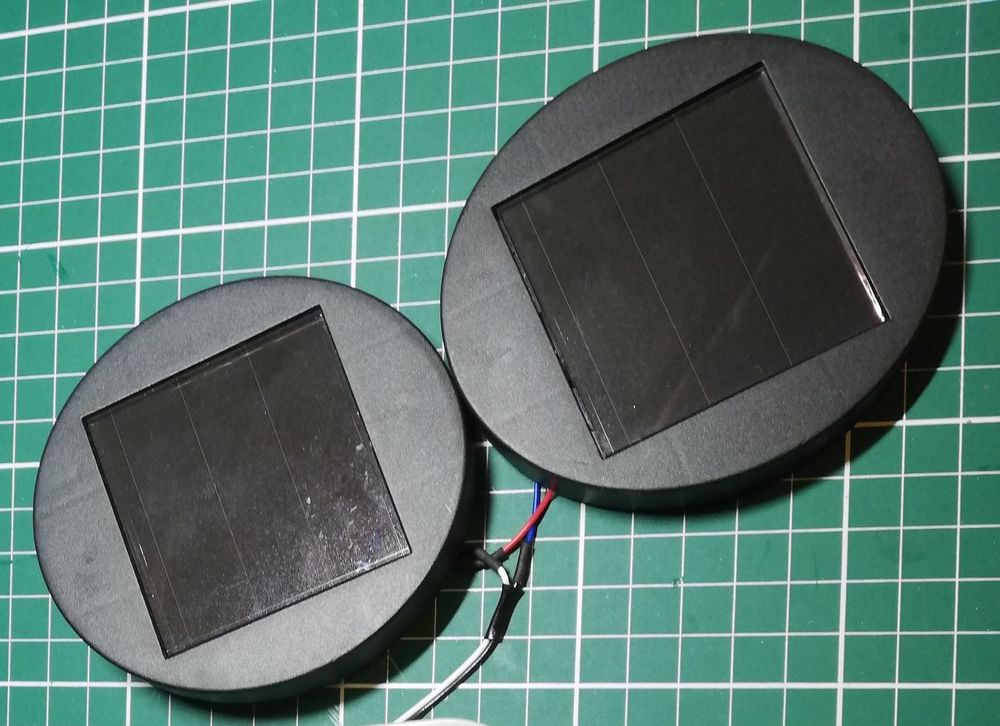
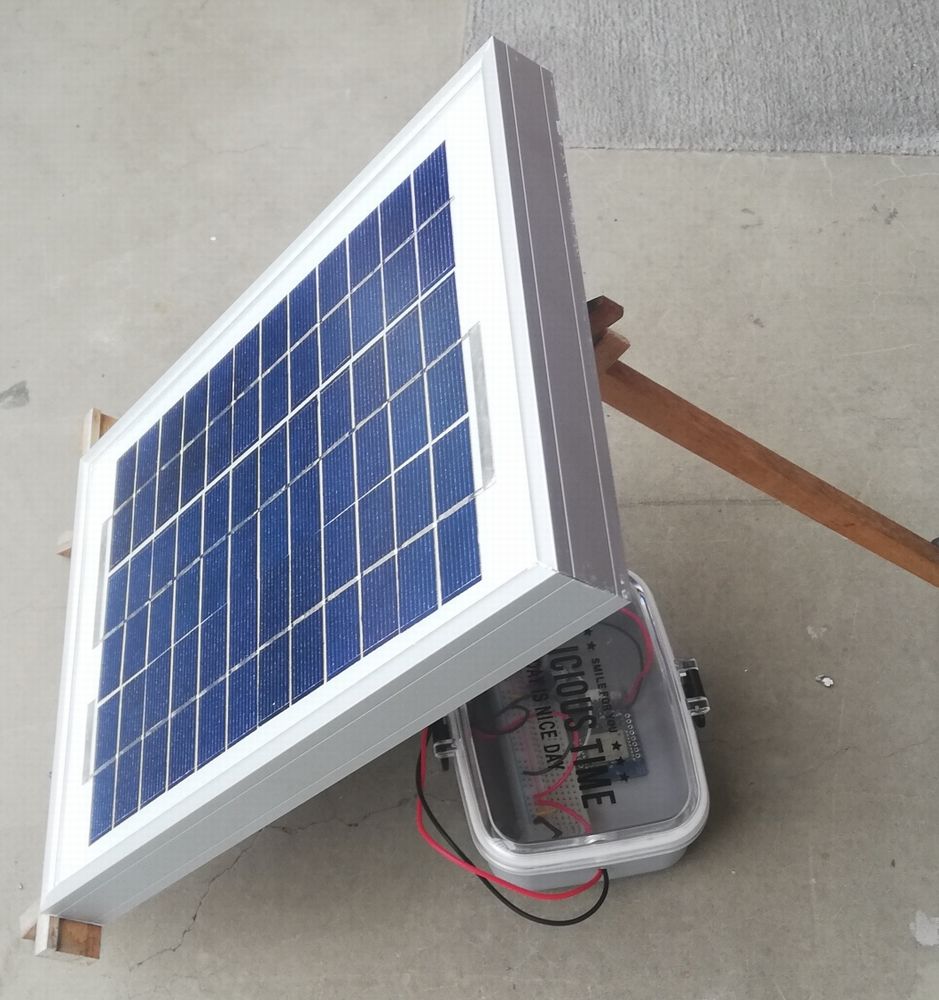
ソーラパネルにはダイソーの300円ガーデンライトのものを2つシリーズにして使用しました。
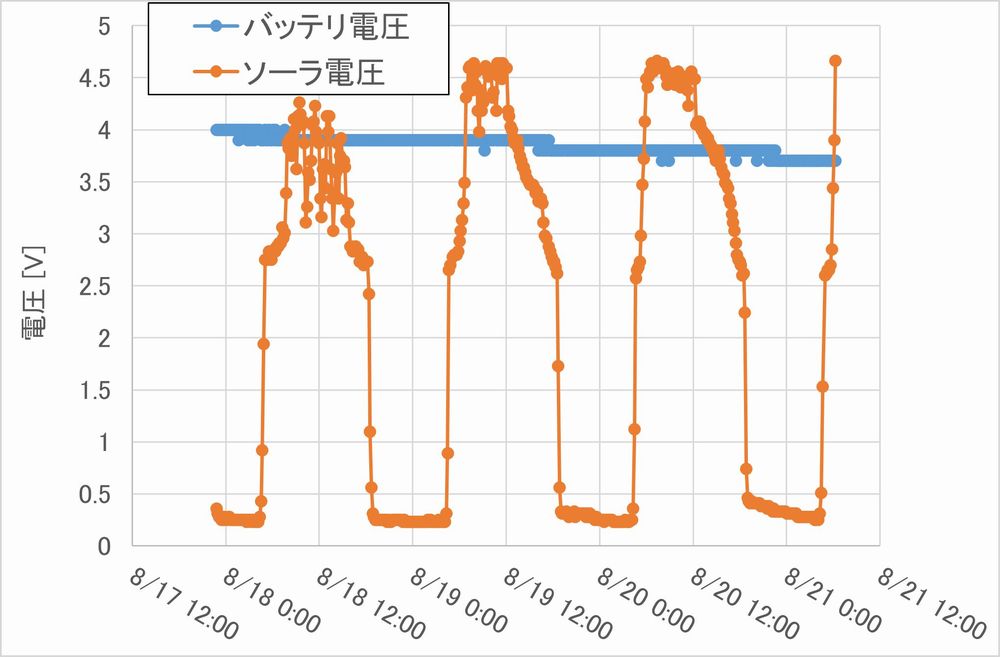
ソーラ発電電圧は抵抗分圧してアナログ入力ピンで計測します。
動作概要
Arduino MKR WiFi 1010で検出したデータ(バッテリ電圧、ソーラ電圧、気圧、温湿度) を10分おきにUDPで自宅サーバに送信します。
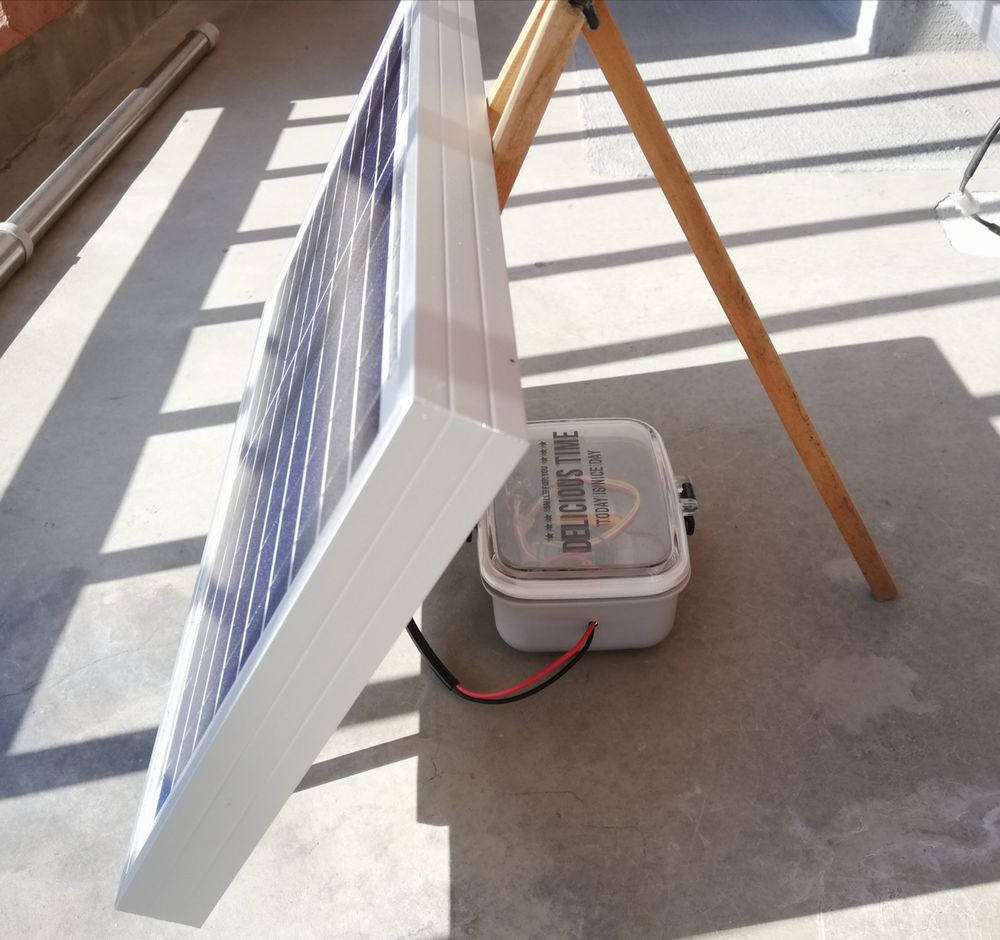
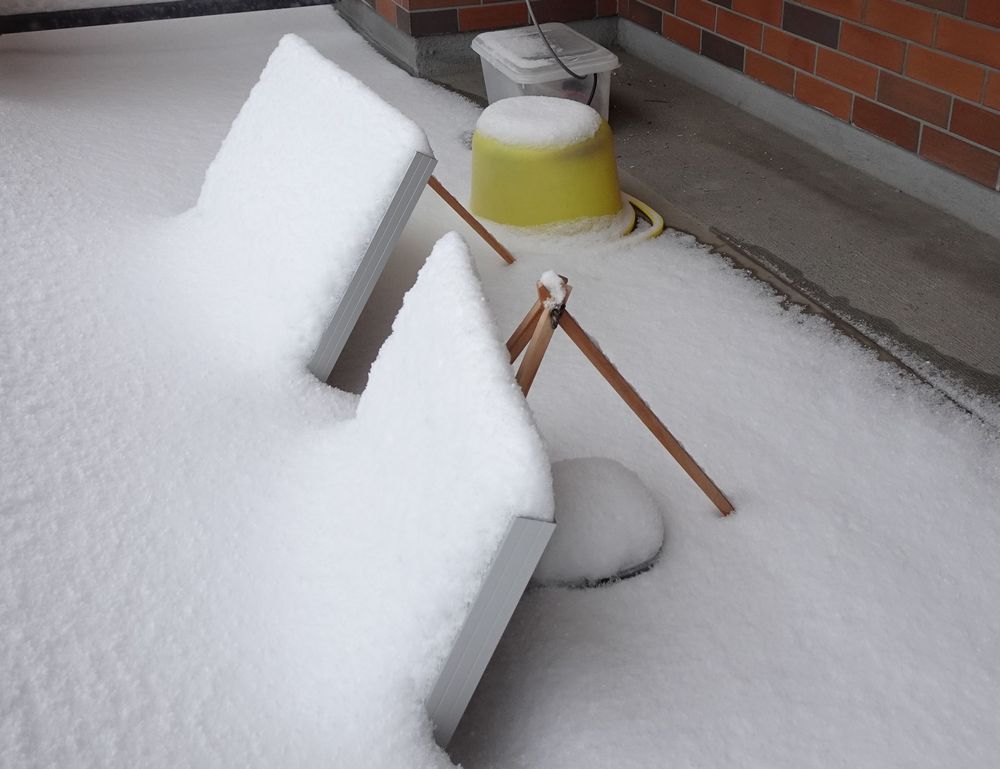
ベランダに配置して運用します。
UDP送信後にWiFiを切ってスリープし10分後に起床しWiFi接続→UDP送信を繰り返します。
スリープ&WiFi OFFすることでかなり消費電力を減らすことができました。
消費電力はザックリ以下のような感じです(Vin = 6V)。
・WiFi ON:50 mA
・WiFi OFF:22 mA
・WiFi ON & スリープ:30mA
・WiFi OFF & スリープ:15mA
Arduino IDE コード
|
1 2 3 4 5 6 7 8 9 10 11 12 13 14 15 16 17 18 19 20 21 22 23 24 25 26 27 28 29 30 31 32 33 34 35 36 37 38 39 40 41 42 43 44 45 46 47 48 49 50 51 52 53 54 55 56 57 58 59 60 61 62 63 64 65 66 67 68 69 70 71 72 73 74 75 76 77 78 79 80 81 82 83 84 85 86 87 88 89 90 91 92 93 94 95 96 97 98 99 100 101 102 103 104 105 106 107 108 109 110 111 112 113 114 115 116 117 118 119 120 121 |
#include <WiFiNINA.h> #include <WiFiUdp.h> #include "DHT.h" #include "ArduinoLowPower.h" #include <BMP280_DEV.h> int status = WL_IDLE_STATUS; #include "arduino_secrets.h" ///////please enter your sensitive data in the Secret tab/arduino_secrets.h char ssid[] = SECRET_SSID; // your network SSID (name) char pass[] = SECRET_PASS; // your network password (use for WPA, or use as key for WEP) int keyIndex = 0; // your network key index number (needed only for WEP) unsigned int localPort = 2390; // local port to listen on char ReplyBuffer[100] = ""; // a string to send back WiFiUDP Udp; #define DHTPIN 8 #define DHTTYPE DHT11 DHT dht(DHTPIN, DHTTYPE); float pressure; BMP280_DEV bmp280; void setup() { //Initialize serial and wait for port to open: Serial.begin(115200); bmp280.begin(BMP280_I2C_ALT_ADDR); bmp280.setPresOversampling(OVERSAMPLING_X4); // Set the pressure oversampling to X4 bmp280.startForcedConversion(); bmp280.getCurrentPressure(pressure); // check for the WiFi module: if (WiFi.status() == WL_NO_MODULE) { Serial.println("Communication with WiFi module failed!"); // don't continue while (true); } String fv = WiFi.firmwareVersion(); if (fv < WIFI_FIRMWARE_LATEST_VERSION) { Serial.println("Please upgrade the firmware"); } // attempt to connect to WiFi network: while (status != WL_CONNECTED) { Serial.print("Attempting to connect to SSID: "); Serial.println(ssid); // Connect to WPA/WPA2 network. Change this line if using open or WEP network: status = WiFi.begin(ssid, pass); WiFi.lowPowerMode(); // ENABLE WiFi Low Power Mode // wait 10 seconds for connection: delay(5000); } Serial.println("Connected to WiFi"); printWifiStatus(); Serial.println("\nStarting connection to server..."); } void loop() { while (status != WL_CONNECTED) { // Connect to WPA/WPA2 network. Change this line if using open or WEP network: status = WiFi.begin(ssid, pass); WiFi.lowPowerMode(); delay(500); Serial.println(status); } dht.begin(); bmp280.startForcedConversion(); bmp280.getCurrentPressure(pressure); delay(100); float Vb = analogRead(ADC_BATTERY) * (4.3 / 1023.0); float Vs = analogRead(A1)/1023.0*(69.0+10.0)/10.0*3.3; float h = dht.readHumidity(); float t = dht.readTemperature(); sprintf(ReplyBuffer,"Vbat:%.1f V, Vsol:%.2f V, %.1f hPa, Temp.:%.2f deg, Humi.:%.1f",Vb, Vs, pressure, t, h); Udp.begin(localPort); Udp.beginPacket("192.168.0.255", 2390); Udp.write(ReplyBuffer); Udp.endPacket(); delay(100); status = WL_IDLE_STATUS; WiFi.end(); LowPower.deepSleep(60000 * 10); } void printWifiStatus() { // print the SSID of the network you're attached to: Serial.print("SSID: "); Serial.println(WiFi.SSID()); // print your board's IP address: IPAddress ip = WiFi.localIP(); Serial.print("IP Address: "); Serial.println(ip); // print the received signal strength: long rssi = WiFi.RSSI(); Serial.print("signal strength (RSSI):"); Serial.print(rssi); Serial.println(" dBm"); } |
参考
- WiFiNINA library
- Powering MKR WiFi 1010 with batteries(スリープ動作)
- MKR Zero Read Battery Voltage (バッテリ電圧検出)
- BMP280 Arduinoライブラリ
- 温湿度センサDHTライブラリ
結果
数日運用してみました。
ダイソーのカワイイソーラーでは発電量が小さいらしくLiPoバッテリを充電できるほどではないようで無日照時に徐々にバッテリ電圧下がっています。何日もつかな 🙄 ?
我が家はベランダが東向きなので晴天時でも日照短いのがすこし悩みどころでもあります。
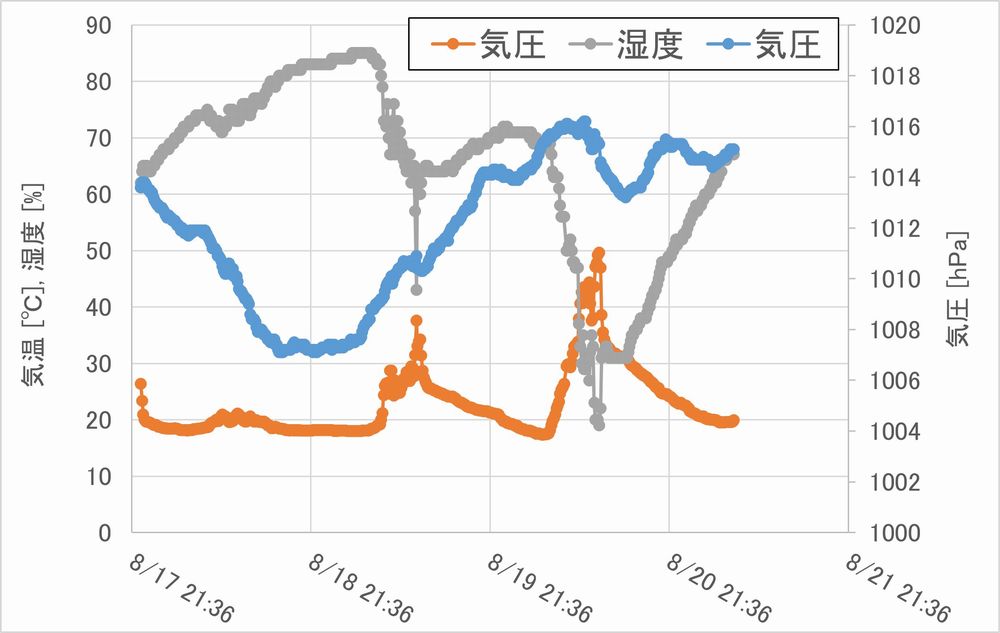
ベランダの気象データが取得でき大変興味深いです。
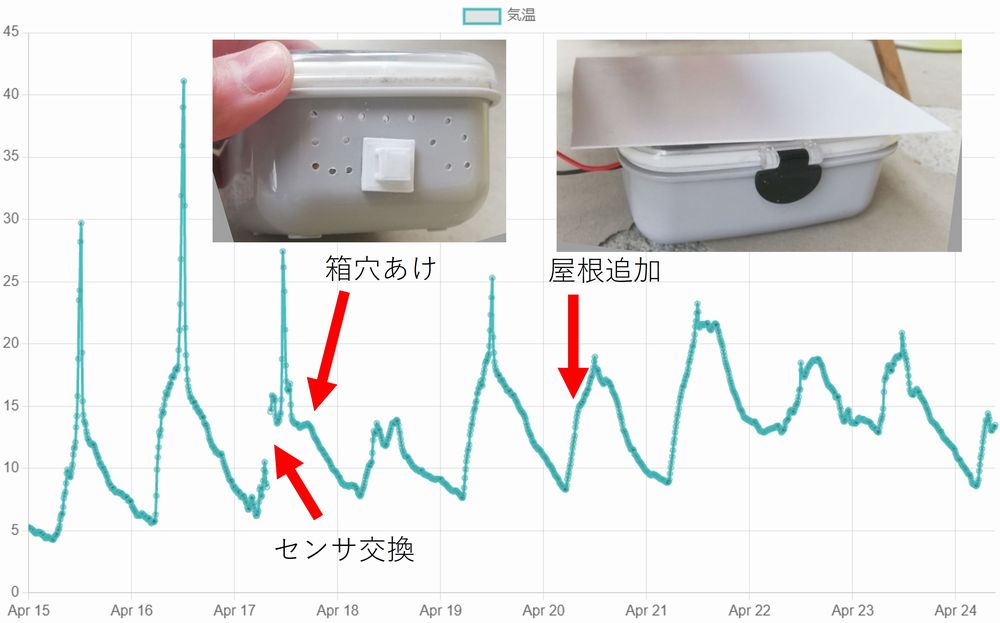
しかし温湿度センサが30℃超えると誤動作しているようです。。。
まぁ北海道は年の半分冬だしいいか。。。
おわりに
現在Arduino MKR WiFi 1010をソーラー駆動での気象データ測定計として運用中です。
Arduino MKR WiFi 1010というよりもうほとんどパワーマネージメントIC BQ24195Lの評価ボードとして楽しんでいる感もありますが、無線機能がやはり非常に便利です。
現状ですと徐々にバッテリ電圧が低下しているのでいつか落ちてしまうと思います。
次回はソーラパネルの検討を実施したいです。
また温湿度計もなにかいいものがあれば変更するかもしれません。
追記
2021/8/22
徐々にバッテリ電圧が低下しております。。
