さくらのIoTモジュールでGPSリアルタイムトラッキング(完成編)
本記事にはアフィリエイト広告が含まれます。
さくらのIoTモジュールでGPSリアルタイムトラッキング を行いまして、長女ちゃんの登下で実用していたのですが、今回IFTTTで帰宅時に家に近づくとスマホに通知が来るようにしましたので完結編としてまとめます。
目次
概要
さくらのIoTモジュールでGPS情報を送り、Web上のマップでリアルタイムに位置情報を表示します。
家に近づいたらIFTTTでスマホに通知を送ります。
さくらのIoTモジュール+GPSの設定
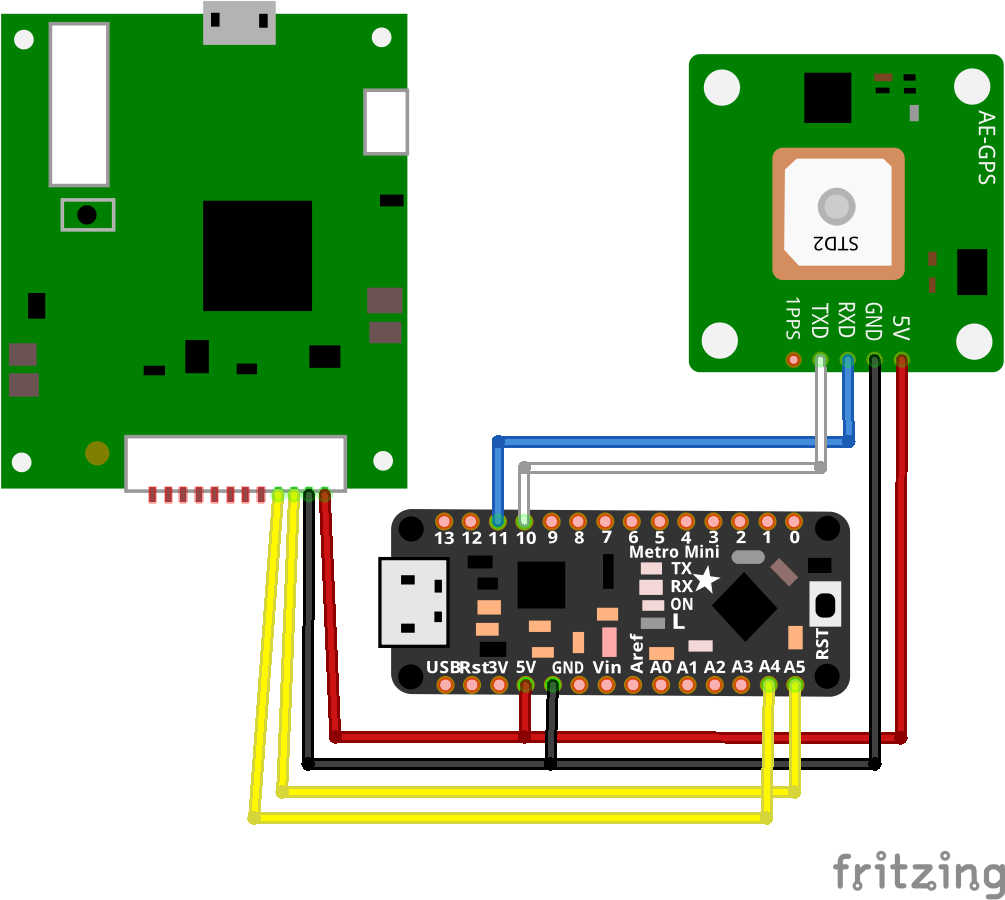
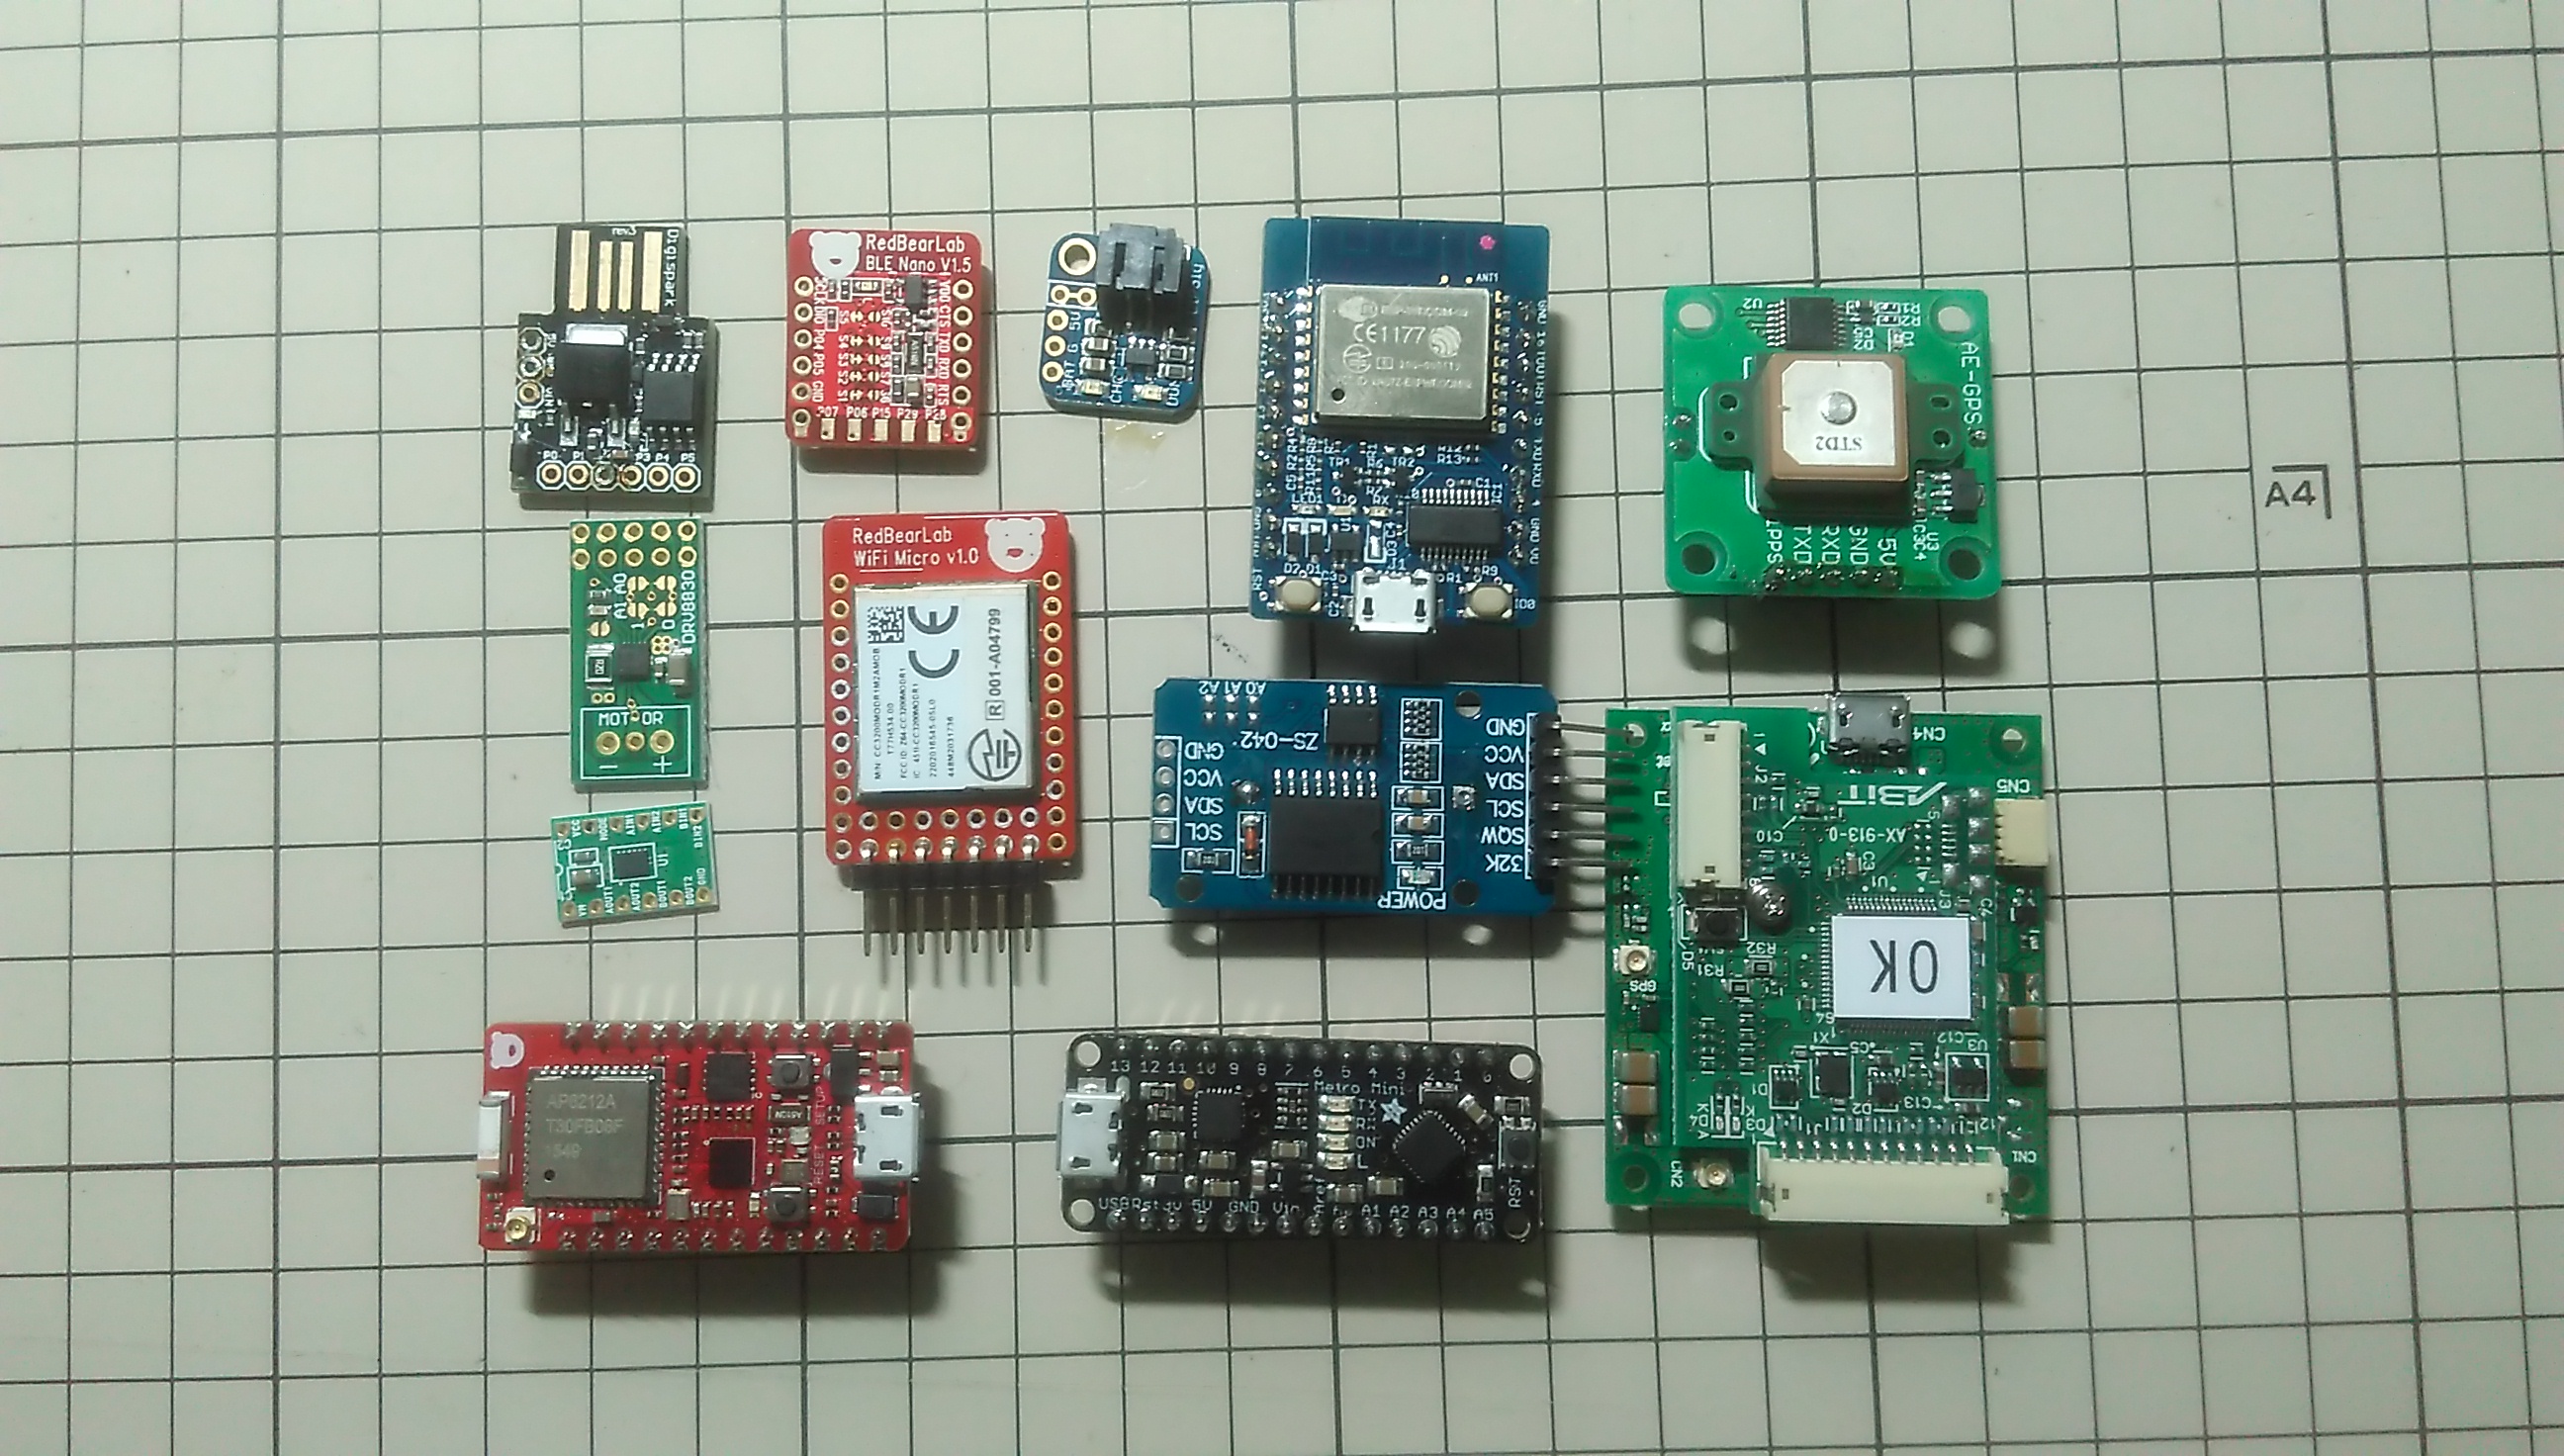
詳細は以下のとおりでマイコンにはArduino Nano互換機を使用しています。
安すぎるー!
Arduino IDE用コード
|
1 2 3 4 5 6 7 8 9 10 11 12 13 14 15 16 17 18 19 20 21 22 23 24 25 26 27 28 29 30 31 32 33 34 35 36 37 38 39 40 41 42 43 44 45 46 47 48 49 50 51 52 53 54 55 56 57 58 59 60 61 62 63 64 65 66 67 68 69 70 71 72 73 74 75 76 77 78 79 80 81 82 83 |
#include <SakuraAlpha.h> #include <TinyGPS++.h> #include <SoftwareSerial.h> #define BUF_LEN 16 static const int RXPin = 10, TXPin = 11; static const uint32_t GPSBaud = 9600; float lat; float lng; //自宅の緯度経度 float latHome = 4x.xxxxxxx; float lngHome = 14x.xxxxxxx; float earthR = 6378137; //地球の長半径[m] float distance; uint32_t sateNo = 0; uint32_t state = 0; // The TinyGPS++ object TinyGPSPlus gps; // The serial connection to the GPS device SoftwareSerial ss(RXPin, TXPin); SakuraAlphaI2C sakura; void setup() { Serial.begin(9600); ss.begin(GPSBaud); for(;;){ Serial.println("Waiting to come online..."); if( sakura.getNetworkStatus() == 1 ) break; delay(1000); } Serial.println("online!"); } void loop(){ unsigned long start = millis(); do { while (ss.available() > 0){ gps.encode(ss.read()); } } while (millis() - start < 5000); lat = gps.location.lat(); lng = gps.location.lng(); sateNo = gps.satellites.value(); //2点の緯度経度から距離概算 //http://qiita.com/fantm21/items/9f587d2526cf7231a0ba distance = sqrt(pow(earthR * (lat - latHome)/180.0*M_PI, 2) + pow(cos(lngHome/180.0*M_PI) * earthR * (lng - lngHome)/180.0*M_PI, 2)); if(sateNo >= 4){ //距離ステータス if(state == 0 && distance > 300.0){ state = 1; } if(state == 1 && distance < 200.0){ state = 2; //1st notification (200m以内) } if(state == 2 && distance < 100.0){ state = 3; //2nd notification (100m以内) } if(state == 3 && distance < 50.0){ state = 4; //3rd notification (50m以内) } //モジュール転送 sakura.writeChannel(0, lat); //ch0 緯度 sakura.writeChannel(1, lng); //ch1 経度 sakura.writeChannel(2, sateNo); //ch2 受信衛星数 sakura.writeChannel(3, distance); //ch3 自宅からの距離[m] sakura.writeChannel(4, state); //ch4 距離ステータス } } |
マイコンで5秒毎にGPSモジュールの情報(緯度、軽度、受信衛星数)を受けて、緯度経度から自宅からの距離を計算します。距離の概算には以下を参考にさせていただきました。
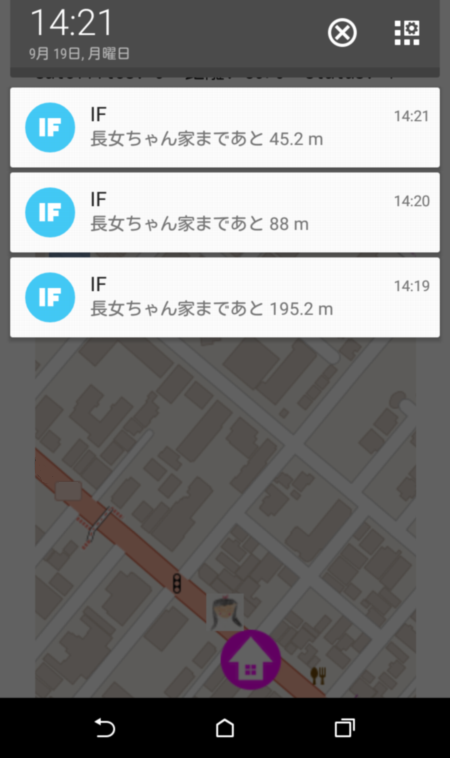
通学・帰宅を判断するために距離ステータスを設け、家から300m以上離れると1を代入し帰宅時に200m以内に入ると2、100m以内で3、50m以内で4としています。
以上のデータをGPS受信衛星数が4以上の時にIoT通信モジュールにI2Cで転送し、3G回線でプラットフォームに通信しています。
IFTTTの設定
IoT通信モジュールからの距離ステータスをうけて長女ちゃんが家に近づいたらスマホに通知が来るようにIFTTTを利用しました。
IFTTTとは
if this then thatの略で各種Webサービス同士を連携して自分好みのWebサービス(レシピ)を生成することができます。ここではthis(トリガ)にwebに値(3つまで)を送信(GETまたはPOST)できるMakerチャンネルを使用しthat(アクション)にスマホに通知を送るIF Notificationsチャンネルを使用しました。
レシピ生成
Makerチャンネルを使用して、スマホに通知を送る方法は以下に詳細が記載せれており非常に参考になります。
- Makerチャンネルを作成
- レシピを作成
新しいレシピを作成してthisにMakerチャンネルをthatにIF Notificationsチャンネルを選択します。
イベント名は”sakuraGPS”としました。
通知内容は
長女ちゃん家まであと {{Value1}} m
としValue1には家からの距離が代入されるようにします。
以下でサーバーからGET(またはPOST)すると通知が来ます。
|
1 |
http://maker.ifttt.com/trigger/sakuraGPS/with/key/シークレットキー?value1={家からの距離} |
Webサーバーの設定
「さくらのIoT Platform α版」では、下記のサービスが提供されています。
- Outgoing WebHook:モジュール→サーバー
- WebSocket:双方向
- Incoming Webhook:サーバー→モジュール
今回は、このブログを動かしている Raspberry Pi 2 サーバーに、「Outgoing WebHook」から値を受信し、処理しています。
Nginx の設定
/sakura/ ディレクトリに Basic 認証を付けています。
|
1 |
sudo vi /etc/nginx/sites-available/default |
下記を追加
|
1 2 3 4 5 |
location /sakura/ { auth_basic "Restricted"; auth_basic_user_file /etc/nginx/.htpasswd; proxy_pass http://backend; } |
※ 設定の詳細はこちらの記事に記載しております。
ラズパイサーバー ★ Nginx 追加設定
PHP
- Outgoing WebHook を受信し、/sakura/gps.txt に書き出す
- channel 4 の statusが2以上に切り替わった時、IFFTに距離を送信する
/sakura/index.php
|
1 2 3 4 5 6 7 8 9 10 11 12 13 14 15 16 17 18 19 20 21 22 23 24 25 |
<?php $filepath = "gps.txt"; $json = file_get_contents("php://input"); $data = json_decode($json,true); $place = array(); for ($i = 0; $i <= 4; $i++) { array_push($place,$data["payload"]["channels"][$i]["value"]); } // 値が空の時がある為、nullチェック if ( in_array(null, $place, true) == false ) { // 前回のステータスを取得 $rData = fopen($filepath,'r'); $content = file_get_contents($filepath); $placeOld = explode(",", $content); // 前回のステータスと変化 且つ ステータスが2以上の時、IFFTに送信 if ( $placeOld[4] != $place[4] && $place[4] >= 2 ) { // IFFT で設定したシークレットキーのURLに、距離をGETする file_get_contents('http://maker.ifttt.com/trigger/sakuraGPS/with/key/IFFTのシークレットキー?value1='.(string)round($place[3],1)) ; } // gps.txt に書き込む file_put_contents($filepath, implode(",",$place)); } |
何故か高頻度で空の値が入ってくるので、(PHP側の原因なのか?データなのか?原因究明できていません)null チェックをしています。
gps.txt
緯度、経度、衛星数、距離、ステータスが書き出されます。
|
1 |
43.00745,141.44801,4,7711.8975,4 |
HTML ( OpenStreetMap … JavaScript)
地図(OpenStreetMap)でリアルタイムトラッキングさせる記述です。
|
1 2 3 4 5 6 7 8 9 10 11 12 13 14 15 16 17 18 19 20 21 22 23 24 25 26 27 28 29 30 31 32 33 34 35 36 37 38 39 40 41 42 43 44 45 46 47 48 49 50 51 52 53 54 55 56 57 58 59 60 61 62 63 64 65 66 67 68 69 70 71 72 73 74 75 76 77 78 79 80 81 82 83 84 85 86 87 88 89 90 91 92 93 94 95 96 97 |
<div id="mapTestText" class="mapTestText"> </div> <div id="map" class="map"> </div> <p><script type="text/javascript">// <![CDATA[ var opacity = 1; // 地図レイヤー作成 var map1 = new ol.layer.Tile({ opacity: opacity, source: new ol.source.OSM() }); // 家アイコン var iconFeature = new ol.Feature({ geometry: new ol.geom.Point(ol.proj.fromLonLat([経度, 緯度])), }); var iconStyle = new ol.style.Style({ image: new ol.style.Icon(/** @type {olx.style.IconOptions} */ ({ src: '/wp/wp-content/uploads/map-icon-home.png', })) }); iconFeature.setStyle(iconStyle); // 学校アイコン var iconFeature2 = new ol.Feature({ geometry: new ol.geom.Point(ol.proj.fromLonLat([経度, 緯度])), }); var iconStyle2 = new ol.style.Style({ image: new ol.style.Icon(/** @type {olx.style.IconOptions} */ ({ src: '/wp/wp-content/uploads/map-icon-school.png', })) }); iconFeature2.setStyle(iconStyle2); // 児童館アイコン var iconFeature3 = new ol.Feature({ geometry: new ol.geom.Point(ol.proj.fromLonLat([経度, 緯度])), }); var iconStyle3 = new ol.style.Style({ image: new ol.style.Icon(/** @type {olx.style.IconOptions} */ ({ src: '/wp/wp-content/uploads/map-icon-jidokan.png' })) }); iconFeature3.setStyle(iconStyle3); // アイコンレイヤー作成 var vectorSource = new ol.source.Vector({ features: [iconFeature,iconFeature2,iconFeature3] }); var iconLayer = new ol.layer.Vector({ source: vectorSource, }); // 地図表示 var map = new ol.Map({ layers: [map1,iconLayer], target: 'map', interactions: ol.interaction.defaults({mouseWheelZoom:false}), view: new ol.View({ // 地図の中心地セット center: ol.proj.fromLonLat([経度, 緯度]), zoom: 17 }), }); // リアルタイムアイコン作成 var imgElement = document.createElement('img'); imgElement.setAttribute('src', '/wp/wp-content/uploads/icon-sister-150x150.png'); var marker = new ol.Overlay({ element: imgElement, position: '', positioning: 'bottom-center' }); map.addOverlay(marker); // 現在地のセット function gpsTracking() { req = new XMLHttpRequest(); req.open("GET", "/sakura/gps.txt", true, "BASIC認証のID", "BASIC認証のパスワード"); req.send(null); req.onload = function(){ var genzaiti = new Array(); var source = req.responseText; genzaiti = source.split(","); // HTML上に書き出し(確認の為) document.getElementById('mapTestText').innerHTML = 'lat:' + genzaiti[0] + ' long:' + genzaiti[1] + ' satellites: ' + genzaiti[2] + ' 距離: ' + Number(genzaiti[3]).toFixed(1) + ' status: ' + genzaiti[4] + ' source: ' + source; // リアルタイムアイコンに現在地のセット marker.setPosition( ol.proj.fromLonLat([ Number(genzaiti[1]) , Number(genzaiti[0]) ]) ); // 地図の中心地をアイコンの場所にセット map.getView().setCenter(ol.proj.transform([ Number(genzaiti[1]) , Number(genzaiti[0]) ], 'EPSG:4326', 'EPSG:3857')); } }; gpsTracking(); // 5秒ごとに実行 setInterval('gpsTracking()',5000); // ]]></script></p> |
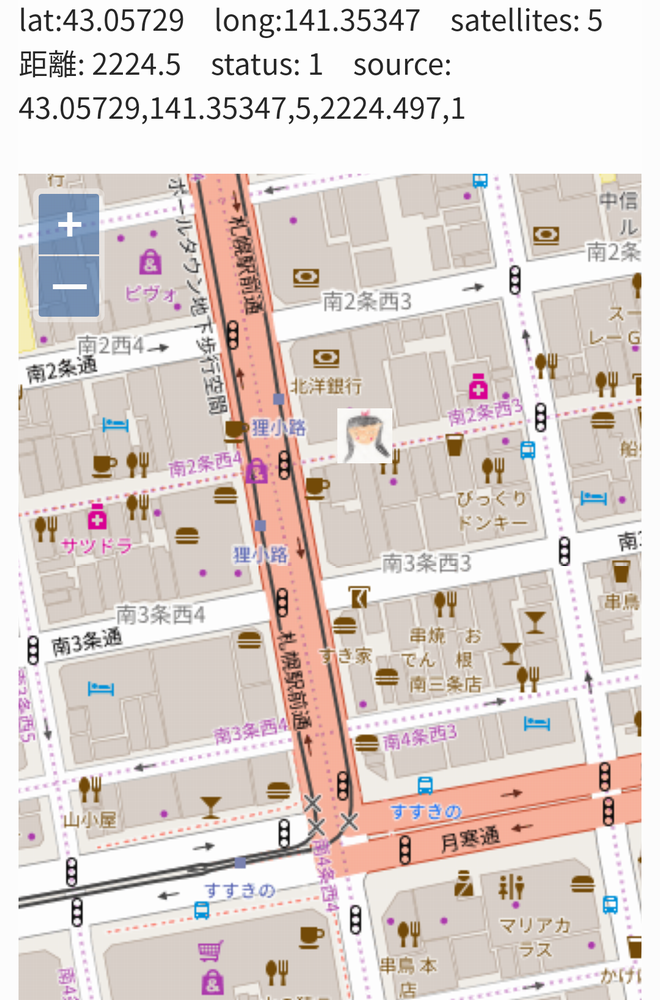
このような感じで、地図上に現在地のアイコンが表示されます。
![]()
※ 動作の様子はこちらの記事に記載しております。
さくらのIOTモジュールでGPSリアルタイムトラッキング
動作
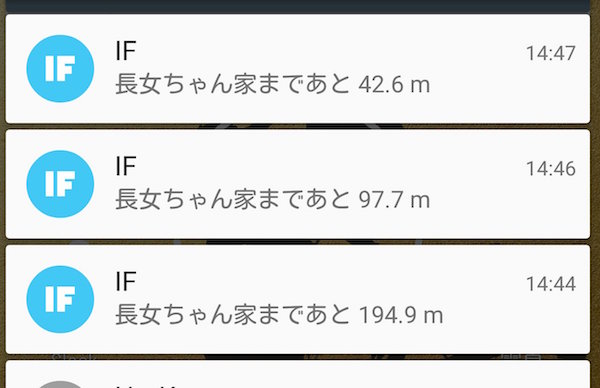
無事に通知が来ることを確認できました 🙂
これで家の鍵をもたせてない長女ちゃん![]() がいつ帰ってきても安心だね!
がいつ帰ってきても安心だね!
 お父ちゃん
2016.10.2


