M5StickC 8Servos Hat でラジコンを堪能
本記事にはアフィリエイト広告が含まれます。
8個のサーボモータを制御できるM5StickC用拡張ボードを購入しました。
非常に低価格のうえ使いやすかったです。
ここではM5StickC 8Servos Hatを使用してラジコンを作りましたのでご報告します。
目次
M5StickC 8Servos Hat
M5StickCに以下のサンプルコードを書き込んですぐに使用できます。
https://github.com/m5stack/M5-ProductExampleCodes/tree/master/Hat/8servos-hat/Arduino/8SERVO
“M5StickCからI2Cを用いて、STM32F030F4マイコンを経由して各サーボを制御することができます。サーボを複数同時に動作させるため、16340バッテリーを取り付けられるようになっています。”
とのことでサーボを動かすコマンドは簡単ですし複数接続しても電流能力などを気にすることもありません。
製作準備
ラジコンはジョイスティックでグリグリコントロールできるものを目指しました。
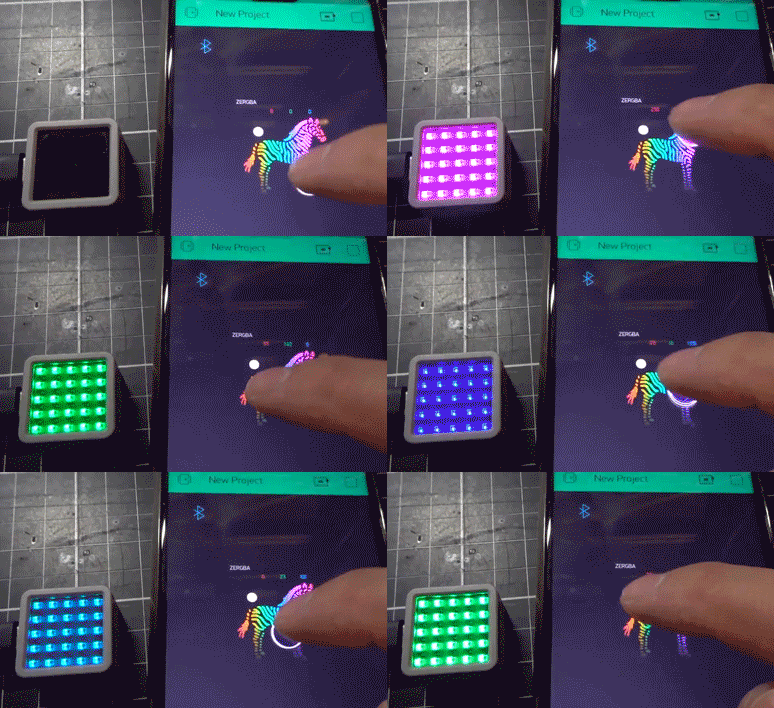
まずはスマホアプリBlynkのジョイスティックウィジェットとM5StickCをBLEで連携しました。
大変いいものを入手したので
久々にM5StickCをちょすまずは下ごしらえ#Blynk #BLE pic.twitter.com/bERJpckfIP
— HomeMadeGarbage (@H0meMadeGarbage) April 26, 2020
ジョイスティックのx, y値をM5StickCで受けて角度に変換してディスプレイ表示しています。
角度のディスプレイ表示は以下のM5StickCのサンプルコードTFT_Pie_Chartを利用しました。
M5StickCを8Servos Hatに載せ、サーボを接続しジョイスティックの角度で動かしたのが以下です。
実に手軽に複数のサーボを動かすことができます。#M5StickC #Blynk
M5StickC 8Servos Hat – スイッチサイエンス https://t.co/BAlnwOubvm pic.twitter.com/wRHMUtyYL1
— HomeMadeGarbage (@H0meMadeGarbage) April 26, 2020
実に簡単に機構が完成しました。
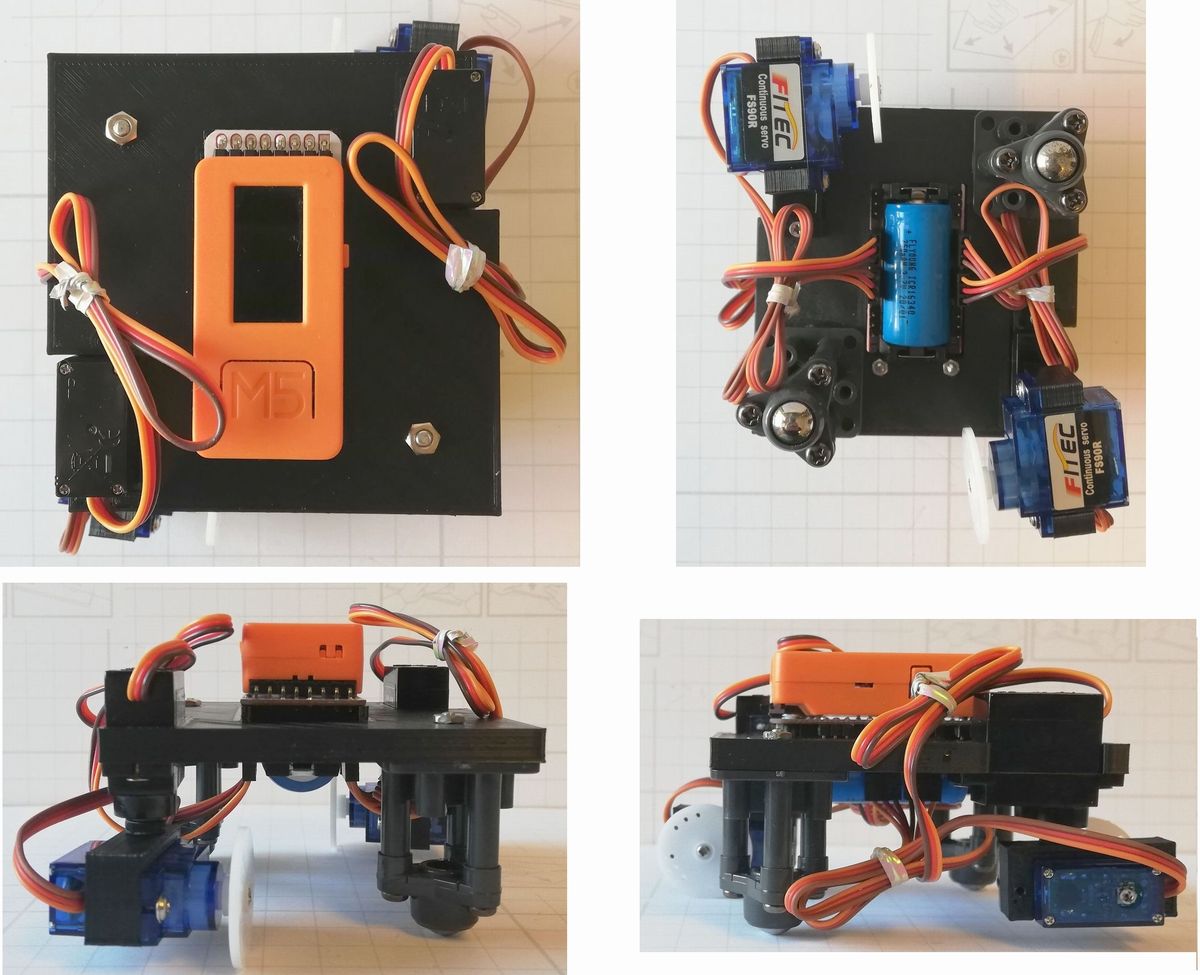
ラジコンカー “カニ”
製作した機体について記載します。
タイヤとして2個のボールキャスタと2個の360度回転サーボを使用しました。
360度回転サーボを180度サーボで回転させて四方八方への移動を実現させます。
機体フレームやサーボ固定具は3Dプリンタで製作しました。
なんかカニっぽい
ジョイスティックのx, y値をBLEでM5StickCに送ってサーボの角度と360度回転サーボの前転/後転を制御します。
思いのほか良いビークルになった。
まだサーボ端子は4つしか使っていない
伸びしろですね#M5StickC #Blynk #8servos pic.twitter.com/7V278pBbdS— HomeMadeGarbage (@H0meMadeGarbage) April 27, 2020
本当はサーボの回転軸直下に360度回転サーボのタイヤが来るように配置すれば
方向転換時の機体のブレも小さいのでしょうが
コンパクトで簡単な構造にしました。
部品
- M5StickC
- サーボモータ
- 360度連続回転マイクロサーボ Feetech FS90R
- ボールキャスタ
Wii ヌンチャク
ちょっと物理コントローラで”カニ”を動かしたくなったので、
家にあったWiiヌンチャクを無線化してみました。
まずはヌンチャクをM5Stack ATOM Liteに接続しました。
ヌンチャクとM5Stack ATOM Lite間はI2Cで通信します。接続は以下の通り。
ESP-NOW
M5Stack ATOM Liteで受け取ったWiiヌンチャクの値を機体をコントロールするM5StickCに無線通信するためにESP-NOWというプロトコルを使用しました。
ESP間でWiFi網を使用した独自通信方式のようでArduino IDE用サンプルコードも用意されております。
早速サンプルコードを元にM5Stack ATOM Lite (Master) – M5StickC (Slave)間通信を試してみました。
Wiiヌンチャクを無線化するべく
ESP-NOWを初めて使ってみました。
非常にユースフルで今後ESP間の通信はESP-NOWで決まり!ヌンチャク -(I2C)-> M5ATOM Lite -(ESP-NOW)-> M5StickC pic.twitter.com/75poCftdFJ
— HomeMadeGarbage (@H0meMadeGarbage) April 28, 2020
ジョイスティックのx, y値をI2CでM5Stack ATOM Liteに送り、更にESP-NOWでM5StickCに無線送信してディスプレイに表示しています。
ESP-NOWによって非常に簡単にESP間の無線通信が実現できました!
Arduinoコード
Wiiヌンチャクで機体”カニ”を制御するためのコードです。
M5Stack ATOM Lite (Master)
ヌンチャクのジョイスティックのx, y値をI2Cで受け取り、ESP-NOWで送信します。
ヌンチャク-M5Stack ATOM間の通信コートは以下を参考にいたしました。
ESP32 BLE Nunchuck Controller Sketch
|
1 2 3 4 5 6 7 8 9 10 11 12 13 14 15 16 17 18 19 20 21 22 23 24 25 26 27 28 29 30 31 32 33 34 35 36 37 38 39 40 41 42 43 44 45 46 47 48 49 50 51 52 53 54 55 56 57 58 59 60 61 62 63 64 65 66 67 68 69 70 71 72 73 74 75 76 77 78 79 80 81 82 83 84 85 86 87 88 89 90 91 92 93 94 95 96 97 98 99 100 101 102 103 104 105 106 107 108 109 110 111 112 113 114 115 116 117 118 119 120 121 122 123 124 125 126 127 128 129 130 131 132 133 134 135 136 137 138 139 140 141 142 143 144 145 146 147 148 149 150 151 152 153 154 155 156 157 158 159 160 161 162 163 164 165 166 167 168 169 170 171 172 173 174 175 176 177 178 179 180 181 182 183 184 185 186 187 188 189 190 191 192 193 194 195 196 197 198 199 200 201 202 203 204 205 206 207 208 209 210 211 212 213 214 215 216 217 218 219 220 |
#include <esp_now.h> #include <WiFi.h> #include "Wire.h" uint8_t nunbuff[10]; // array to store ESP output int cnt = 0; uint8_t x_dat = 0; // x Data uint8_t y_dat = 0; // y Data uint8_t z_dat = 0; // z&c Data uint8_t x_axis; // z accele axis data uint8_t y_axis; // y accele axis data uint8_t z_axis; // z accele axis data uint8_t z2 = 0; uint8_t c2 = 0; char str1; // 1st byte data char str2; // 2nd byte data char str3; // 3rd byte data char str4[10]; int val1 = 0; // z button ON + c button ON int val2 = 0; // data switching int state = 0; // storage data int old_val = 0; // Old value esp_now_peer_info_t slave; #define CHANNEL 3 #define PRINTSCANRESULTS 0 #define DELETEBEFOREPAIR 0 void InitESPNow() { WiFi.disconnect(); if (esp_now_init() == ESP_OK) { Serial.println("ESPNow Init Success"); } else { Serial.println("ESPNow Init Failed"); ESP.restart(); } } void ScanForSlave() { int8_t scanResults = WiFi.scanNetworks(); bool slaveFound = 0; // reset on each scan memset(&slave, 0, sizeof(slave)); Serial.println(""); if (scanResults == 0) { Serial.println("No WiFi devices in AP Mode found"); } else { Serial.print("Found "); Serial.print(scanResults); Serial.println(" devices "); for (int i = 0; i < scanResults; ++i) { String SSID = WiFi.SSID(i); int32_t RSSI = WiFi.RSSI(i); String BSSIDstr = WiFi.BSSIDstr(i); delay(10); if (SSID.indexOf("Slave") == 0) { Serial.println("Found a Slave."); Serial.print(i + 1); Serial.print(": "); Serial.print(SSID); Serial.print(" ["); Serial.print(BSSIDstr); Serial.print("]"); Serial.print(" ("); Serial.print(RSSI); Serial.print(")"); Serial.println(""); // Get BSSID => Mac Address of the Slave int mac[6]; if ( 6 == sscanf(BSSIDstr.c_str(), "%x:%x:%x:%x:%x:%x%c", &mac[0], &mac[1], &mac[2], &mac[3], &mac[4], &mac[5] ) ) { for (int ii = 0; ii < 6; ++ii ) { slave.peer_addr[ii] = (uint8_t) mac[ii]; } } slave.channel = CHANNEL; // pick a channel slave.encrypt = 0; // no encryption slaveFound = 1; break; } } } if (slaveFound) { Serial.println("Slave Found, processing.."); } else { Serial.println("Slave Not Found, trying again."); } WiFi.scanDelete(); } bool manageSlave() { if (slave.channel == CHANNEL) { if (DELETEBEFOREPAIR) { deletePeer(); } Serial.print("Slave Status: "); const esp_now_peer_info_t *peer = &slave; const uint8_t *peer_addr = slave.peer_addr; bool exists = esp_now_is_peer_exist(peer_addr); if ( exists) { // Slave already paired. Serial.println("Already Paired"); return true; } else { // Slave not paired, attempt pair esp_err_t addStatus = esp_now_add_peer(peer); if (addStatus == ESP_OK) { // Pair success Serial.println("Pair success"); return true; } else { Serial.println("Not sure what happened"); return false; } } } else { Serial.println("No Slave found to process"); // No slave found to process return false; } } void deletePeer() { const esp_now_peer_info_t *peer = &slave; const uint8_t *peer_addr = slave.peer_addr; esp_err_t delStatus = esp_now_del_peer(peer_addr); } // send data void sendData() { uint8_t data[3]; data[0] = x_dat; data[1] = y_dat; data[2] = z2; const uint8_t *peer_addr = slave.peer_addr; Serial.print("Sending: "); //Serial.println(data); esp_err_t result = esp_now_send(peer_addr, data, 3); Serial.print("Send Status: "); if (result == ESP_OK) { Serial.println("Success"); } else { Serial.println("Not sure what happened"); } } void nunchuck_init () { // In the case of blackNunchuck, change the address. Wire.beginTransmission (0x52); // transmit to device 0x52 Wire.write (0x40); // sends memory address *(blackNunchuck:0xF0) Wire.write (0x00); // sends sent a zero. *(blackNunchuck:0x55) Wire.endTransmission (); // stop transmitting } void send_zero () { // In the case of blackNunchuck, change the address. Wire.beginTransmission (0x52); // transmit to device 0x52 Wire.write (0x00); // sends one byte Wire.endTransmission (); // stop transmitting } void setup() { Serial.begin(115200); Wire.begin (25, 21); //SDA, SCL nunchuck_init (); // send the initilization handshake WiFi.mode(WIFI_STA); InitESPNow(); } void loop() { Wire.requestFrom (0x52, 6); // request data from nunchuck while (Wire.available ()) { nunbuff[cnt] = nunchuk_decode_byte (Wire.read ()); cnt++; } int z = 0; int c = 0; if (cnt >= 5) { x_dat = nunbuff[0]; y_dat = nunbuff[1]; x_axis = nunbuff [2]; y_axis = nunbuff [3]; z_axis = nunbuff [4]; if ((nunbuff[5] >> 0) & 1) z = 1; // The first bit of data of the 5byte (Nuncuck Z-button) if ((nunbuff[5] >> 1) & 1) c = 1; // The second bit of data of the 5byte (Nuncuck C-button) if (z == 1 & c == 1)z_dat = 0; // The button has not been pressed. if (z == 0 & c == 1)z_dat = 1; // When the Z button is pressed. if (z == 1 & c == 0)z_dat = 2; // When the C button is pressed. if (z == 0 & c == 0) { // When the Z and C buttons are pressed simultaneously. val1 = 0; } else { val1 = 1; } if ((val1 == 0)&&(old_val)) { // State holding operation state = 1 - state; delay(10); } old_val = val1; if (state == 1) { val2 = 0; // mode switch } else { val2 = 1; // mode switch } delay(1); } z2 = z; c2 = c; cnt = 0; send_zero (); // send the request for next bytes delay (10); if (slave.channel == CHANNEL) { bool isPaired = manageSlave(); if (isPaired) { sendData(); } else { Serial.println("Slave pair failed!"); } } else { ScanForSlave(); } delay(100); } char nunchuk_decode_byte (char x) { x = (x ^ 0x17) + 0x17; return x; } |
M5StickC (Slave)
ESP-NOWでジョイスティックの値を受け取り、角度を算出してサーボとタイヤを制御します。
8Servos Hatはサンプルコードを元に制御しております。
|
1 2 3 4 5 6 7 8 9 10 11 12 13 14 15 16 17 18 19 20 21 22 23 24 25 26 27 28 29 30 31 32 33 34 35 36 37 38 39 40 41 42 43 44 45 46 47 48 49 50 51 52 53 54 55 56 57 58 59 60 61 62 63 64 65 66 67 68 69 70 71 72 73 74 75 76 77 78 79 80 81 82 83 84 85 86 87 88 89 90 91 92 93 94 95 96 97 98 99 100 101 102 103 104 105 106 107 108 109 110 111 112 113 114 115 116 117 118 119 120 121 122 123 124 125 126 127 128 129 130 131 132 133 134 135 136 137 138 139 140 141 142 143 144 145 146 147 148 149 150 151 152 153 154 155 156 157 158 159 160 161 162 163 164 165 166 167 168 169 170 171 172 173 174 175 176 177 |
#include <M5StickC.h> #include "IIC_servo.h" #include <esp_now.h> #include <WiFi.h> #define CHANNEL 1 int x = 0, y = 0, th2; int thL, thR; float th = 0.0; int stopValueL = 90, stopValueR=90; int speedL = 30, speedR = 30; #define DEG2RAD 0.0174532925 byte inc = 0; unsigned int col = 0; // Init ESP Now with fallback void InitESPNow() { WiFi.disconnect(); if (esp_now_init() == ESP_OK) { Serial.println("ESPNow Init Success"); } else { Serial.println("ESPNow Init Failed"); // Retry InitESPNow, add a counte and then restart? // InitESPNow(); // or Simply Restart ESP.restart(); } } // config AP SSID void configDeviceAP() { const char *SSID = "Slave_1"; bool result = WiFi.softAP(SSID, "Slave_1_Password", CHANNEL, 0); if (!result) { Serial.println("AP Config failed."); } else { Serial.println("AP Config Success. Broadcasting with AP: " + String(SSID)); } } void setup() { Serial.begin(115200); Serial.println("ESPNow/Basic/Slave Example"); M5.begin(); M5.Axp.ScreenBreath(10); M5.Lcd.fillScreen(TFT_BLACK); M5.Lcd.println(" "); M5.Lcd.println(" Power ON"); IIC_Servo_Init(); //sda 0 scl 26 Servo_angle_set(6,stopValueL); Servo_angle_set(3,stopValueR); //Set device in AP mode to begin with WiFi.mode(WIFI_AP); // configure device AP mode configDeviceAP(); // This is the mac address of the Slave in AP Mode Serial.print("AP MAC: "); Serial.println(WiFi.softAPmacAddress()); // Init ESPNow with a fallback logic InitESPNow(); // Once ESPNow is successfully Init, we will register for recv CB to // get recv packer info. esp_now_register_recv_cb(OnDataRecv); } // callback when data is recv from Master void OnDataRecv(const uint8_t *mac_addr, const uint8_t *data, int data_len) { char macStr[18]; snprintf(macStr, sizeof(macStr), "%02x:%02x:%02x:%02x:%02x:%02x", mac_addr[0], mac_addr[1], mac_addr[2], mac_addr[3], mac_addr[4], mac_addr[5]); //Serial.print("Last Packet Recv from: "); Serial.println(macStr); Serial.print(data[0]); Serial.print(", "); Serial.print(data[1]); Serial.print(", "); Serial.println(data[2]); x = int(data[0]) - 132; y = int(data[1]) - 132; if(abs(x) > 10 || abs(y) > 10){ th = atan2(y,-x) *180.0/M_PI; if(th < 0){ th += 360; } fillSegment(40, 80, 0, 360, 35, TFT_BLACK); fillSegment(40, 80, int(th)-90, 5, 35, TFT_GREEN); if(th > 180.0){ //th2 = map(int(th - 180.0),0, 180, 180, 0); th2 = int(th - 180.0); thL = stopValueL + speedL; thR = stopValueR - speedR; }else{ //th2 = map(int(th),0, 180, 180, 0); th2 = int(th); thL = stopValueL - speedL; thR = stopValueR + speedR; } Serial.println(th2); Servo_angle_set(2,th2); Servo_angle_set(7,th2); Servo_angle_set(6,thL); Servo_angle_set(3,thR); }else{ th = 0; fillSegment(40, 80, 0, 360, 35, TFT_BLACK); Servo_angle_set(6,stopValueL); Servo_angle_set(3,stopValueR); } } void loop() { } // ######################################################################### // Draw circle segments // ######################################################################### // x,y == coords of centre of circle // start_angle = 0 - 359 // sub_angle = 0 - 360 = subtended angle // r = radius // colour = 16 bit colour value int fillSegment(int x, int y, int start_angle, int sub_angle, int r, unsigned int colour) { // Calculate first pair of coordinates for segment start float sx = cos((start_angle - 90) * DEG2RAD); float sy = sin((start_angle - 90) * DEG2RAD); uint16_t x1 = sx * r + x; uint16_t y1 = sy * r + y; // Draw colour blocks every inc degrees for (int i = start_angle; i < start_angle + sub_angle; i++) { // Calculate pair of coordinates for segment end int x2 = cos((i + 1 - 90) * DEG2RAD) * r + x; int y2 = sin((i + 1 - 90) * DEG2RAD) * r + y; M5.Lcd.fillTriangle(x1, y1, x2, y2, x, y, colour); // Copy segment end to sgement start for next segment x1 = x2; y1 = y2; } } // ######################################################################### // Return the 16 bit colour with brightness 0-100% // ######################################################################### unsigned int brightness(unsigned int colour, int brightness) { byte red = colour >> 11; byte green = (colour & 0x7E0) >> 5; byte blue = colour & 0x1F; blue = (blue * brightness)/100; green = (green * brightness)/100; red = (red * brightness)/100; return (red << 11) + (green << 5) + blue; } |
参考
動作
Wiiコントローラで新規の機体”カニ”を制御することができました。
機体にはまだ四つサーボを追加できますので改善や応用を考えたいと思います。
いい日カニ玉
