Blynk Controlled Car
 お父ちゃん
2016.9.25
お父ちゃん
2016.9.25
本記事にはアフィリエイト広告が含まれます。
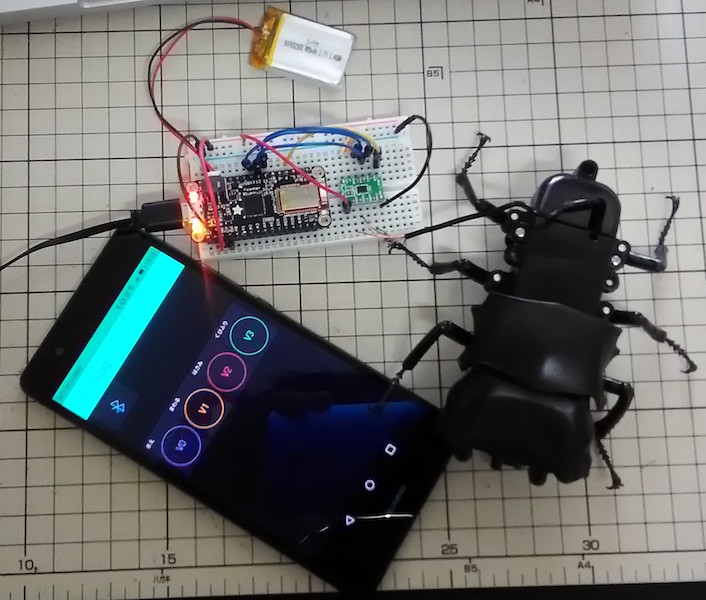
I made Blynk controlled Car using Adafruit Feather 32u4 Bluefruit LE. I can easily using Blynk!
目次
Configuration

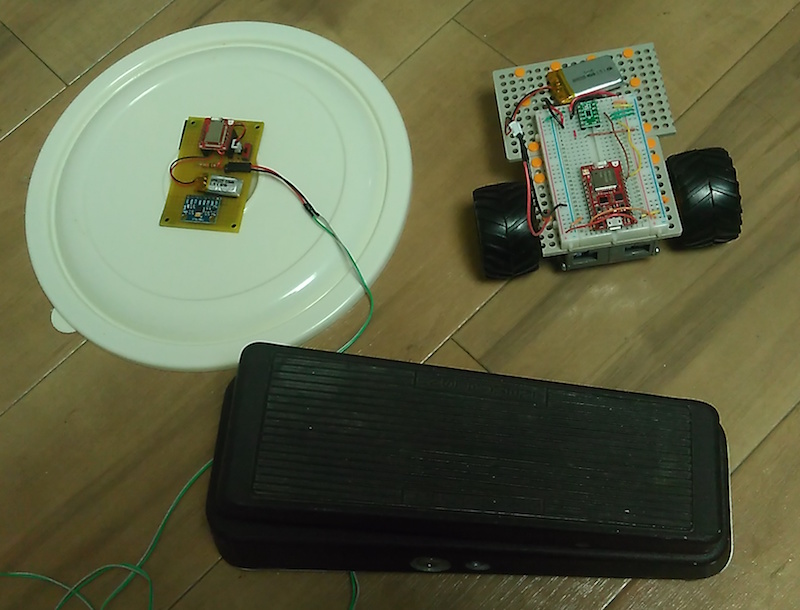
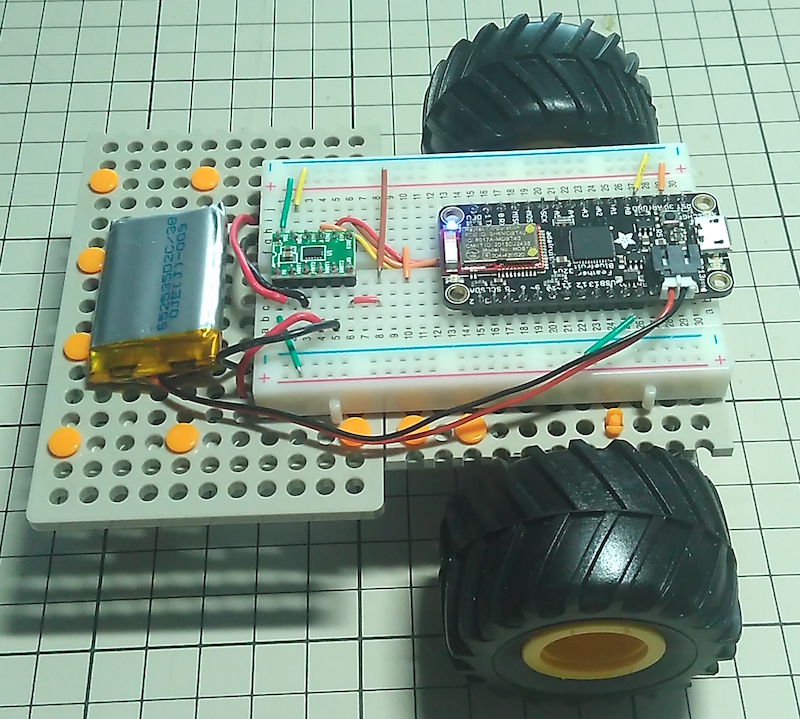
I use the BLE equipped microcomputer Adafruit Feather 32u4 Bluefruit LE and the motor driver DRV8835 to control the rotation of the two motors by Blynk.
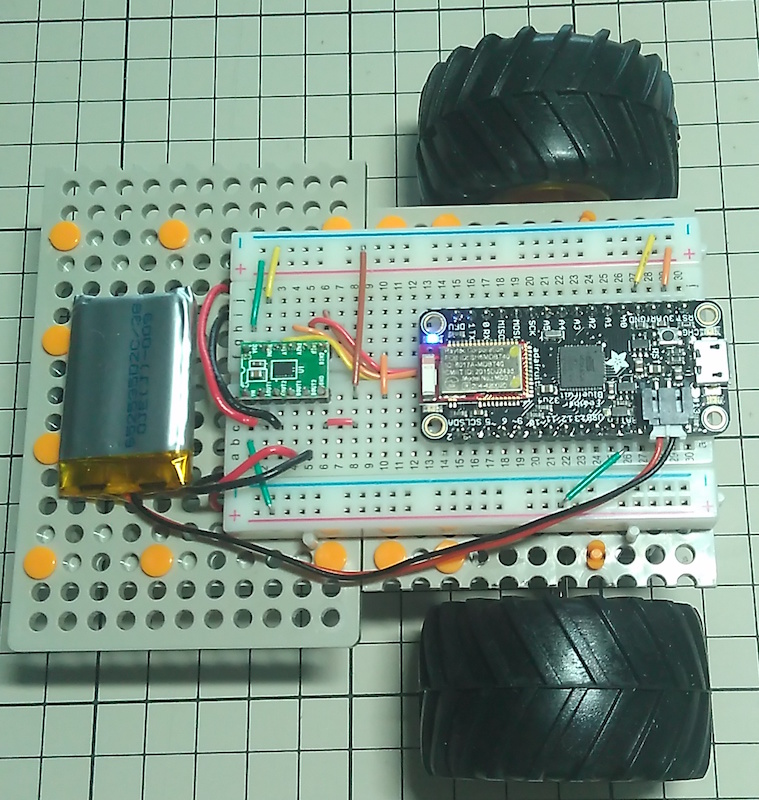
Parts
- BLE-equipped microcomputer Adafruit Feather 32u4 bluefruit LE
- Motor driver DRV8835
- Li-ion polymer battery 400mAh
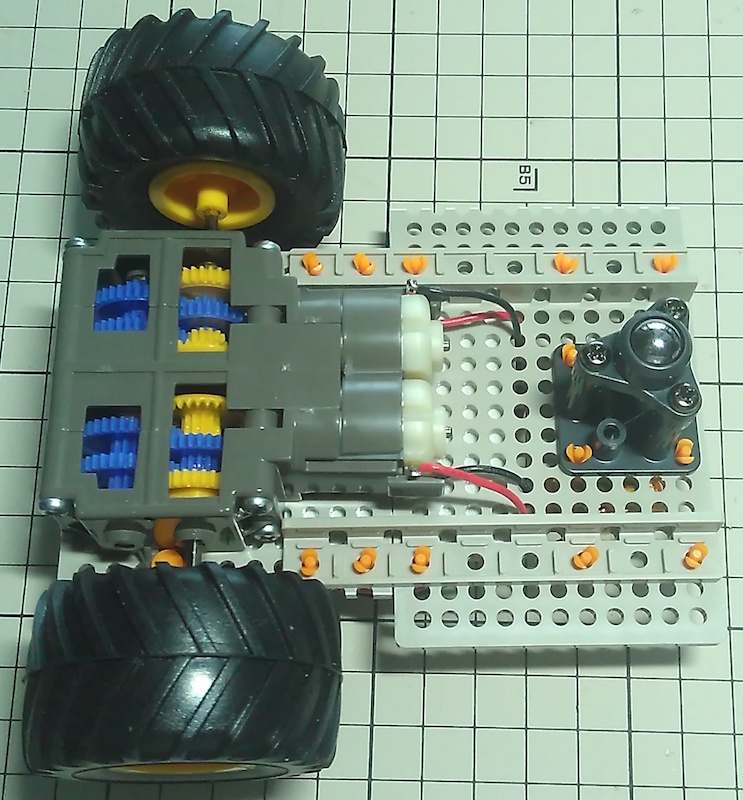
- Double gearbox
gear ratio is 344.2 : 1
- Universal Plate
- Off-road tyre set
- Ball caster


Blynk Library for Arduino
Latest library is located in the following.
https://github.com/blynkkk/blynk-library
Adafruit Feather 32u4 Bluefruit LE. is used. So, Arduino code is generated in reference to the following.
[Example] -> [Blynk] -> [Boards_BLE]-> [Adafruit_Feather_32u4_BLE]
Blynk settings
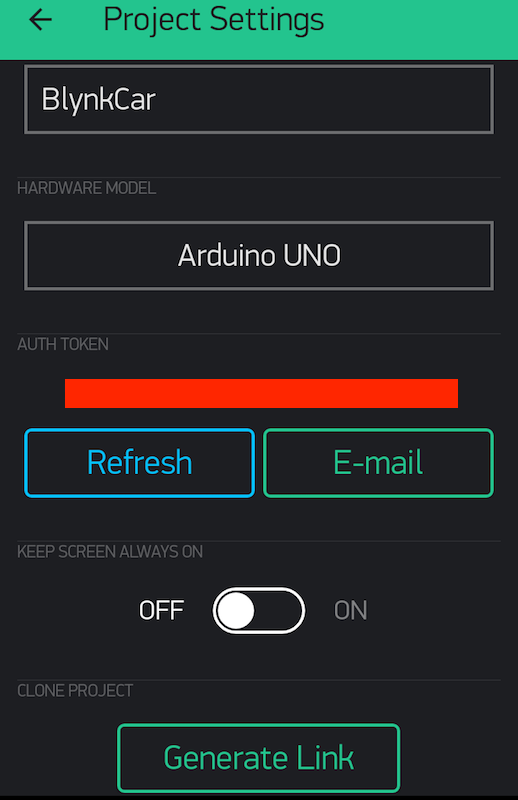
Create a new project . Select the Arduino UNO in hardware, because there is no Adafruit Feather 32u4 BLE yet. AUTH TOKEN will make a note so you use at the time of Arduino code generation ( or to send mail ).
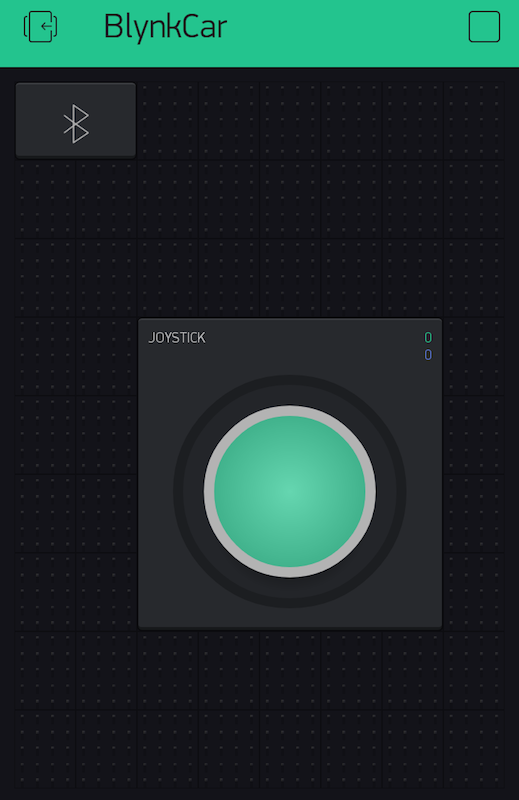
Place the BLE widget and the joystick widget.
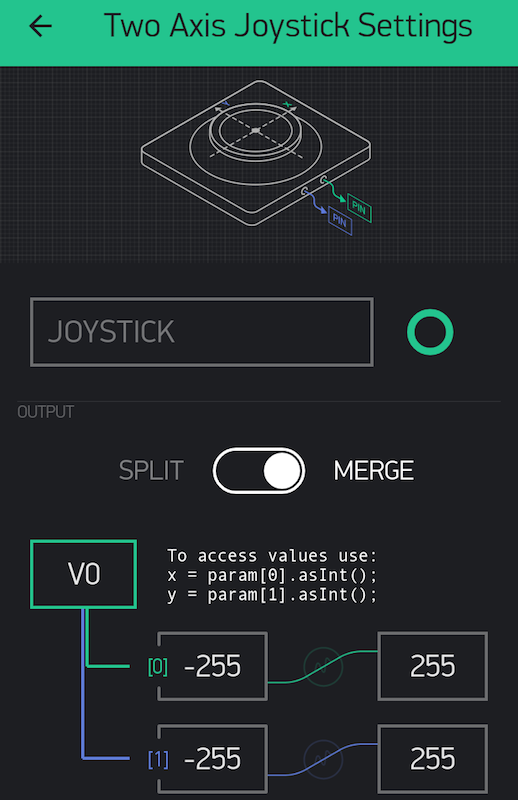
Joystick setting. The values of the two-axis are output in virtual pin V0. The values of X and Y are -255 to 255, respectively.
Arduino IDE Code
[Sketch Example]-> [Blynk]-> [boards_ble]-> [Adafruit_Feather_32u4_BLE] code generated by reference.
|
1 2 3 4 5 6 7 8 9 10 11 12 13 14 15 16 17 18 19 20 21 22 23 24 25 26 27 28 29 30 31 32 33 34 35 36 37 38 39 40 41 42 43 44 45 46 47 48 49 50 51 52 53 54 55 56 57 58 59 60 61 62 63 64 65 66 67 68 69 70 71 72 73 74 75 76 77 78 79 80 81 82 83 84 85 86 |
#define BLYNK_PRINT Serial #define BLYNK_USE_DIRECT_CONNECT #include <BlynkSimpleSerialBLE.h> #include <SPI.h> #include <Adafruit_BLE.h> #include <Adafruit_BluefruitLE_SPI.h> // You should get Auth Token in the Blynk App. // Go to the Project Settings (nut icon). char auth[] = "YourAuthToken"; // SHARED SPI SETTINGS (see adafruit webpages for details) #define BLUEFRUIT_SPI_CS 8 #define BLUEFRUIT_SPI_IRQ 7 #define BLUEFRUIT_SPI_RST 4 // Optional but recommended, set to -1 if unused #define BLUEFRUIT_VERBOSE_MODE true // Create ble instance, see pinouts above Adafruit_BluefruitLE_SPI ble(BLUEFRUIT_SPI_CS, BLUEFRUIT_SPI_IRQ, BLUEFRUIT_SPI_RST); //pin name const int forwardL = 11; const int rearL = 10; const int forwardR = 5; const int rearR = 6; long Speed; long SpeedL, SpeedR; BLYNK_WRITE(V0) { long x = param[0].asInt(); long y = param[1].asInt(); Serial.print("x: "); Serial.print(x); Serial.print(" y: "); Serial.print(y); Speed = sqrt(x*x+y*y); if(Speed > 255){ Speed = 255; } Serial.print(" Speed: "); Serial.println(Speed); if(y >= 0){ if(x >= 0){ SpeedL = 0; SpeedR = abs(x); }else{ SpeedL = abs(x); SpeedR = 0; } analogWrite(forwardL, Speed - SpeedL); analogWrite(rearL, 0); analogWrite(forwardR, Speed - SpeedR); analogWrite(rearR, 0); }else{ if(x >= 0){ SpeedL = 0; SpeedR = abs(x); }else{ SpeedL = abs(x); SpeedR = 0; } analogWrite(forwardL, 0); analogWrite(rearL, Speed - SpeedL); analogWrite(forwardR, 0); analogWrite(rearR, Speed - SpeedR); } } void setup() { Serial.begin(9600); Blynk.begin(auth, ble); ble.begin(BLUEFRUIT_VERBOSE_MODE); ble.factoryReset(); // Optional ble.setMode(BLUEFRUIT_MODE_DATA); } void loop() { Blynk.run(); } |
You can now control two motors by receiving the two values of the Blynk joystick and move them back and forth!
Blynk Connecting BLE
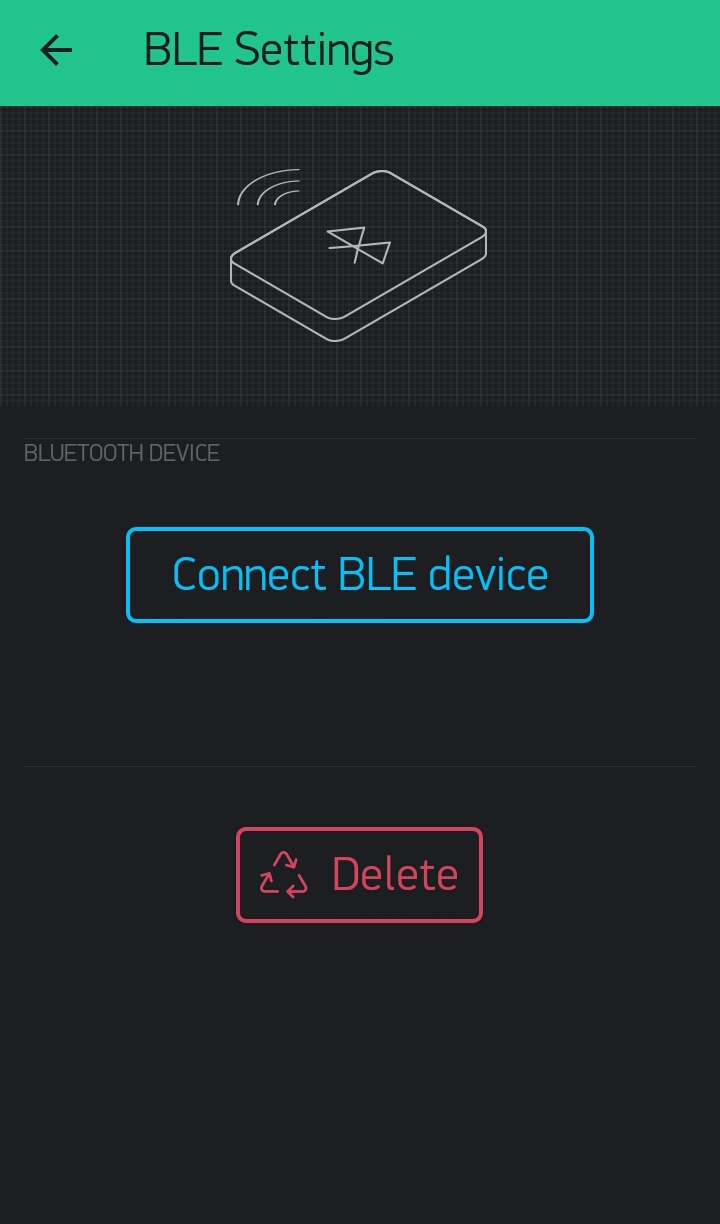
Click on the BLE widget of the project.
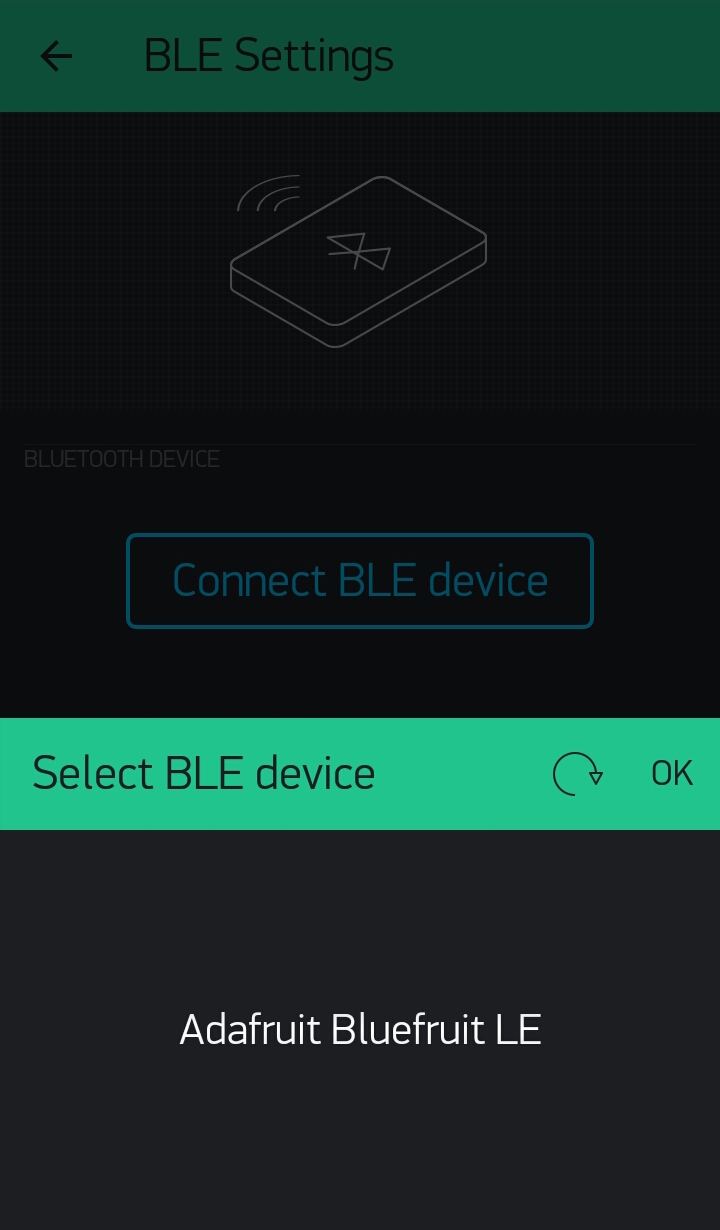
Click on the “Connect BLE device”.
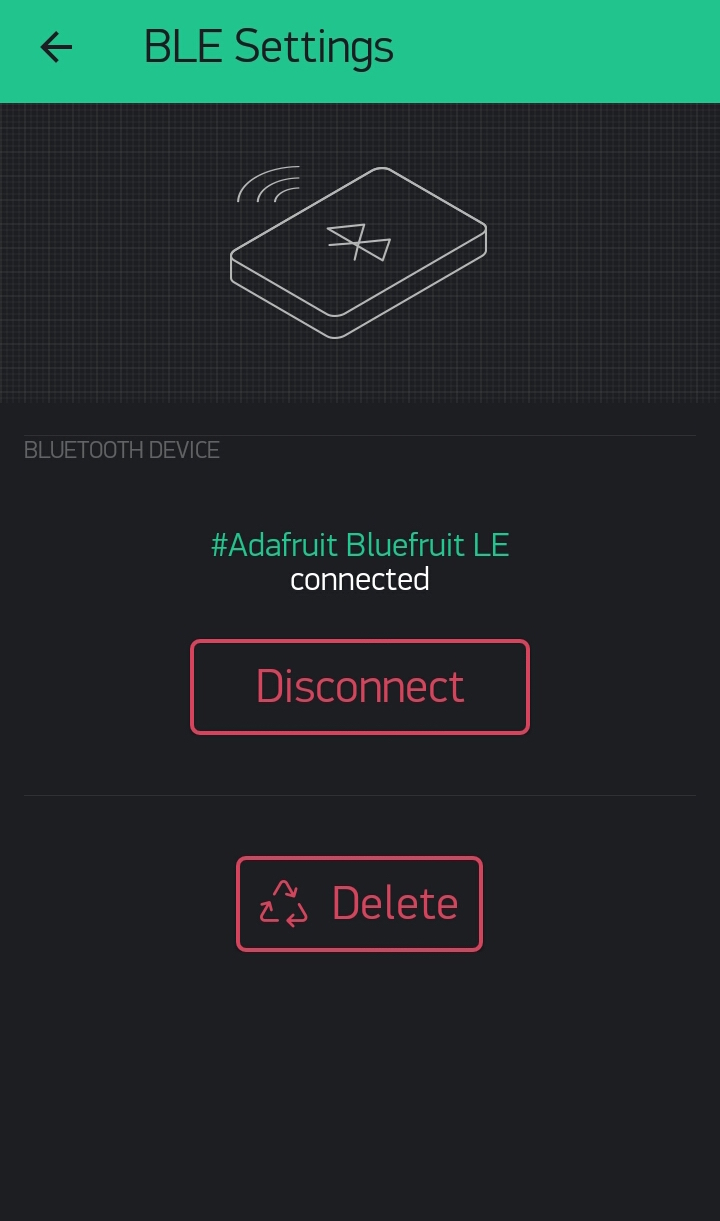
Then, conect to “Adafruit Bluefruit LE” by clicking “OK”.
Operation
In the future, I’d like to have this camera mounted on a head-mounted display (smartphone): roll: