スマート靴占い 『 IしたoTんきになぁ〜れ 』
Home > IoT > さくらのIoTプラットフォームβ版 >
本記事にはアフィリエイト広告が含まれます。
ハードウェアコンテストのGUGEN2016に投稿したスマート靴占い装置
『 IしたoTんきになぁ〜れ』
について記載します。1次審査通らなかったけど。。。(T_T)
目次
概要
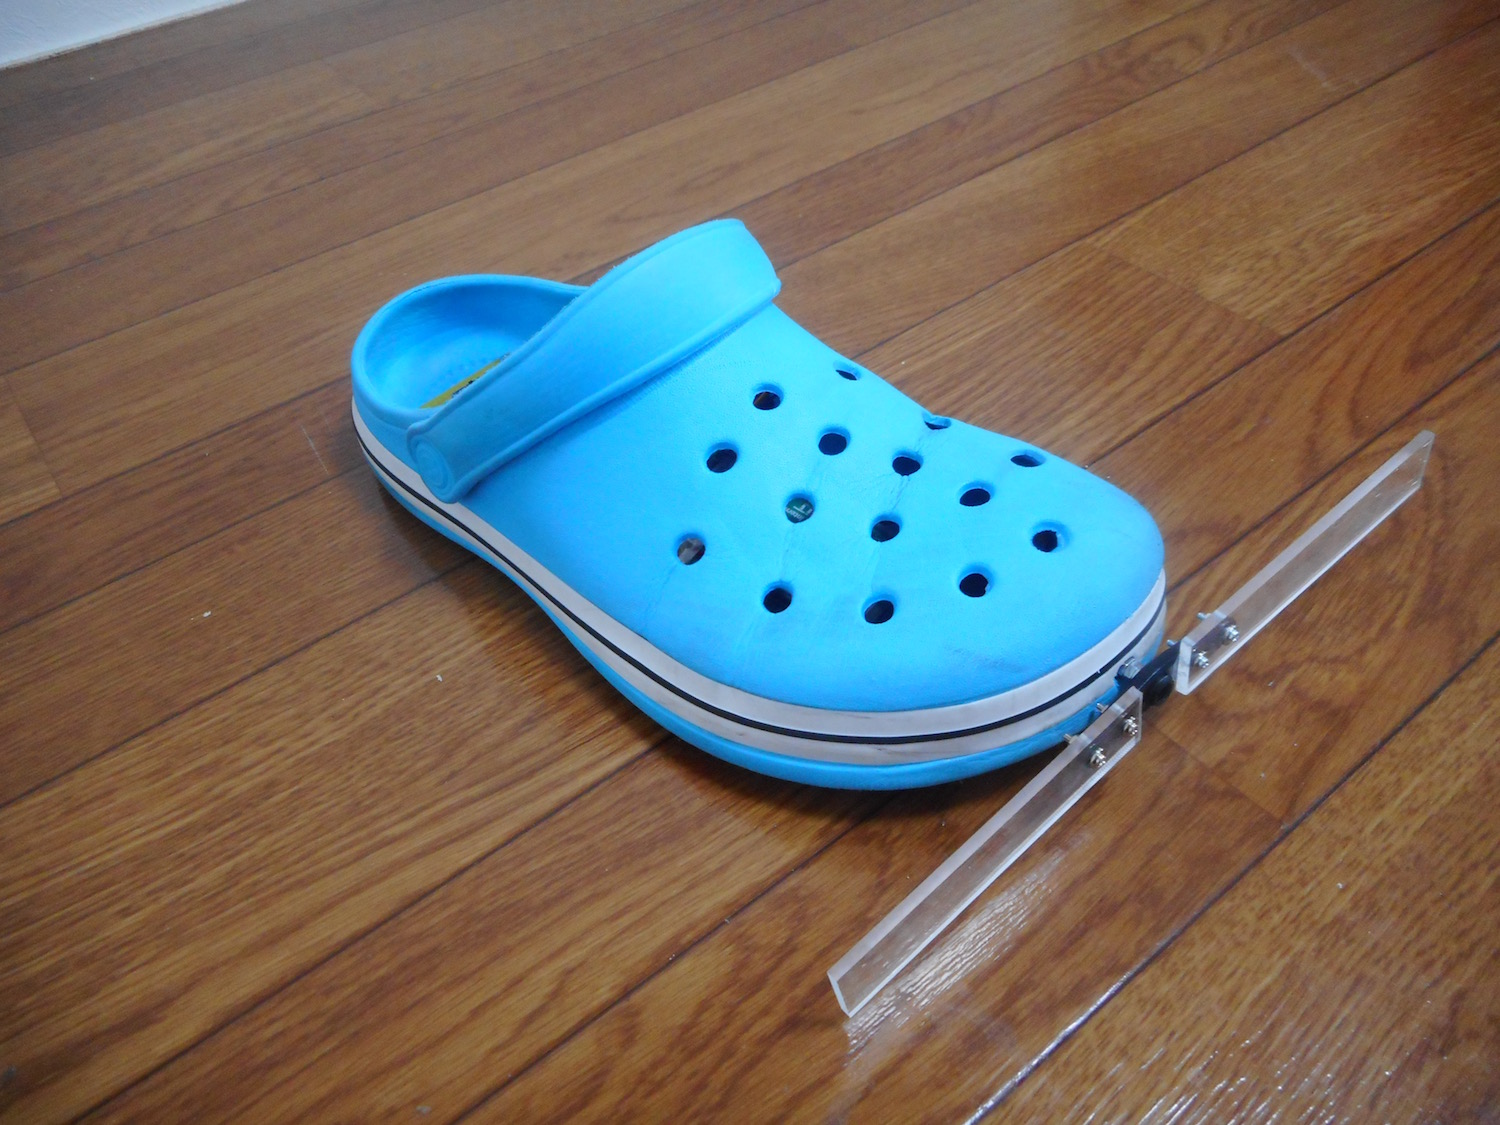
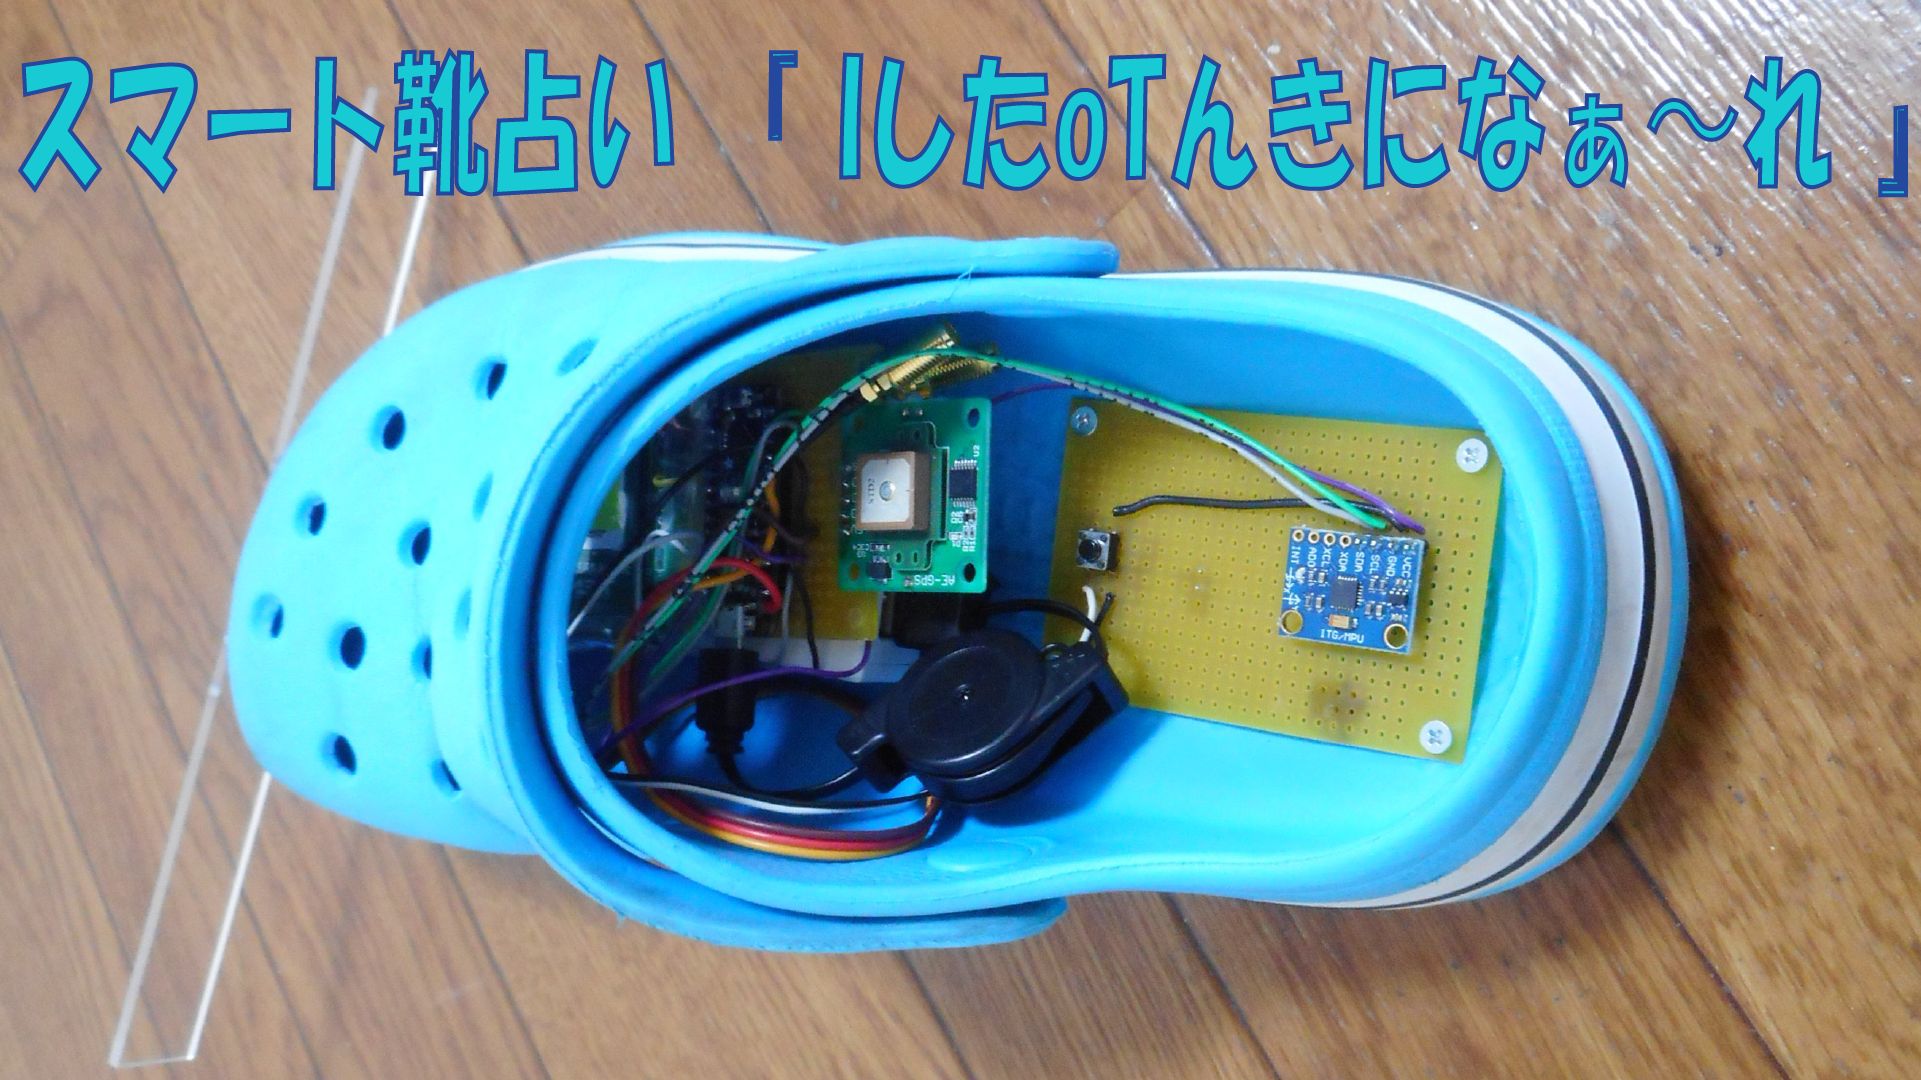
『 IしたoTんきになぁ〜れ 』 は通信システムと駆動システムを内蔵し、天気予報の確率と100%一致する靴占いを実現する靴です。靴を投げ飛ばすと、その地点の明日の天気に従って靴が着地姿勢を変え、天気を占います。
脱ウェアラブルデバイスです。
動画
電気系統
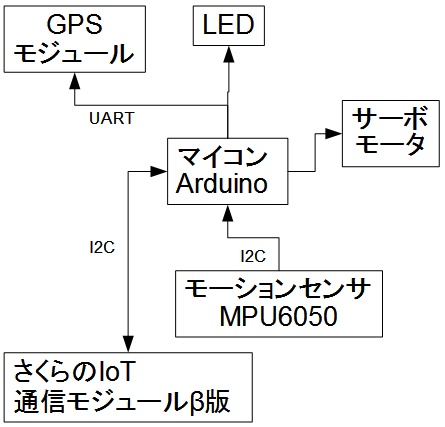
構成
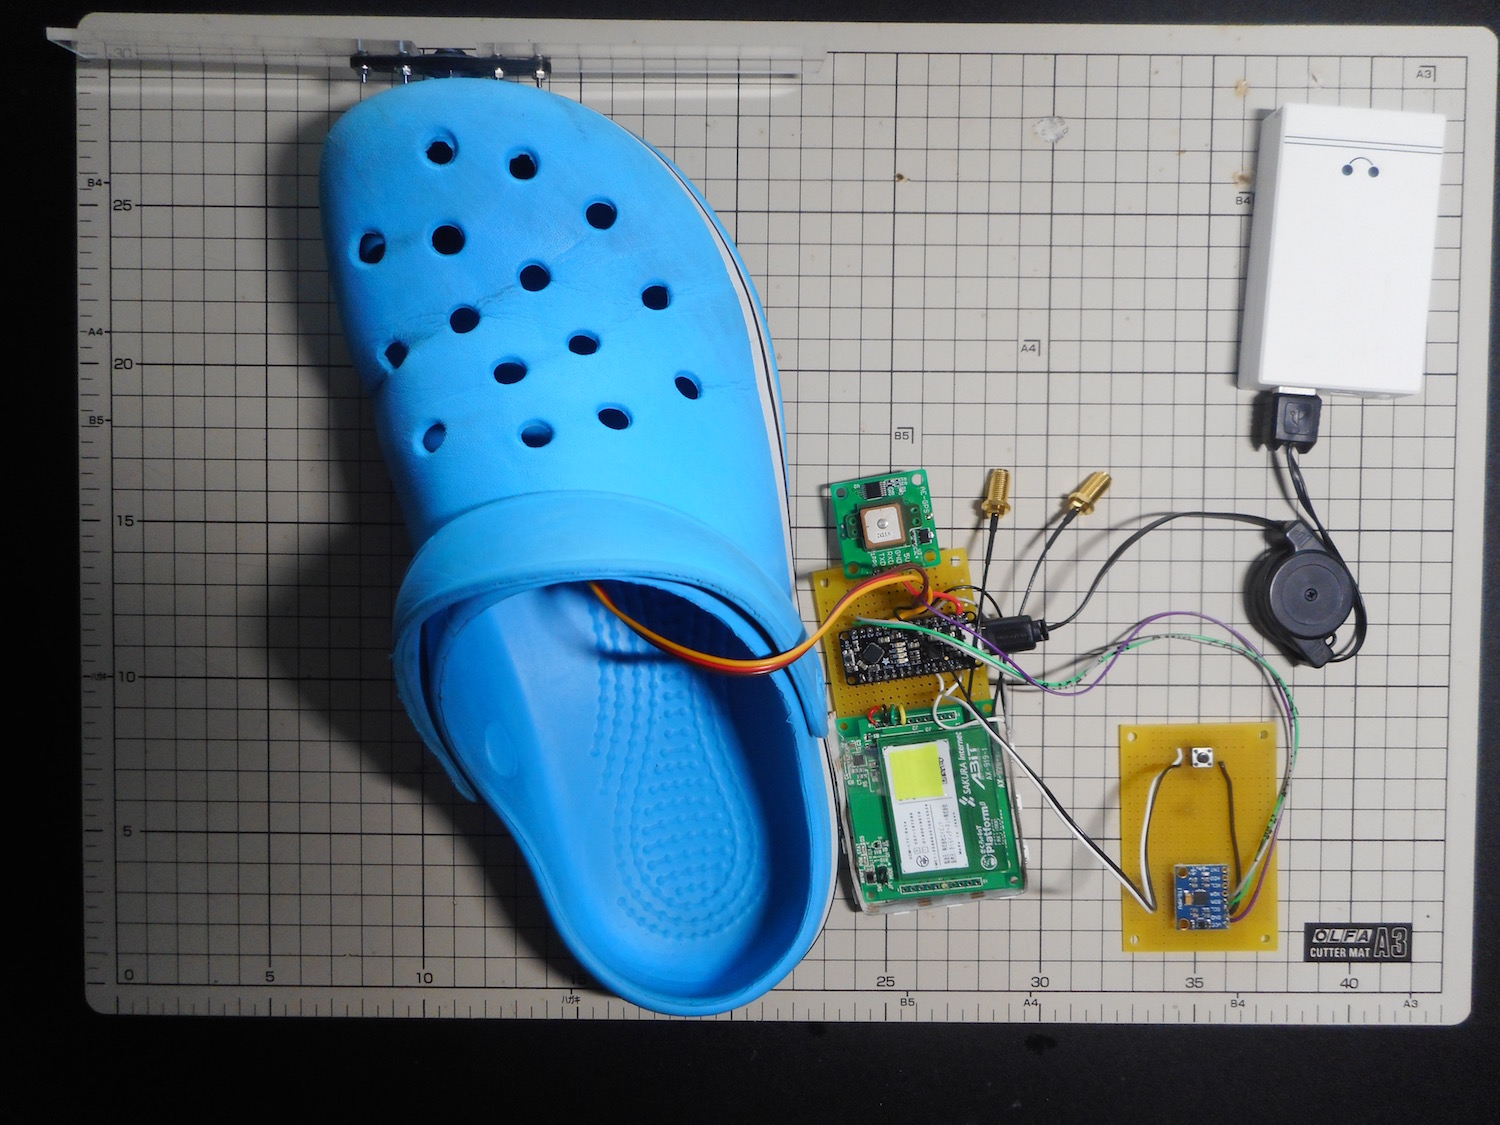
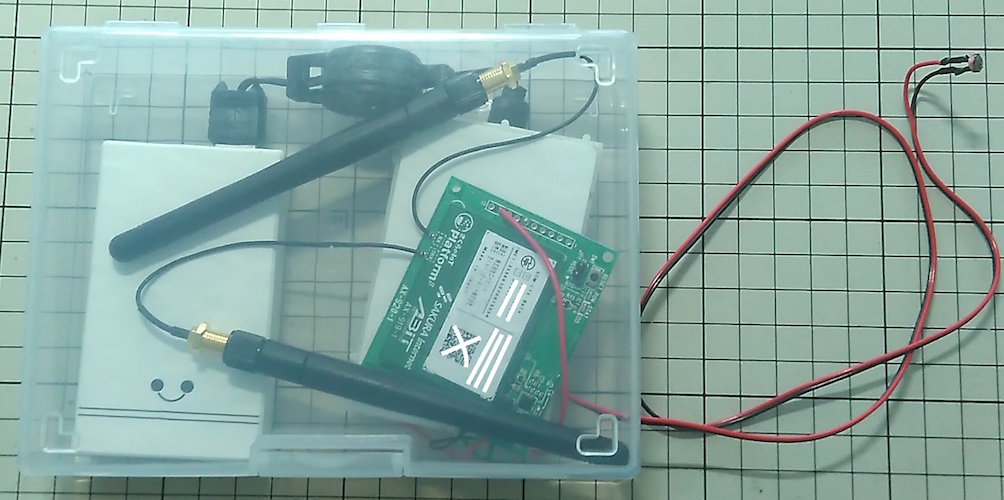
部品
- GPS受信機キット
GPS設定等の詳細は以下参照ください
https://homemadegarbage.com/sakura-iot-pre1
- モーションセンサ MPU6050
靴の着地姿勢を検知
- サーボモータ MG995
着地後に靴の先端についた羽をサーボで回転させて天気に応じた姿勢にします
- LEDテープ Neopixel
動作ステート、通信ステートを色で表示
赤:パワーオン初期状態
青:GPS位置情報受信完了
水色:天気情報問い合せ中
緑:天気情報受信完了
紫:占い終了
- モバイルバッテリー
電源として使用
- マイコン Adafruit Metro Mini 328
- さくらの通信モジュール(LTE)β版 & ブレイクアウトボード
さくらのIoT Platform β版
α版でも利用していたのですが、ついにβ版 IoTモジュールが販売されたので使用しました。β版でも通信料は無料でLTE通信を使用しています。
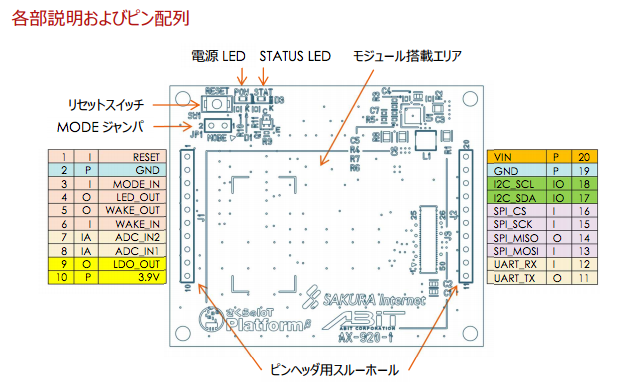
モジュールの主な特徴
- ロジックI/Oは1.8V系なので要注意
- ADC入力端子(ADC_IN1, 2):マイコン通さず電圧レベル取得可能
- パワーセーブ端子(WAKE_IN ):LowレベルでDeep Sleepモードに遷移
詳細ドキュメントは以下
https://iot.sakura.ad.jp/developer/
ライブラリは以下
https://github.com/sakura-internet/SakuraIOArduino
Arduino IDE用コード
|
1 2 3 4 5 6 7 8 9 10 11 12 13 14 15 16 17 18 19 20 21 22 23 24 25 26 27 28 29 30 31 32 33 34 35 36 37 38 39 40 41 42 43 44 45 46 47 48 49 50 51 52 53 54 55 56 57 58 59 60 61 62 63 64 65 66 67 68 69 70 71 72 73 74 75 76 77 78 79 80 81 82 83 84 85 86 87 88 89 90 91 92 93 94 95 96 97 98 99 100 101 102 103 104 105 106 107 108 109 110 111 112 113 114 115 116 117 118 119 120 121 122 123 124 125 126 127 128 129 130 131 132 133 134 135 136 137 138 139 140 141 142 143 144 145 146 147 148 149 150 151 152 153 154 155 156 157 158 159 160 161 162 163 164 165 166 167 168 169 170 171 172 173 174 175 176 177 178 179 180 181 182 183 184 185 186 187 188 189 190 191 192 193 194 195 196 197 198 199 200 201 202 203 204 205 206 207 208 209 210 211 212 213 214 215 216 217 218 219 220 221 222 223 224 225 226 227 228 229 230 231 232 233 234 235 236 237 238 239 240 241 242 243 244 245 246 247 248 249 250 251 252 253 254 255 256 257 258 259 260 261 262 263 264 265 266 267 268 269 270 271 |
//https://iot.sakura.ad.jp/developer/ #include <SakuraIO.h> #include <TinyGPS++.h> #include <SoftwareSerial.h> #include <Adafruit_NeoPixel.h> #include "I2Cdev.h" #include "MPU6050.h" #include <Servo.h> #define BUF_LEN 16 #define PIN 9 #define NUMPIXELS 10 Adafruit_NeoPixel pixels = Adafruit_NeoPixel(NUMPIXELS, PIN, NEO_GRB + NEO_KHZ800); static const int RXPin = 10, TXPin = 11; static const uint32_t GPSBaud = 9600; float lat; //緯度 float lng; //経度 //受信衛生数 uint32_t sateNo = 0; // The TinyGPS++ object TinyGPSPlus gps; // The serial connection to the GPS device SoftwareSerial ss(RXPin, TXPin); SakuraIO_I2C sakura; uint8_t values[8] = {0,}; int state = 0; int buttonState = 0; MPU6050 accelgyro; int16_t ax, ay, az; int16_t gx, gy, gz; Servo myservo; // create servo object to control a servo void setup() { myservo.attach(A1); myservo.write(0); delay(1000); myservo.detach(); #if I2CDEV_IMPLEMENTATION == I2CDEV_ARDUINO_WIRE Wire.begin(); #elif I2CDEV_IMPLEMENTATION == I2CDEV_BUILTIN_FASTWIRE Fastwire::setup(400, true); #endif Serial.begin(9600); Serial.println("start!"); ss.begin(GPSBaud); pinMode(12, INPUT_PULLUP); pixels.begin(); for(int i=0;i<NUMPIXELS;i++){ pixels.setPixelColor(i, pixels.Color(100,0,0)); } pixels.show(); while((sakura.getConnectionStatus() & 0x80) != 0x80){ delay(1000); Serial.println("."); } Serial.println("online!"); // initialize mpu6050 Serial.println("Initializing I2C devices..."); accelgyro.initialize(); Serial.println("Testing device connections..."); Serial.println(accelgyro.testConnection() ? "MPU6050 connection successful" : "MPU6050 connection failed"); // use the code below to change accel/gyro offset values accelgyro.setXAccelOffset(-2950); //0 accelgyro.setYAccelOffset(-540); //0 accelgyro.setZAccelOffset(1513); //16384 accelgyro.setXGyroOffset(20); //0 accelgyro.setYGyroOffset(-49); //0 accelgyro.setZGyroOffset(20); //0 myservo.attach(A1); myservo.write(0); delay(1000); myservo.detach(); } void loop(){ unsigned long start = millis(); buttonState = digitalRead(12); if(state == 0){ myservo.attach(A1); myservo.write(0); delay(1000); myservo.detach(); do { while (ss.available() > 0){ gps.encode(ss.read()); } } while (millis() - start < 3000); } lat = gps.location.lat(); lng = gps.location.lng(); sateNo = gps.satellites.value(); Serial.println(lat); Serial.println(lng); Serial.println(sateNo); //GPS OK! if(sateNo >= 4 && state == 0){ state = 1; for(int i=0;i<NUMPIXELS;i++){ pixels.setPixelColor(i, pixels.Color(0,0,100)); } pixels.show(); } buttonState = digitalRead(12); //Button ON -> Tx! if(state == 1 && buttonState == 0){ state = 2; for(int i=0;i<NUMPIXELS;i++){ pixels.setPixelColor(i, pixels.Color(0,100,100)); } pixels.show(); //モジュール転送 sakura.enqueueTx(0, lat); //ch0 緯度 sakura.enqueueTx(1, lng); //ch1 経度 sakura.enqueueTx(2, sateNo); //ch2 受信衛星数 sakura.enqueueTx(3, (uint32_t)values[0]); //受信天気 sakura.send(); } // Rx Queue uint8_t avail; uint8_t queued; sakura.getRxQueueLength(&avail, &queued); /* Serial.print("Rx Available="); Serial.print(avail); Serial.print(" Queued="); Serial.println(queued); */ if(queued == 1 && state == 2){ for(int i=0;i<NUMPIXELS;i++){ pixels.setPixelColor(i, pixels.Color(0,100,0)); } pixels.show(); uint8_t channel; uint8_t type; int64_t offset; uint8_t ret = sakura.dequeueRx(&channel, &type, values, &offset); Serial.print("Dequeue "); Serial.print(ret); if(ret == 0x01){ Serial.print(" ch="); Serial.print(channel); Serial.print(" type="); Serial.print((char)type); Serial.print(" weather="); Serial.print(values[0]); Serial.print(" offset="); Serial.println((int32_t)offset); }else{ Serial.println(" ERROR"); } if(values[0] > 0 && values[0] <= 4){ state = 3; }else{ for(int i=0;i<NUMPIXELS;i++){ pixels.setPixelColor(i, pixels.Color(0,0,100)); } pixels.show(); state = 1; } } if(state == 3){ unsigned long start = millis(); buttonState = digitalRead(12); do { // read raw accel/gyro measurements from device accelgyro.getMotion6(&ax, &ay, &az, &gx, &gy, &gz); Serial.print("a/g/weather:\t"); Serial.print(ax); Serial.print("\t"); Serial.print(ay); Serial.print("\t"); Serial.print(az); Serial.print("\t"); Serial.print(gx); Serial.print("\t"); Serial.print(gy); Serial.print("\t"); Serial.print(gz); Serial.print("\t"); Serial.println(values[0]); } while (millis() - start < 6000); if(values[0] == 2 && az > 10000){ myservo.attach(A1); myservo.write(125); delay(1000); myservo.detach(); } if(values[0] == 3 && az > 10000){ myservo.attach(A1); myservo.write(180); delay(1000); myservo.detach(); } if(values[0] == 1 && az < -10000){ myservo.attach(A1); myservo.write(180); delay(1000); myservo.detach(); } if(values[0] == 2 && az < -10000){ myservo.attach(A1); myservo.write(125); delay(1000); myservo.detach(); } for(int i=0;i<NUMPIXELS;i++){ pixels.setPixelColor(i, pixels.Color(100,0,100)); } pixels.show(); state = 4; } buttonState = digitalRead(12); if(state == 4 && buttonState == 0){ state = 0; for(int i=0;i<NUMPIXELS;i++){ pixels.setPixelColor(i, pixels.Color(100,0,0)); } pixels.show(); } } |
通信システム
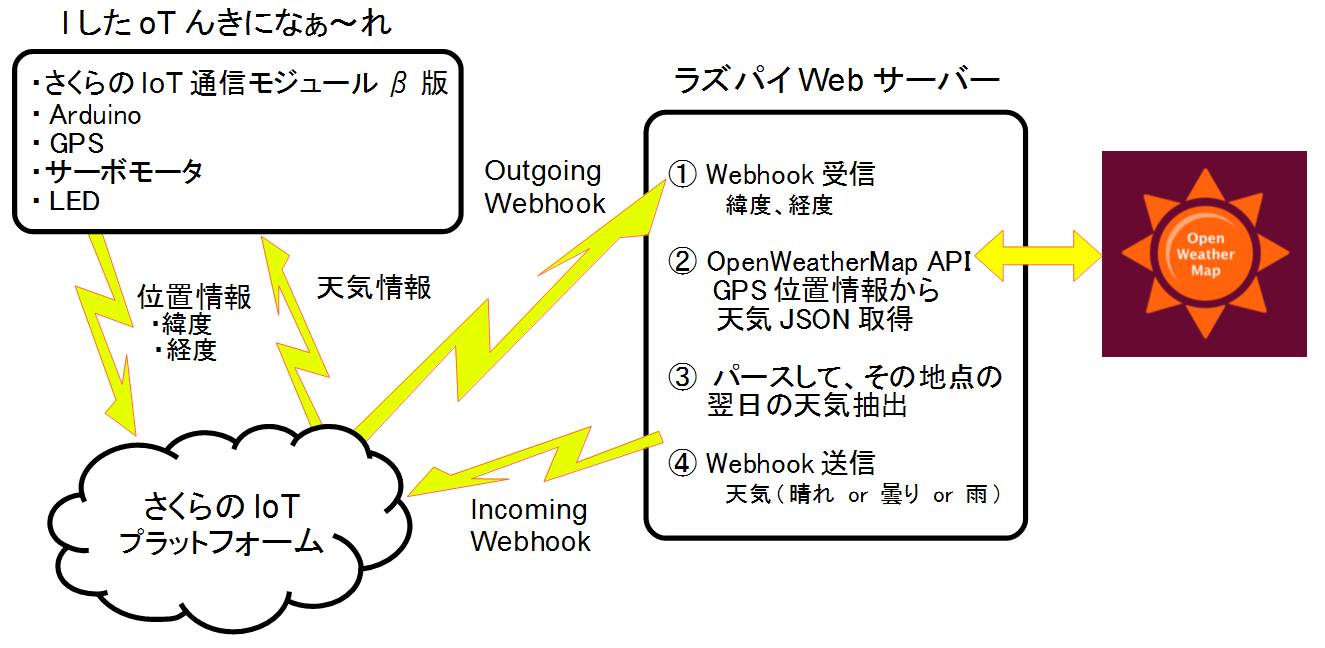
構成
さくらのIoT Platform
開発者ページのコントロールパネルで、Incoming Webhook と Outgoing Webhook の設定をします。

Incoming Webhook
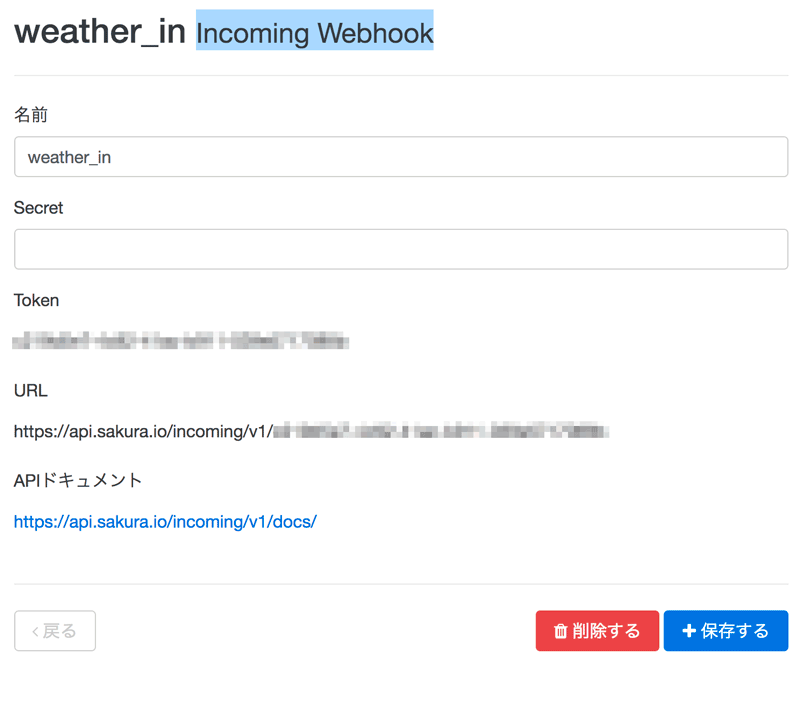
ここで設定されたURLをPHPで使用します。Secret はとりえあず設定していません。
Outgoing Webhook
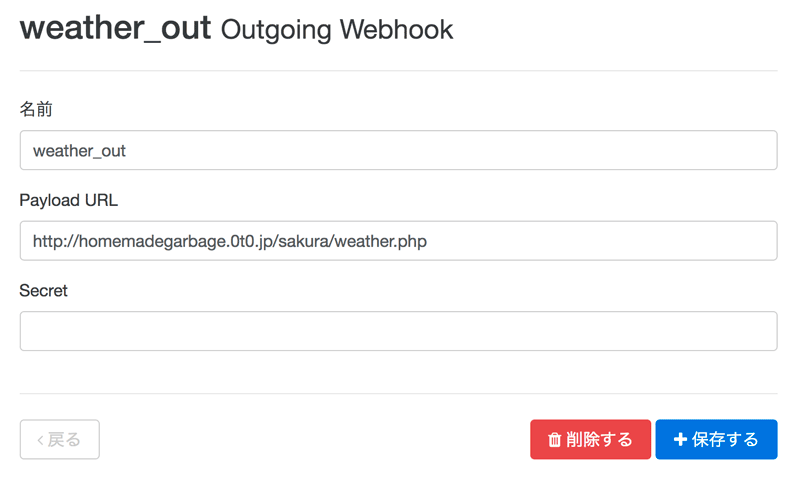
送信先のURLを設定します。
PHP(ラズパイサーバで受信/天気取得/送信)
/sakura/weather.php
|
1 2 3 4 5 6 7 8 9 10 11 12 13 14 15 16 17 18 19 20 21 22 23 24 25 26 27 28 29 30 31 32 33 34 35 36 37 38 39 40 41 42 43 44 45 46 47 48 49 50 51 52 53 54 55 56 57 58 59 60 61 62 63 64 65 66 67 68 69 70 71 72 73 74 75 76 77 78 |
<?php /************************ 1. Outgoing Webhook ************************/ $json = file_get_contents("php://input"); $data = json_decode($json,true); $lat = $data["payload"]["channels"][0]["value"]; $lon = $data["payload"]["channels"][1]["value"]; $satellite = $data["payload"]["channels"][2]["value"]; $weather = $data["payload"]["channels"][3]["value"]; /************************ 2. OpenWeatherMap API ************************/ // API $url = 'http://api.openweathermap.org/data/2.5/forecast?lat=' . $lat . '&lon=' . $lon . '&mode=json&appid=OpenWeatherMapのID'; $json = file_get_contents($url); $array = json_decode($json, true); // ステータスコード取得 preg_match('/HTTP\/1\.[0|1|x] ([0-9]{3})/', $http_response_header[0], $matches); $status_code = $matches[1]; // ステータスが200以外エラーコード if ( $status_code != 200 ) { $send_code = 4; } /************************ 3. OpenWeatherMap Perth ************************/ if ( $send_code != 4 ) { // UTC+9(明日9時) $tomorrow = date("Y-m-d 00:00:00", strtotime("+ 1 days")); foreach ($array["list"] as $key1 => $value1) { if (in_array($tomorrow, $array["list"][$key1])) { $weather_code = $array['list'][$key1]['weather'][0]['id']; } } // 天気コードセット if ( $weather_code == 800 ) { $send_code = 1; } elseif ( $weather_code >= 801 && $weather_code <= 804 ) { $send_code = 2; } else { $send_code = 3; } } /************************ 4. Incoming Webhook ************************/ $url = 'https://api.sakura.io/incoming/v1/IncomingWebhookのID'; $data = array( 'type' => 'channels', 'module' => 'u2lZxGL4rHRv', 'payload' => array( 'channels' => array([ 'channel' => 0, 'type' => 'i', 'value' => $send_code ]) ) ); $options = array( 'http' => array( 'method' => 'POST', 'content' => json_encode( $data ) ) ); $response = file_get_contents($url, false, stream_context_create($options)); // ステータスコード取得 preg_match('/HTTP\/1\.[0|1|x] ([0-9]{3})/', $http_response_header[0], $matches); $status_code = $matches[1]; |
- Outgoing Webhook で、デバイスから緯度経度を受信
- 緯度経度をOpenWetherMapAPIに送り、天気を取得
- jsonをパースし明日9時の天気を取得
- Incoming Webhookで 天気のステータスコードを送信
ホントは投げ飛ばして中空時に重心がシフトして着地姿勢制御するようにしたいので研究に励みます。。。。
 お父ちゃん
2017.1.9
