Electrocardiogram Using TouchDesigner & Arduino
 お父ちゃん
2017.9.24
お父ちゃん
2017.9.24
本記事にはアフィリエイト広告が含まれます。
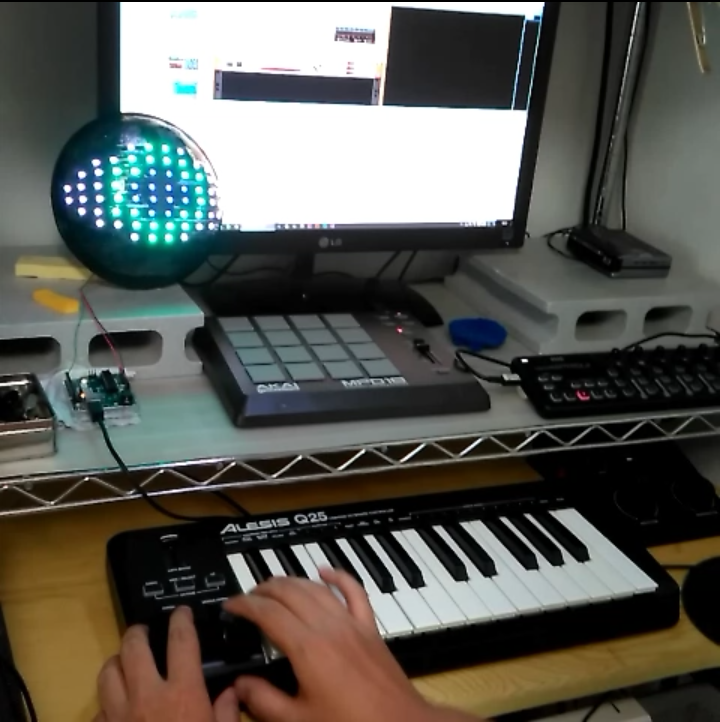
I created an electrocardiogram using TouchDesigner. The image moves according to the value of the sensor connected Arduino.
目次
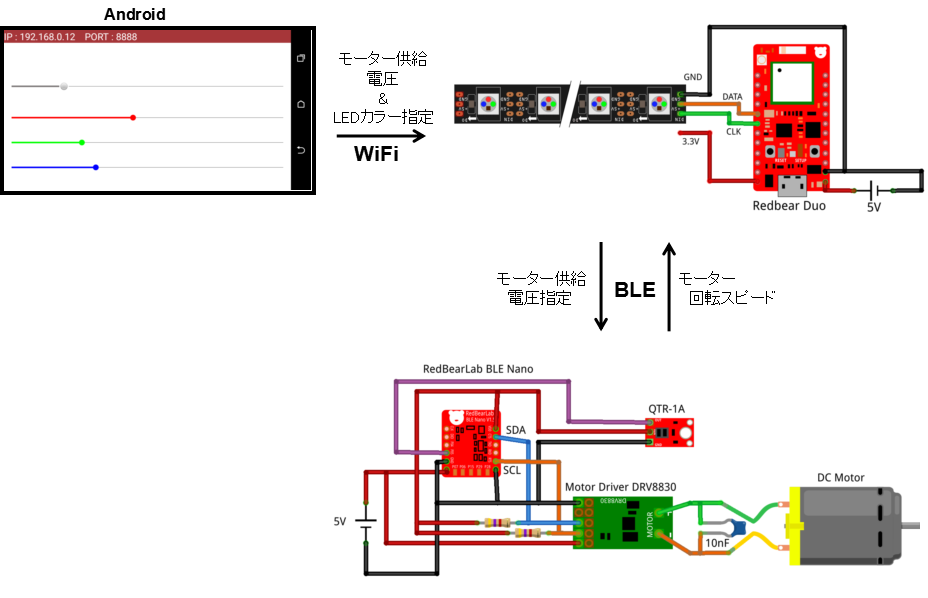
Sensor Configuration
Measure the heart rate with a sensor MAX30105.
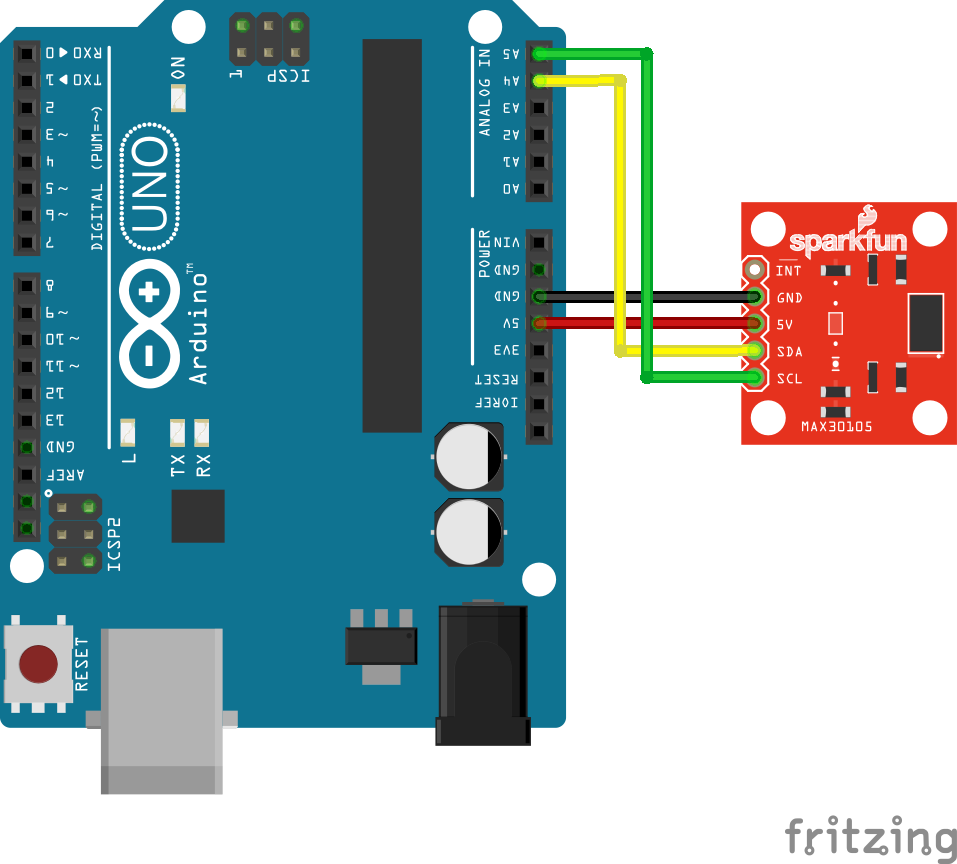
Parts
- Microcomputer Arduino uno
- max30105-mounted particle sensor module
The Arduino library for MAX30105 is below.
https://github.com/sparkfun/SparkFun_MAX3010x_Sensor_Library
Arduino IDE Code
I used Example4_HeartBeat_Plotter.ino in Library Example of MAX 30105 .
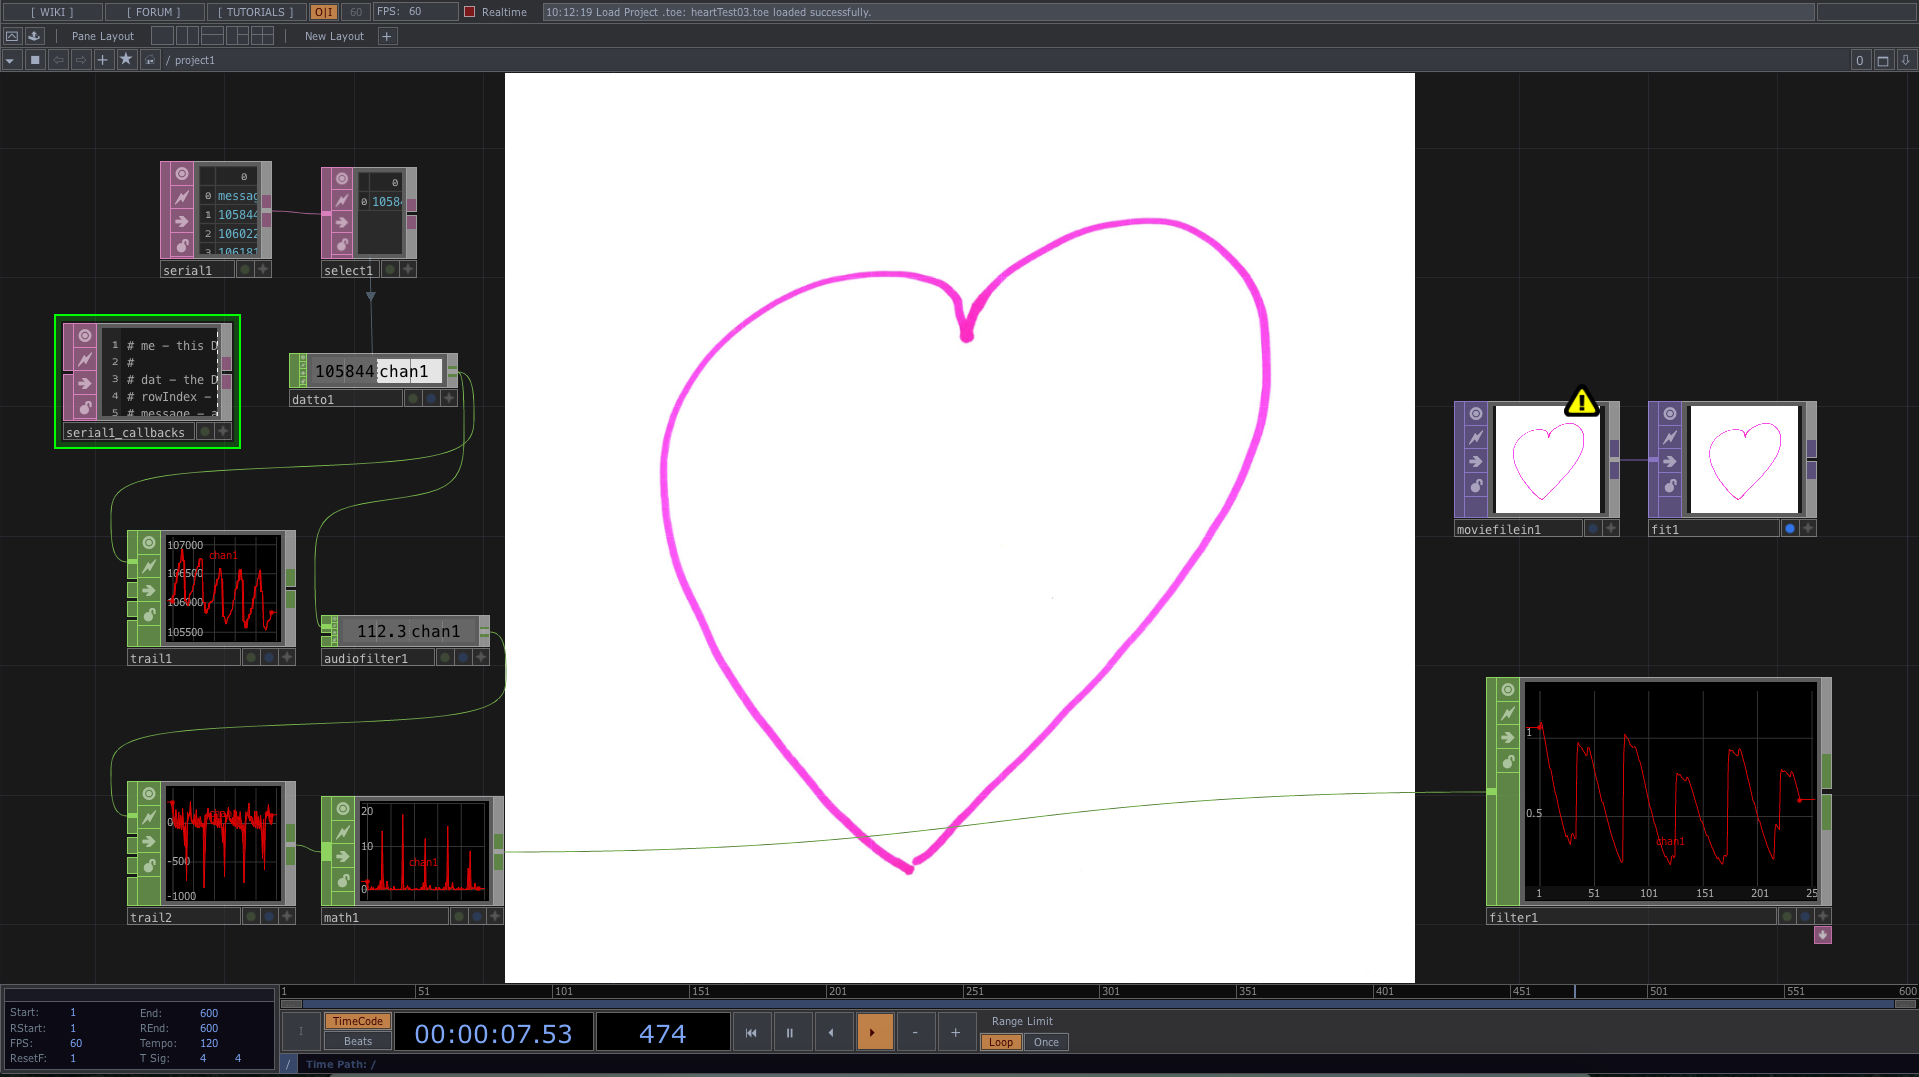
The Touchdesigner program
Operation
Program
-
Serial data from Arduino acquisition
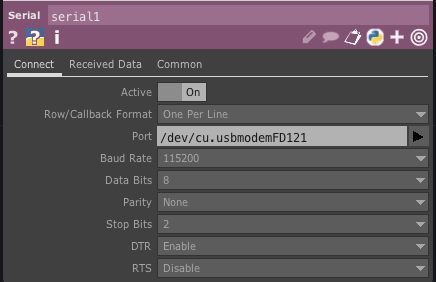
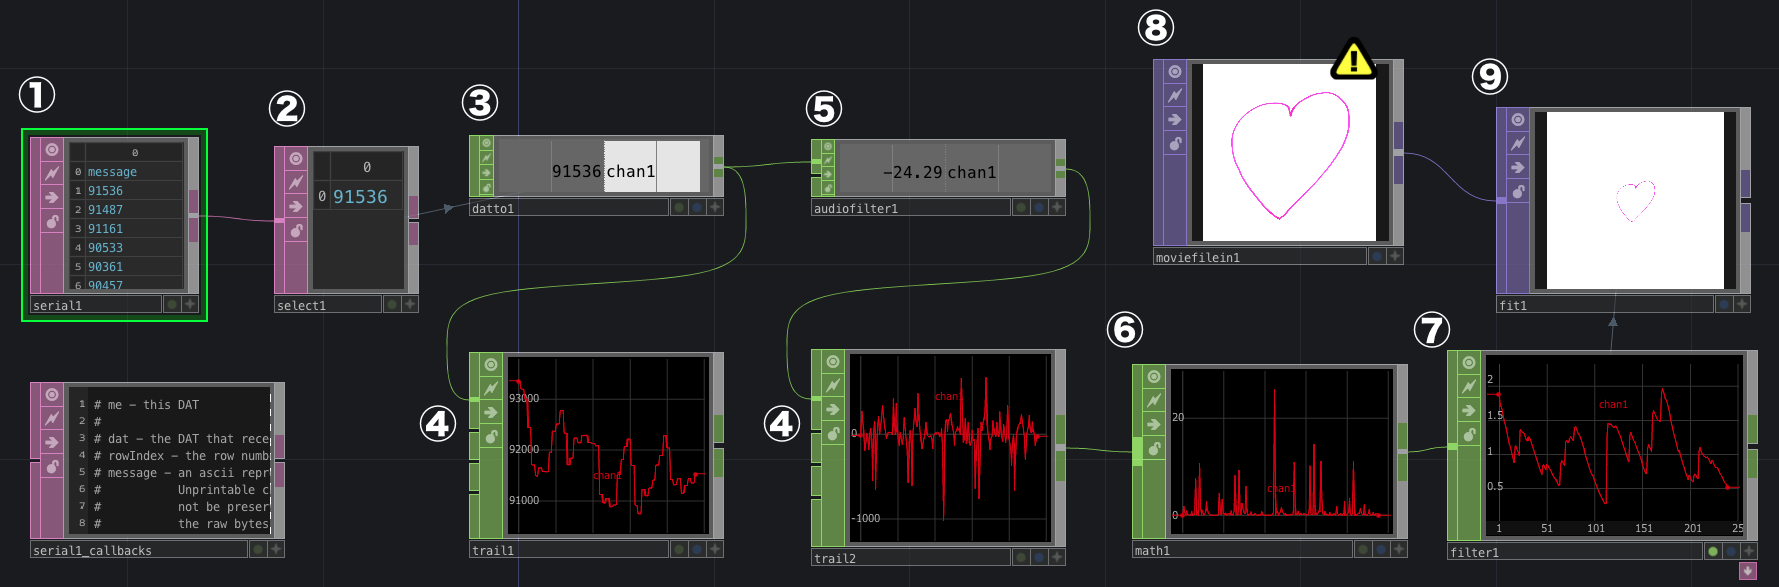
Select and place the Serial operator from the DAT (Data) tab and obtain serial data from Arduino.

- Port: Select the Arduino port connected to the PC
- Baud Rate: 115200
-
Selection of serial data.
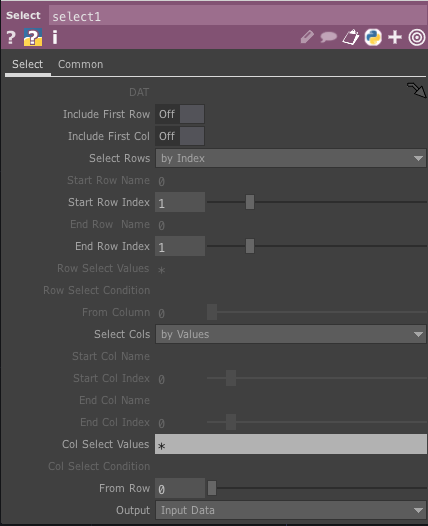
Select and place the Select operator from the DAT tab and wire it with the Serial operator so that only the latest serial data is acquired.
- Select Rows: By Index
- Start Row Index, End Row Index: 1
- Select Cols: by Value
-
Convert latest serial data to CHOP data
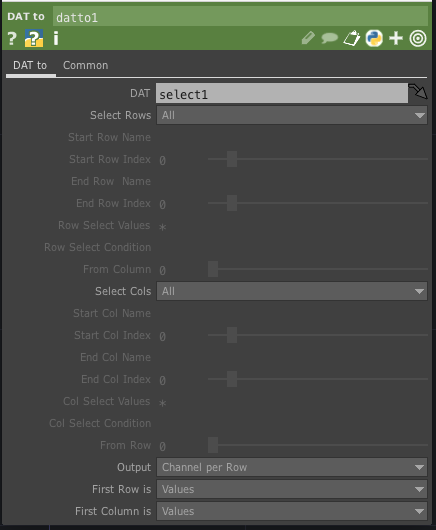
Select and place the DAT to operator from the CHOP (Channel Operators) tab and convert the serial data of the DAT value to the value for CHOP.
- First Column is: Values
- First Column is: Values
-
Plot CHOP data
Select and place the Trail operator from the CHOP tab and wire it with the CHOP operator output and plot the data.
-
CHOP filter serial data of sensorized sensor
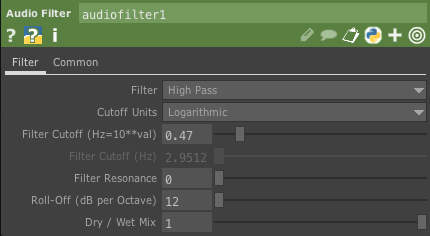
I wanted to eliminate the bias of the serial data, so I selected the Audio Filter operator from the CHOP tab.
- Cutoff Units: Logarithmic Filter
- Cutoff: 0.47
-
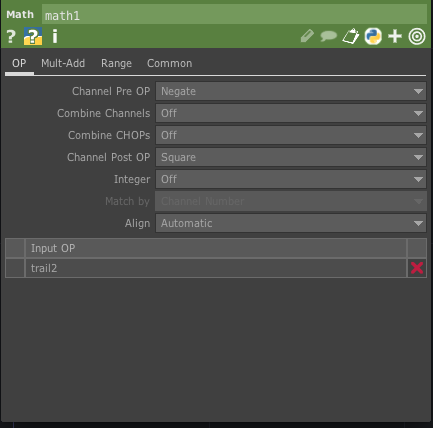
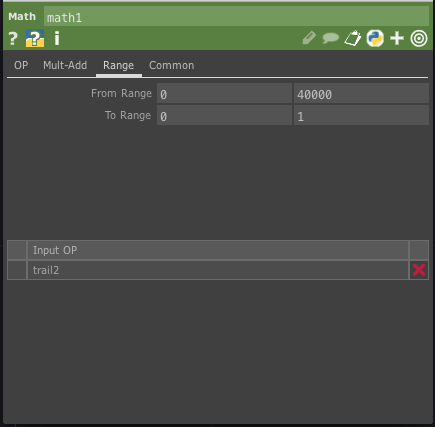
Square the filtered data and convert it to a positive value
Select, place, and wire Math operators from the CHOP tab.
Channel Post OP:Square
From Range: 0-40000 for Normalize output data
-
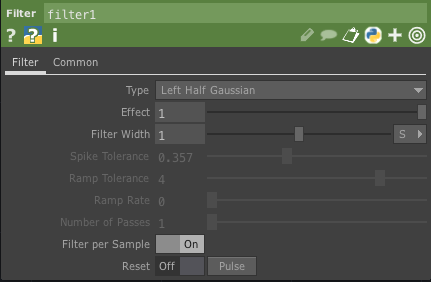
Further filtering the output value
Since the output value changes quite abruptly, arrange and wire the Filter operator from the CHOP tab and gently change the value.
- Type:Left Half Gaussian
- Filter per Sample:On
The operation so far is as follows.
-
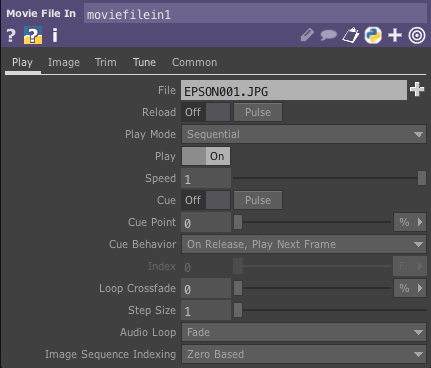
Add image to display
Place the Movie File In operator from the TOP (Texture Operators) tab.
File: Specify image data to display
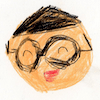
Here I will use the heart drawn by my daughter.
-
Change image size with data output value
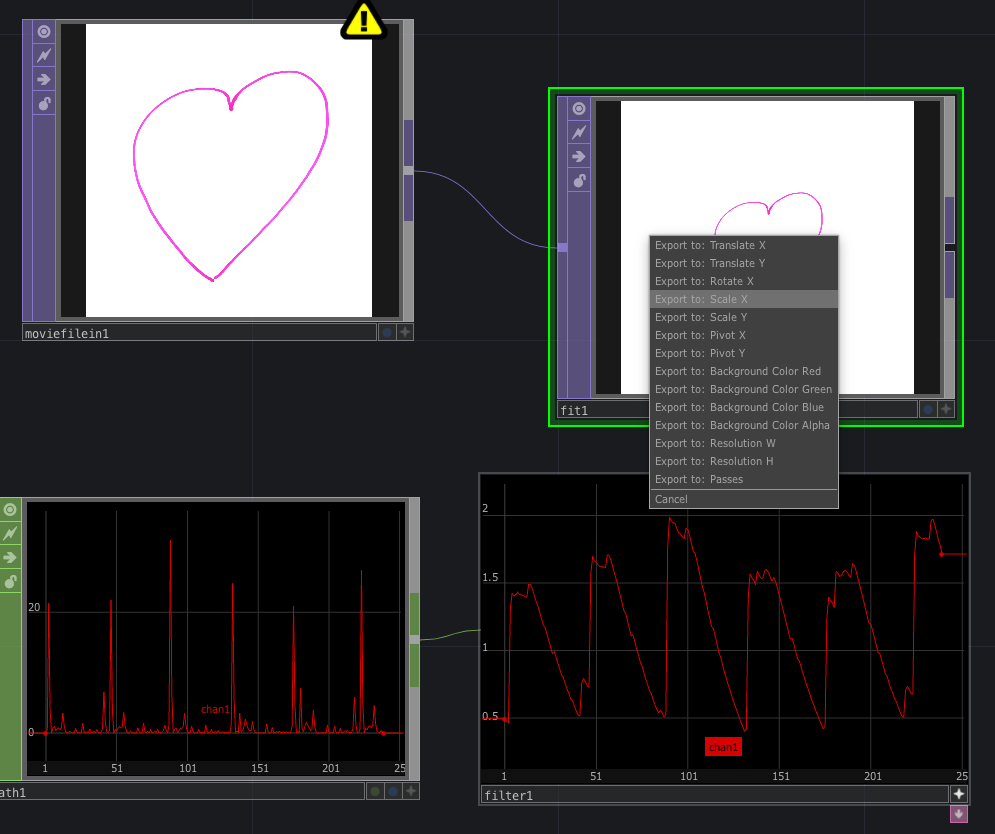
Place the Fit operator from the TOP tab and connect the Movie File In operator.
Click the “+” in the lower right of the Filter operator in 7. and drag chan1 to the Fit operator to open the selection window for various variables. Select Export to Scale X and change the X axis of the image with the output of Filter operator. Likewise with Export to Scale Y, let’s change the image size with Filter operator output value.