導電布 EeonTex で モーションセンシンググローブ DigiTe
本記事にはアフィリエイト広告が含まれます。
ずいぶん前に感圧導電布を購入したまま埃かぶってたので、手袋に貼り付けてモーションセンシングしてみました。
その名もモーションセンシンググローブ DigiTe(デジ手)。
目次
構成
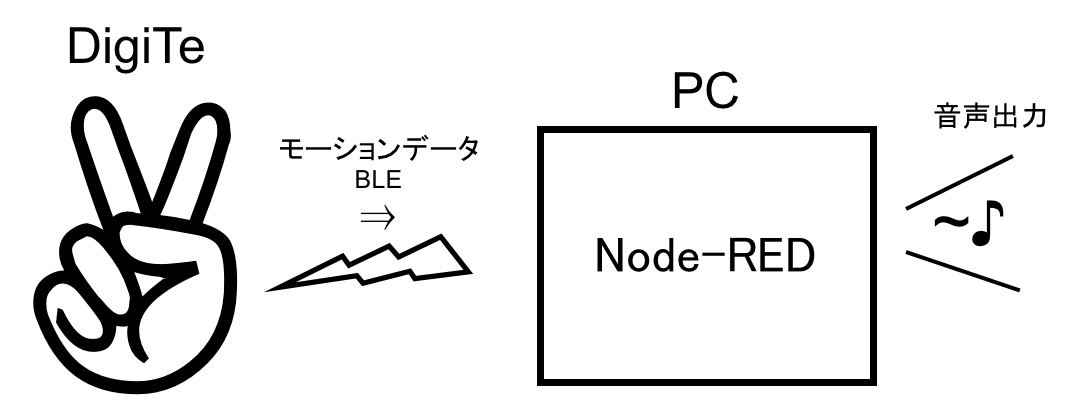
指の動きを感圧導電布で検出してBLEで信号送信し、PCで指の動きに応じた音声を再生します。
全体ブロック図
モーションセンシンググローブ DigiTe 回路図
部品
-
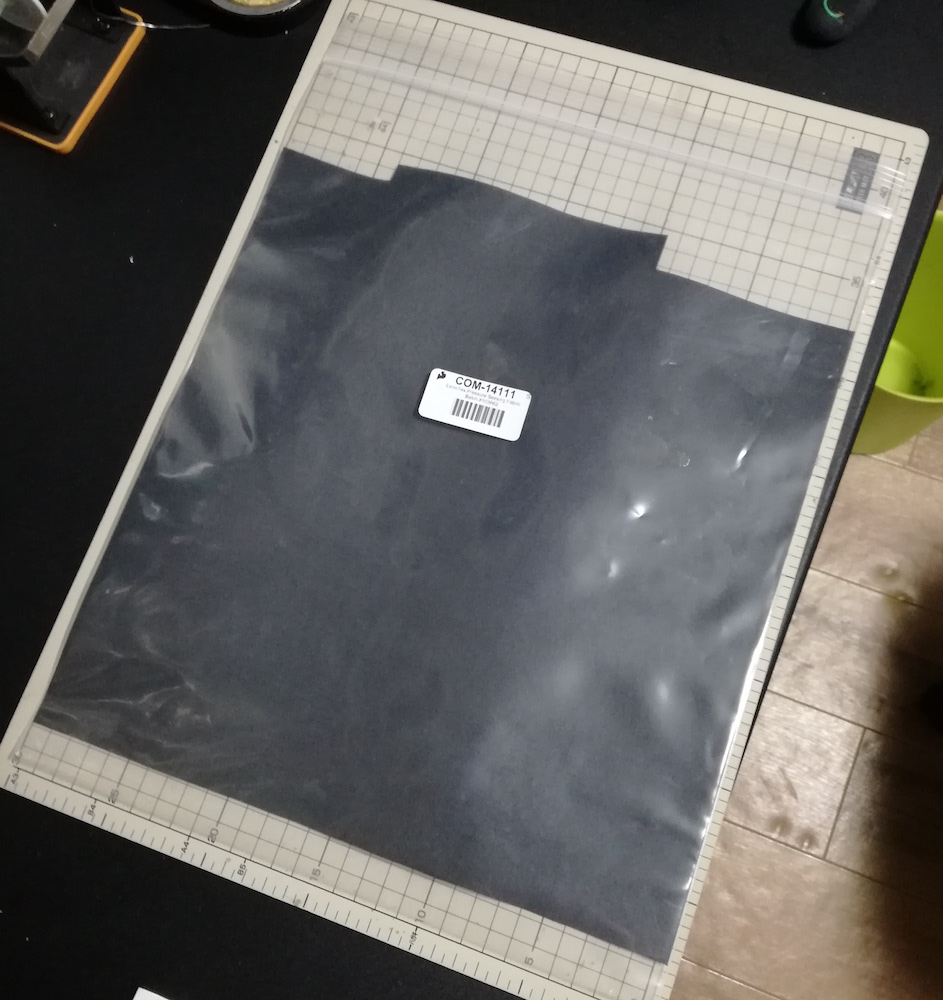
EeonTex 感圧導電布
- 導電糸
- BLE搭載マイコンAdafruit Feather 32u4 Bluefruit LE
- リチウムイオンポリマー電池400mAh
- 抵抗器 4.7kohm
- ブレッドボード
手袋製作
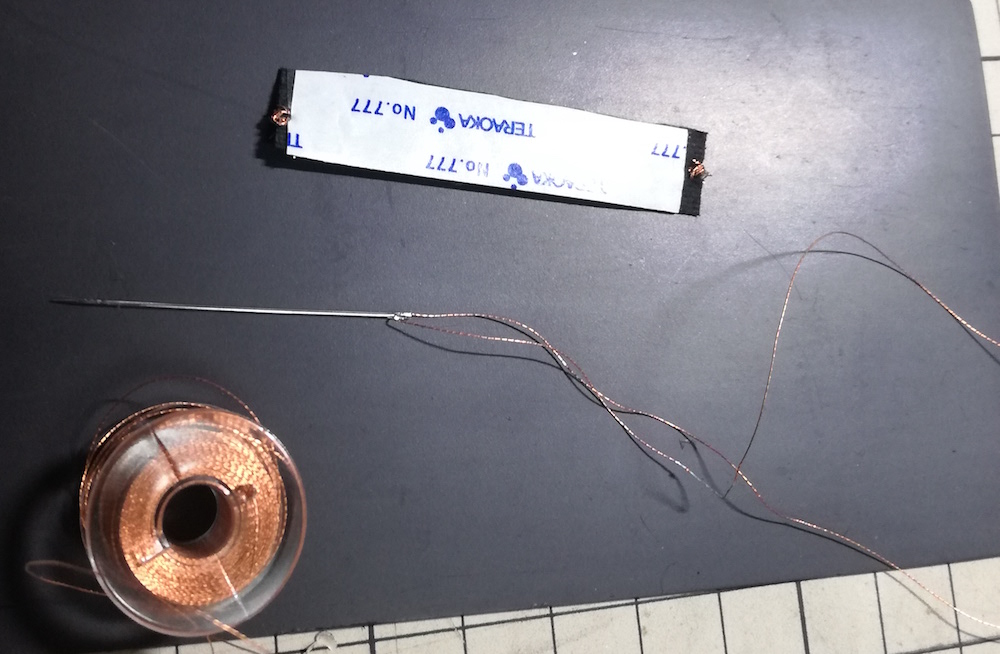
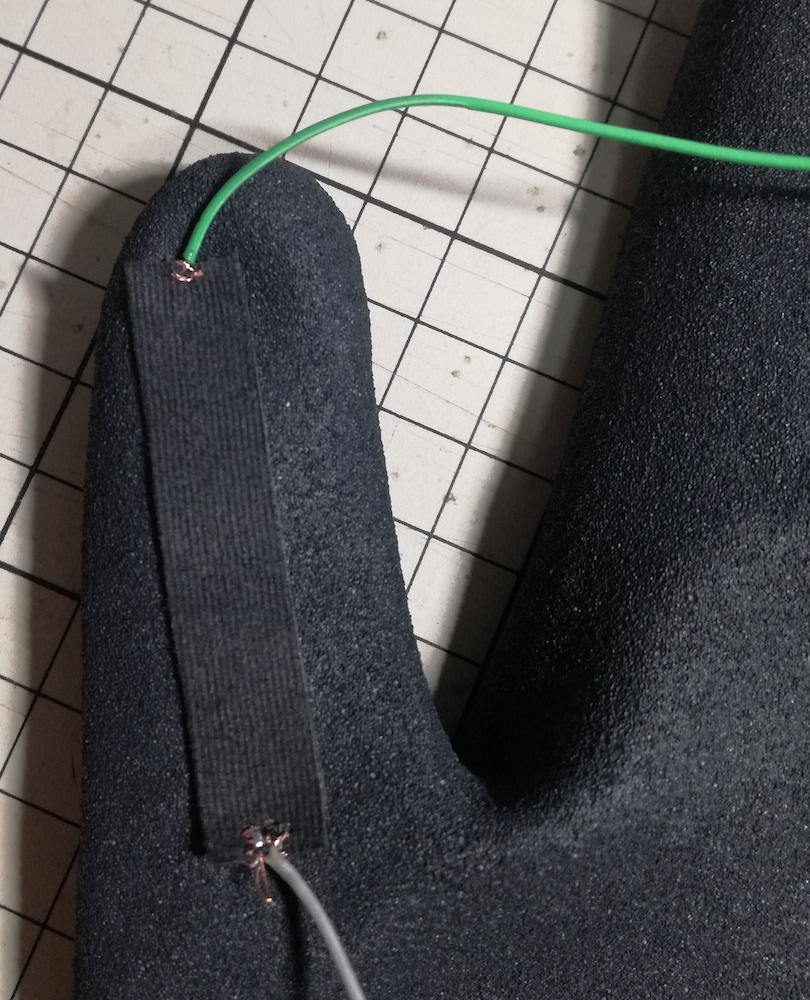
感圧導電布を1cm×5cmほどに切って、配線ハンダ付け用に両端を導電糸で縫い付けて両面テープで手袋の指に貼り付けます。
指を曲げると圧力によって感圧導電布の両端の抵抗値が減少します。
感圧導電布 指を曲げると抵抗値下がる pic.twitter.com/uL76yyyX05
— HomeMadeGarbage (@H0meMadeGarbage) 2018年8月15日
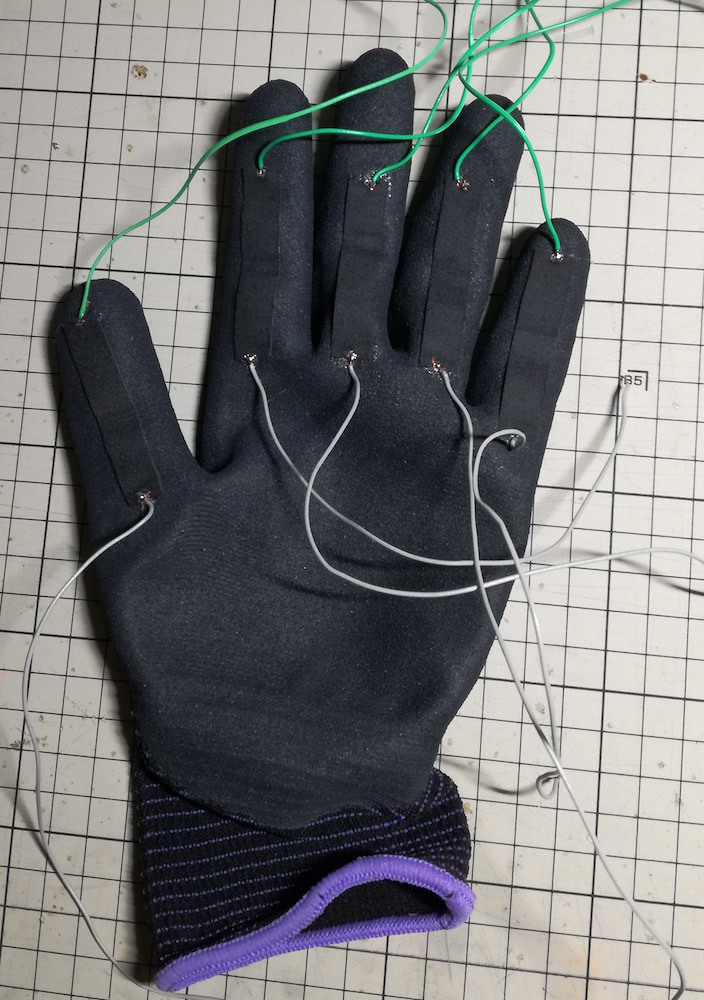
同様に残りの指にも貼り付け。
ちょっと強引ですが、ブレッドボードも手袋に貼り付けてBLE搭載マイコンFeather 32u4と部品を載せて配線します。
Arduinoコード
Feather 32u4の詳細設定は以下のとおりです。
Feather 32u4用のBLEライブラリをインストールします。
https://github.com/adafruit/Adafruit_BluefruitLE_nRF51
このライブラリのコード例 bleuart_datamode.ino を参考にプログラムしました。
|
1 2 3 4 5 6 7 8 9 10 11 12 13 14 15 16 17 18 19 20 21 22 23 24 25 26 27 28 29 30 31 32 33 34 35 36 37 38 39 40 41 42 43 44 45 46 47 48 49 50 51 52 53 54 55 56 57 58 59 60 61 62 63 64 65 66 67 68 69 70 71 72 73 74 75 76 77 78 79 80 81 82 83 84 85 86 87 88 89 90 91 92 93 94 95 96 97 98 99 100 101 102 103 104 105 106 107 108 109 110 111 112 113 114 115 116 117 118 119 120 121 122 123 124 125 126 127 128 129 130 131 132 133 134 135 136 137 |
#include <Arduino.h> #include <SPI.h> #include "Adafruit_BLE.h" #include "Adafruit_BluefruitLE_SPI.h" #include "Adafruit_BluefruitLE_UART.h" #include "BluefruitConfig.h" #if SOFTWARE_SERIAL_AVAILABLE #include <SoftwareSerial.h> #endif #define FACTORYRESET_ENABLE 1 #define MINIMUM_FIRMWARE_VERSION "0.6.6" #define MODE_LED_BEHAVIOUR "MODE" const int analogInPin[5] = {A1, A2, A3, A4, A5}; int sensorValueIni[5] = {0,}; int sensorValue[5] = {0,}; float Div[5] = {0,}; int cnt[5] = {0,}; int sum = 0; int sumOld = 0; /* ...hardware SPI, using SCK/MOSI/MISO hardware SPI pins and then user selected CS/IRQ/RST */ Adafruit_BluefruitLE_SPI ble(BLUEFRUIT_SPI_CS, BLUEFRUIT_SPI_IRQ, BLUEFRUIT_SPI_RST); // A small helper void error(const __FlashStringHelper*err) { Serial.println(err); while (1); } void setup(void) { Serial.begin(115200); //Initial Value Meas. for(int j = 0; j < 5000; j++){ for(int i = 0; i < 5; i++){ sensorValueIni[i] = analogRead(analogInPin[i]); } } if ( !ble.begin(VERBOSE_MODE) ) { error(F("Couldn't find Bluefruit, make sure it's in CoMmanD mode & check wiring?")); } Serial.println( F("OK!") ); if ( FACTORYRESET_ENABLE ) { /* Perform a factory reset to make sure everything is in a known state */ Serial.println(F("Performing a factory reset: ")); if ( ! ble.factoryReset() ){ error(F("Couldn't factory reset")); } } /* Disable command echo from Bluefruit */ ble.echo(false); Serial.println("Requesting Bluefruit info:"); /* Print Bluefruit information */ ble.info(); Serial.println(F("Please use Adafruit Bluefruit LE app to connect in UART mode")); Serial.println(F("Then Enter characters to send to Bluefruit")); Serial.println(); ble.verbose(false); // debug info is a little annoying after this point! /* Wait for connection */ while (! ble.isConnected()) { delay(500); } Serial.println(F("******************************")); // LED Activity command is only supported from 0.6.6 if ( ble.isVersionAtLeast(MINIMUM_FIRMWARE_VERSION) ) { // Change Mode LED Activity Serial.println(F("Change LED activity to " MODE_LED_BEHAVIOUR)); ble.sendCommandCheckOK("AT+HWModeLED=" MODE_LED_BEHAVIOUR); } // Set module to DATA mode Serial.println( F("Switching to DATA mode!") ); ble.setMode(BLUEFRUIT_MODE_DATA); Serial.println(F("******************************")); } void loop(void) { // read the analog in value: for(int j = 0; j < 10; j++){ for(int i = 0; i < 5; i++){ sensorValue[i] = analogRead(analogInPin[i]); Div[i] = Div[i] + (float)sensorValue[i]/(float)sensorValueIni[i]; } } for(int i = 0; i < 5; i++){ Div[i] = Div[i]/10.0; Serial.print(Div[i]); Serial.print("\t"); if(Div[i] < 1.3){ cnt[i] = 1; }else{ cnt[i] = 0; } } Serial.println(""); sum = 0; for(int i = 0; i < 5; i++){ sum = sum + cnt[i]; } Serial.println(sum); //Send input data to host via Bluefruit if(sum != sumOld){ ble.print(sum); sumOld = sum; } delay(500); } |
マイコン起動時に各指の感圧導電布の初期抵抗を測定(指は伸ばした状態)し、曲げた際に30%抵抗が減少すると曲げられた指が検出されます。
指の動きが変化すると、伸びた指の数を算出しBLE送信します。
Node-RED設定
グローブからのBLE信号をPCで受けて音声出力させるためにNode-REDを使用しました。
以下のノードをインストールして使用しています。
- BLE 送信ノード
node-red-contrib-generic-ble - 音声再生ノード
node-red-contrib-audio
ノードの設定
左から順に各ノードの設定について説明します。
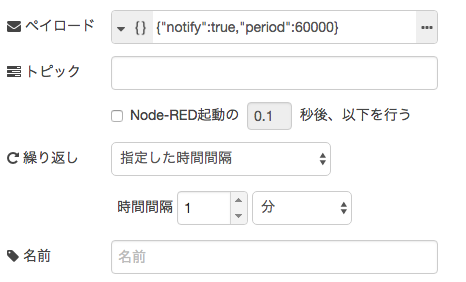
Injectノード
次段のBLE入力ノードを起動するためのノードです。
ペイロードをJSONとして以下を入力します。
|
1 2 3 4 |
{ "notify": true, "period": 60000 } |
このノードを起動することで60秒間、グローブからのBLE信号を受信することができます。ずっと受信したいので、繰り返しを1分間で設定しています。
BLE入力ノード
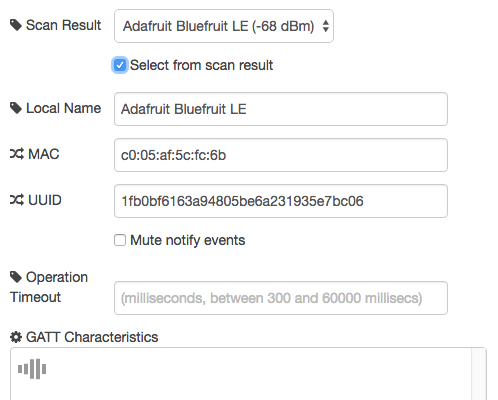
BLEデータ受信用のノードです。グローブを起動した状態でダブルクリックして以下の編集ボタンをクリックします。
以下の”Select from scan result”をチェックして、Scan Resultで “Adafruit Bluefruit LE”を選択して”更新”をクリックします。
この状態でデプロイしてInjectノードを起動すると、グローブからのBLE信号を受信し続けます(ピリオドを無限にするやり方が分からなかった。。。)。
Functionノード -データパース-
以下のように入力し、BLE信号から指の数をパースします。
|
1 2 |
var msg = { payload: Number(msg.payload.characteristics["6e400003b5a3f393e0a9e50e24dcca9e"]) }; return msg; |
Functionノード -条件分岐-
以下のように入力し、指の数(1〜5)によって出力を分岐します。
|
1 2 3 4 5 6 7 8 9 10 11 |
if (msg.payload == 1) { return [ msg, null, null, null, null ]; }else if (msg.payload == 2) { return [ null, msg, null, null, null ]; }else if (msg.payload == 3) { return [ null, null, msg, null, null ]; }else if (msg.payload == 4) { return [ null, null, null, msg, null ]; }else if (msg.payload == 5) { return [ null, null, null, null, msg ]; } |
audioノード
それぞれ再生するmp3データをパス込みで指定します。
ここではBLEデータ(指の数)が1のとき「いち」、2のとき「に」…と再生するようにしました。長女ちゃん![]() の声を録音しました。
の声を録音しました。
動作
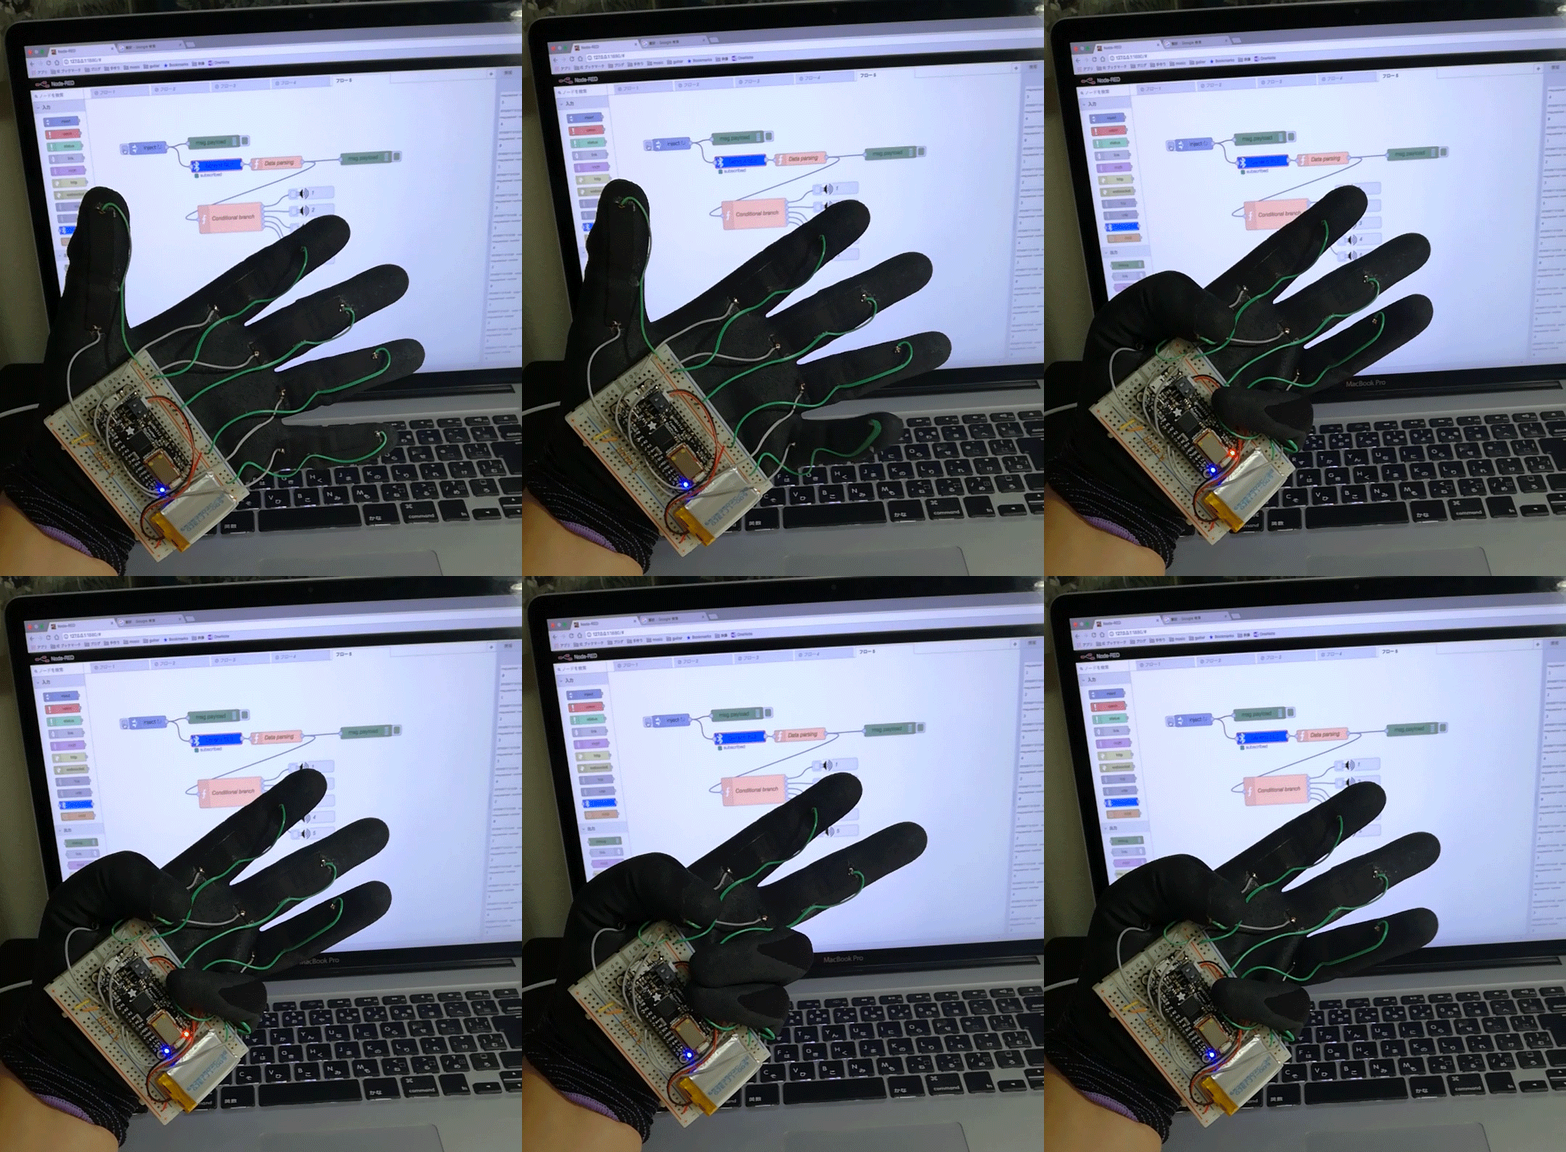
感圧導電布で指の動き検出。#ble #adafruit #EeonTex #nodered pic.twitter.com/tumJenGQfA
— HomeMadeGarbage (@H0meMadeGarbage) 2018年8月16日
応用してじゃんけんバージョンも
ジャンケン検出。#ble #adafruit #EeonTex #nodered pic.twitter.com/tumJenGQfA pic.twitter.com/KYNUB09wIS
— HomeMadeGarbage (@H0meMadeGarbage) 2018年8月16日
ちょっと試作感満載ですがモーションセンシンググローブができました。
まだまだ導電布たくさんあるし、なかなか使えるなぁ 🙄 。
曲げセンサより経済的だしね!
追記
18/8/22
Adafruit様のブログで紹介いただきました!
 お父ちゃん
2018.8.17
