M5Stick-Car
 お父ちゃん
2019.7.10
お父ちゃん
2019.7.10
本記事にはアフィリエイト広告が含まれます。
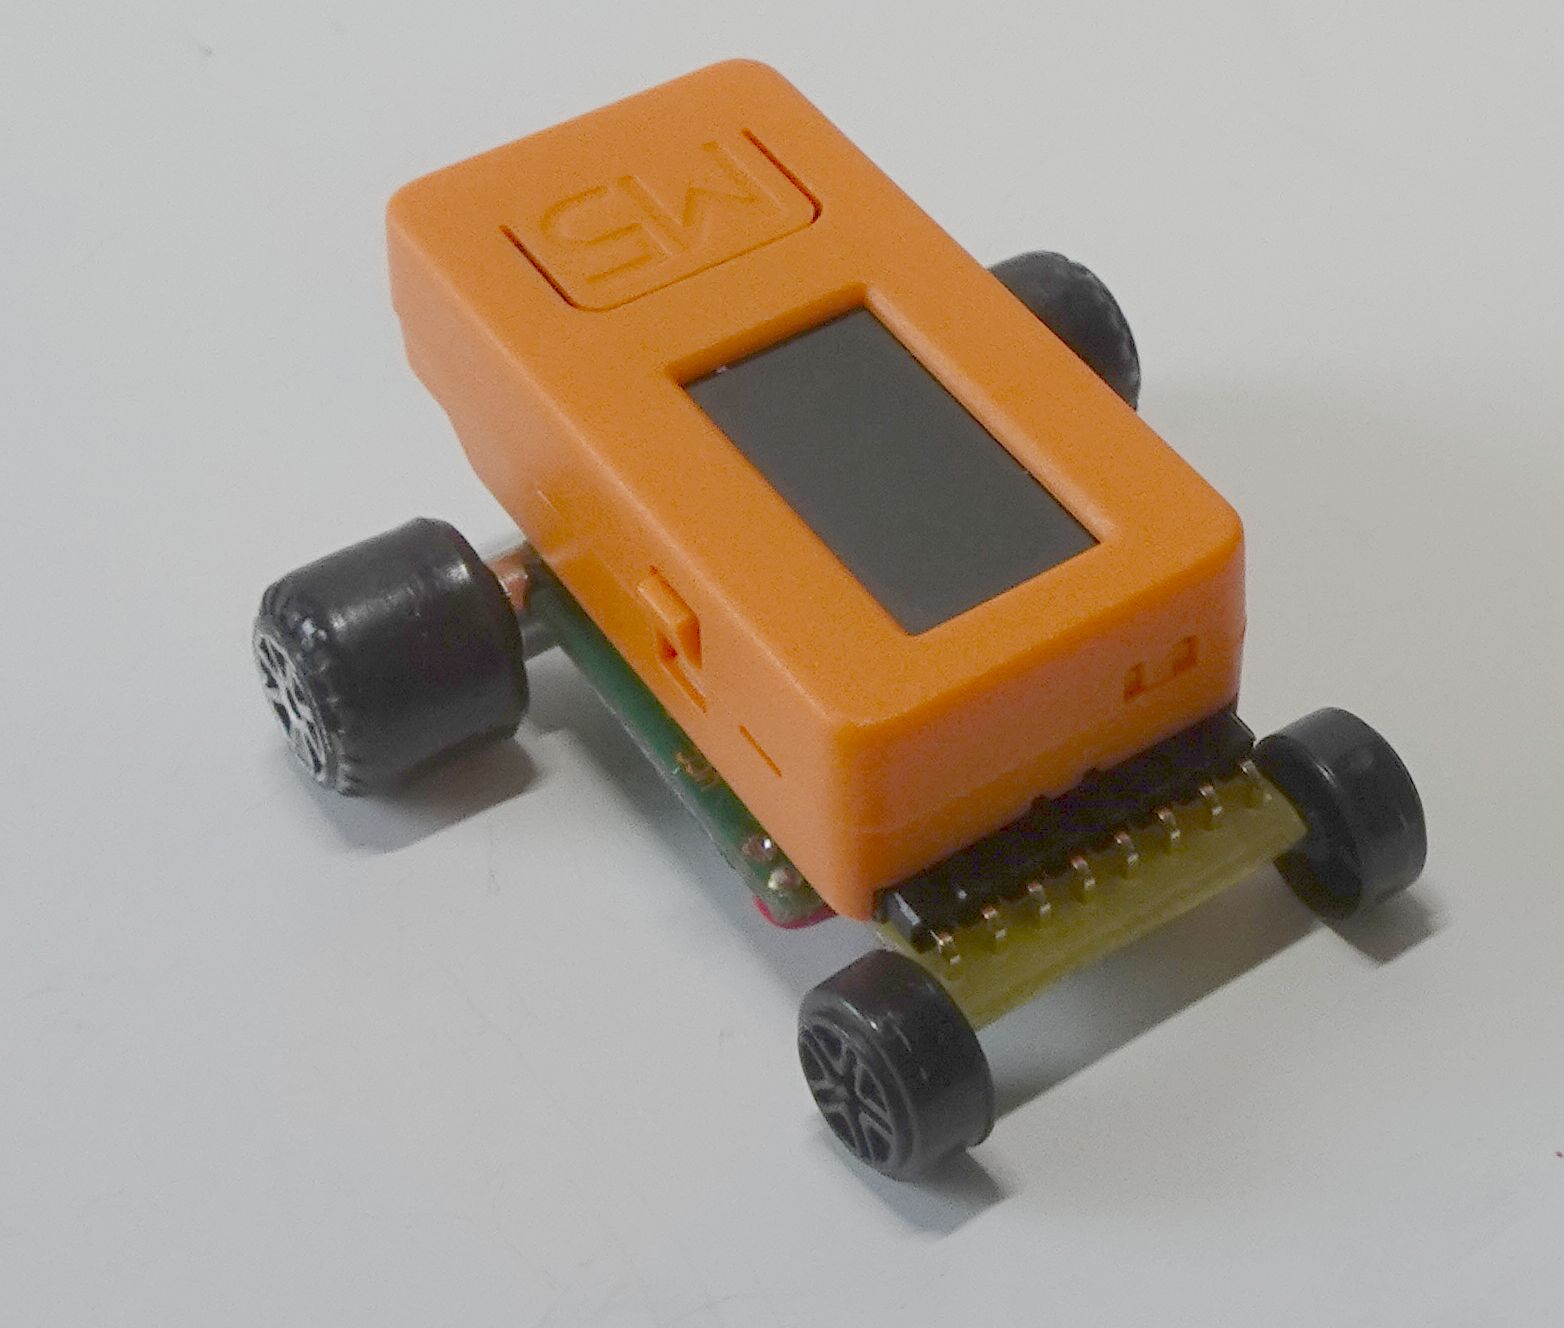
I made Blynk-controlled mini Car using M5Stick-C.
I introduce the WiFi-controlled car “M5Stick-Car” manufactured using M5Stick-C.
目次
Structure
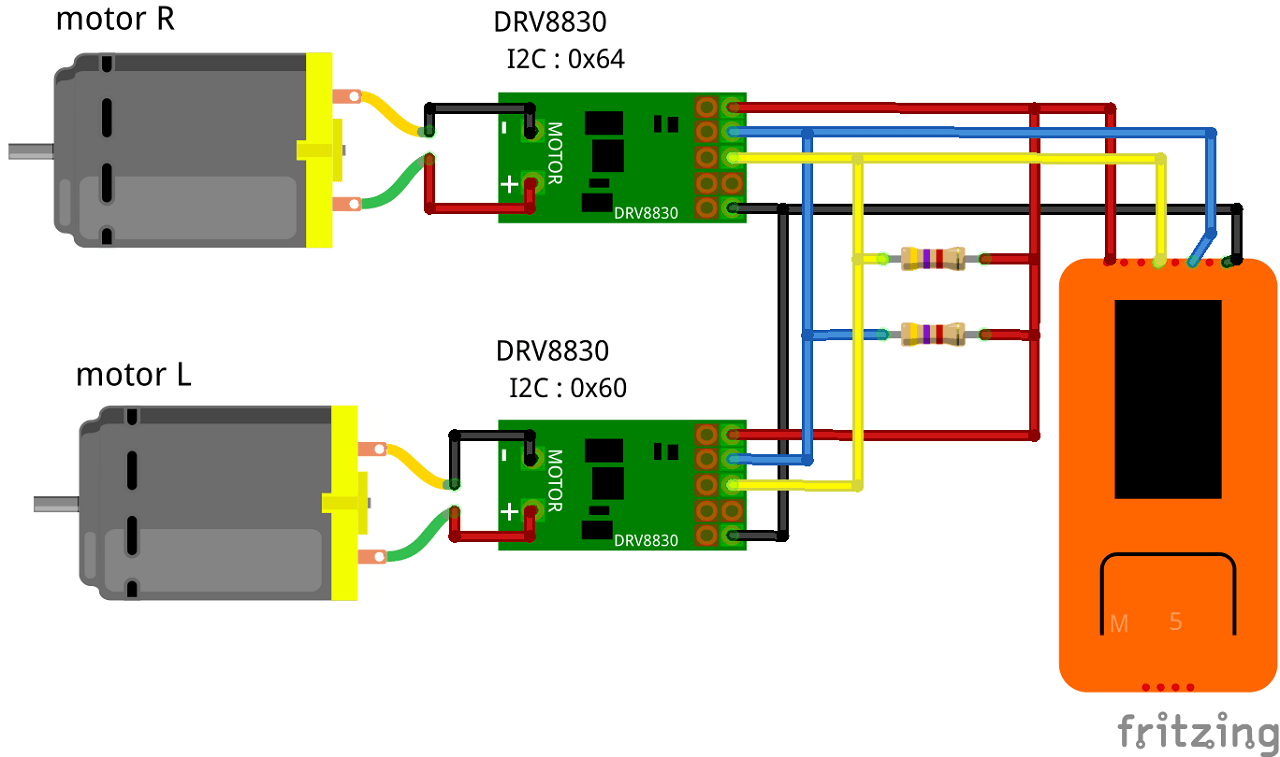
Move two motors using I2C motor driver DRV8830. It communicates with M5Stick-C via WiFi with a smartphone application Blynk to control the motor and realize WiFi control operation.
Parts
- M5StickC
- I2C Motor Driver DRV8830
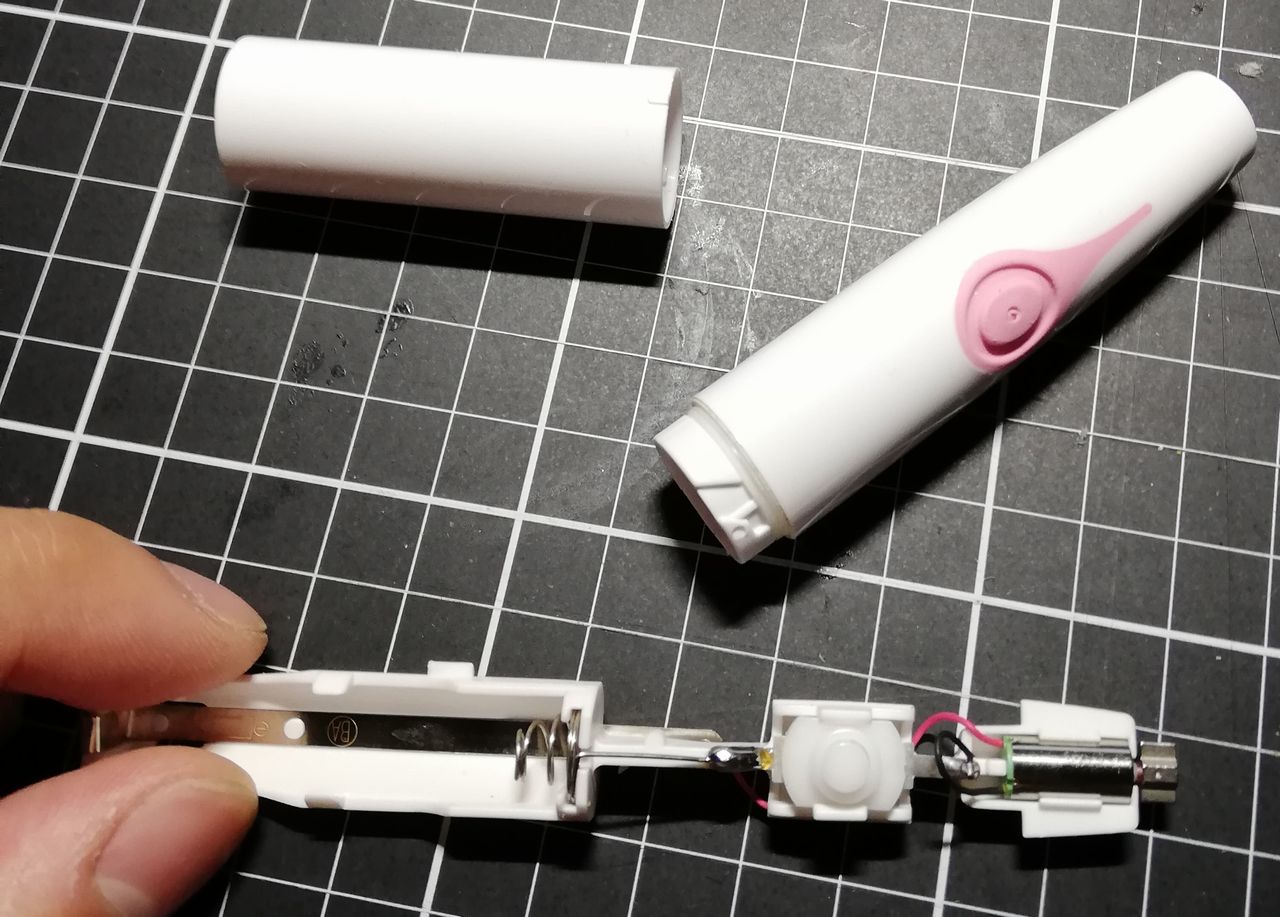
- Motor Use the electric toothbrush motor

Car
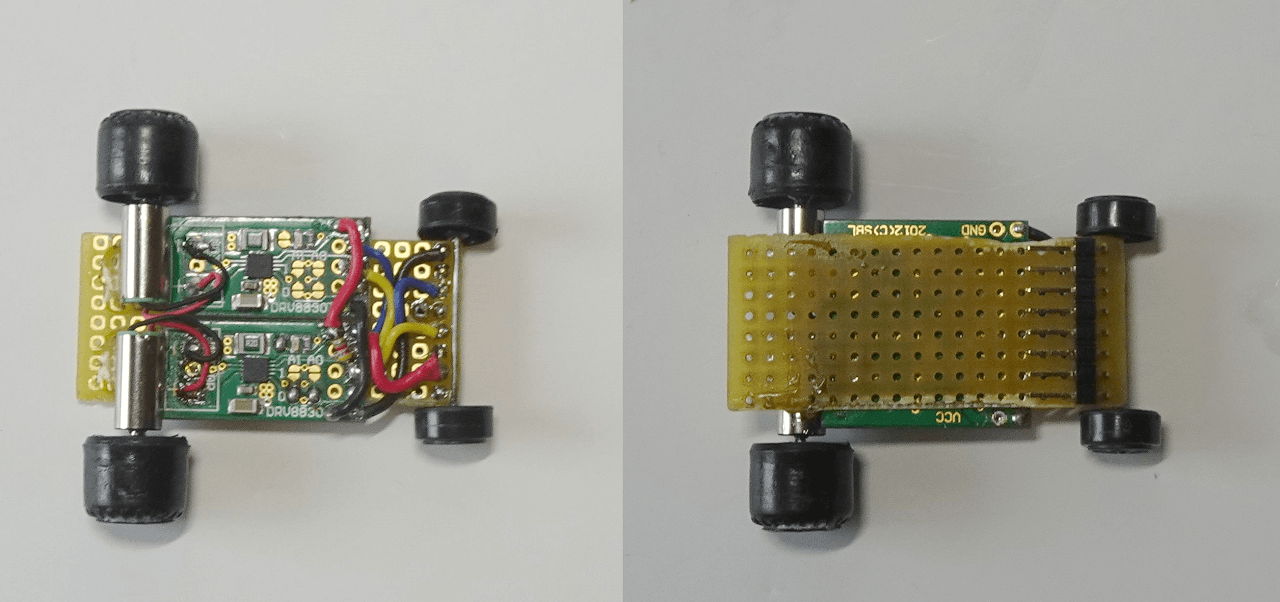
A connector, a motor driver, and a vibration motor were mounted by cutting the universal board to a size and connecting it to the M5Stick-C.
The electric toothbrush vibration motor was used for the motor. It was a good feeling of power when I tried because it was possible to store something that could not be used after the brush replacement connection broke.
I glued the toy mini car tire to the motor and used the mini car tire on the front wheel.
M5Stick-C
I used Arduino IDE for the design environment. Please refer to the following official site for the setting method.
https://docs.m5stack.com/#/ja/quick_start/m5stickc/m5stickc_quick_start_with_arduino_Windows
It’s small and cute, but it’s full of color LCD displays, microphones, infrared LEDs, BLE and WiFi functions. It is very easy to handle because it is compactly contained in a solid package. The details are as follows.
https://github.com/m5stack/M5StickC
Blynk
M5Stick-C is controlled by smartphone app Blynk via WiFi. By simply downloading the application and registering an account, you can easily communicate and control various microcomputers using various widgets such as buttons via WiFI and BLE. This version of Blynk app is 2.27.6.
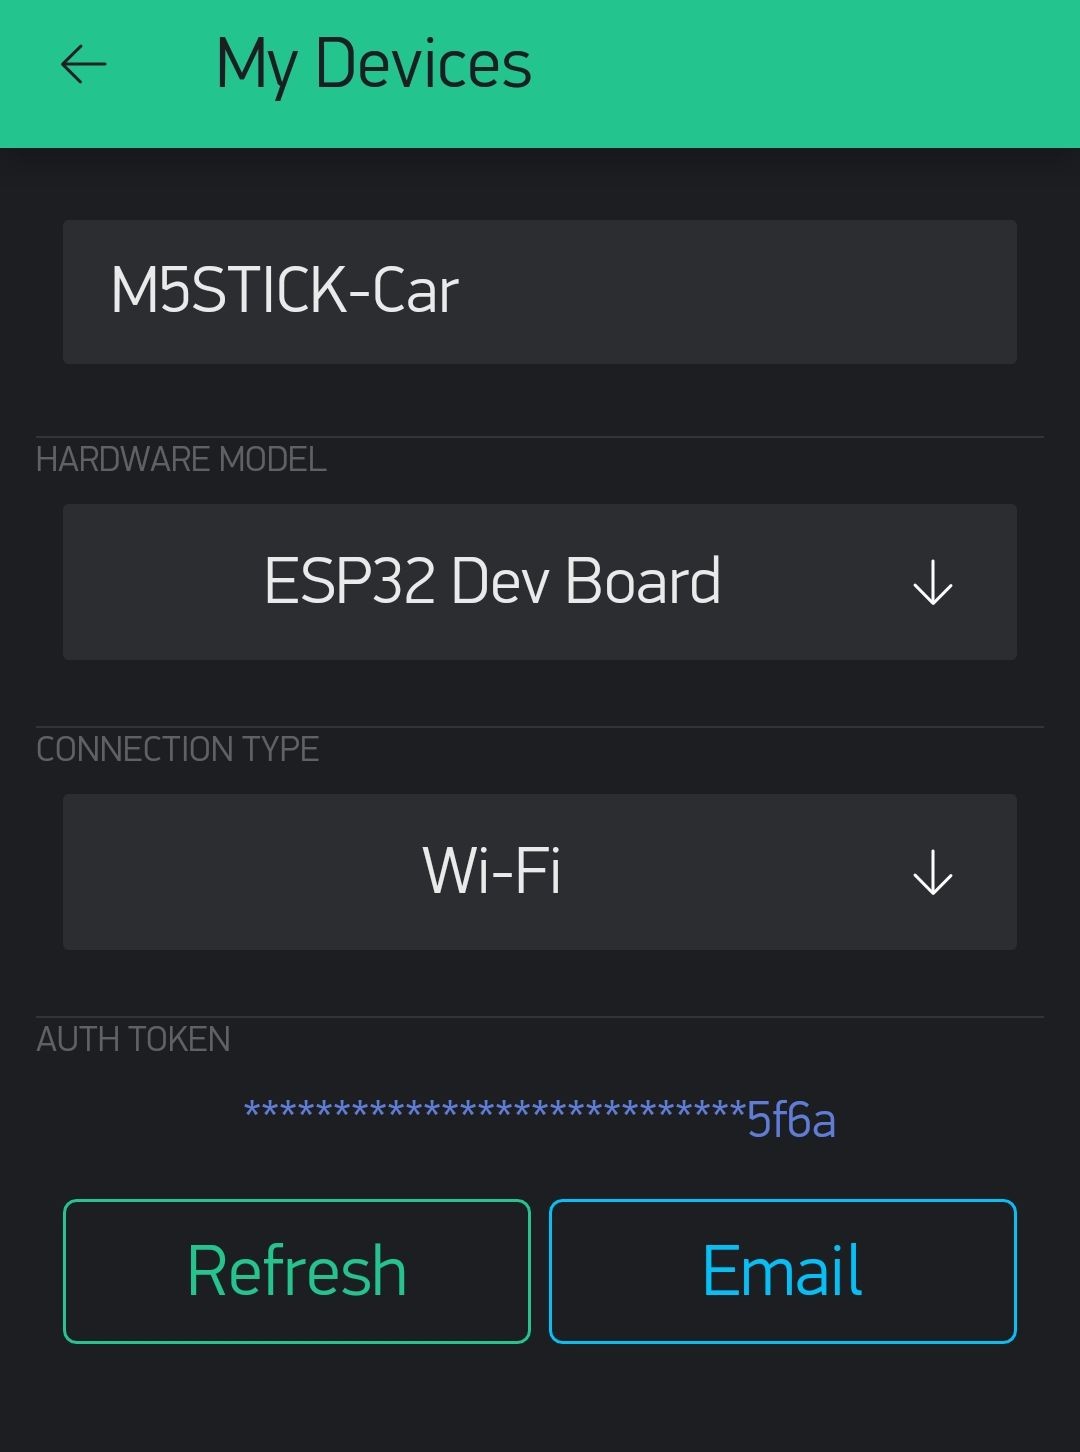
Create a new project HARDWARE MODEL, select ESP32 Dev Board. CONNECTION TYPE select WiFi. AUTH TOKEN will be used when generating Arduino code (sent to the registered email).

Arrange the joystick widget.
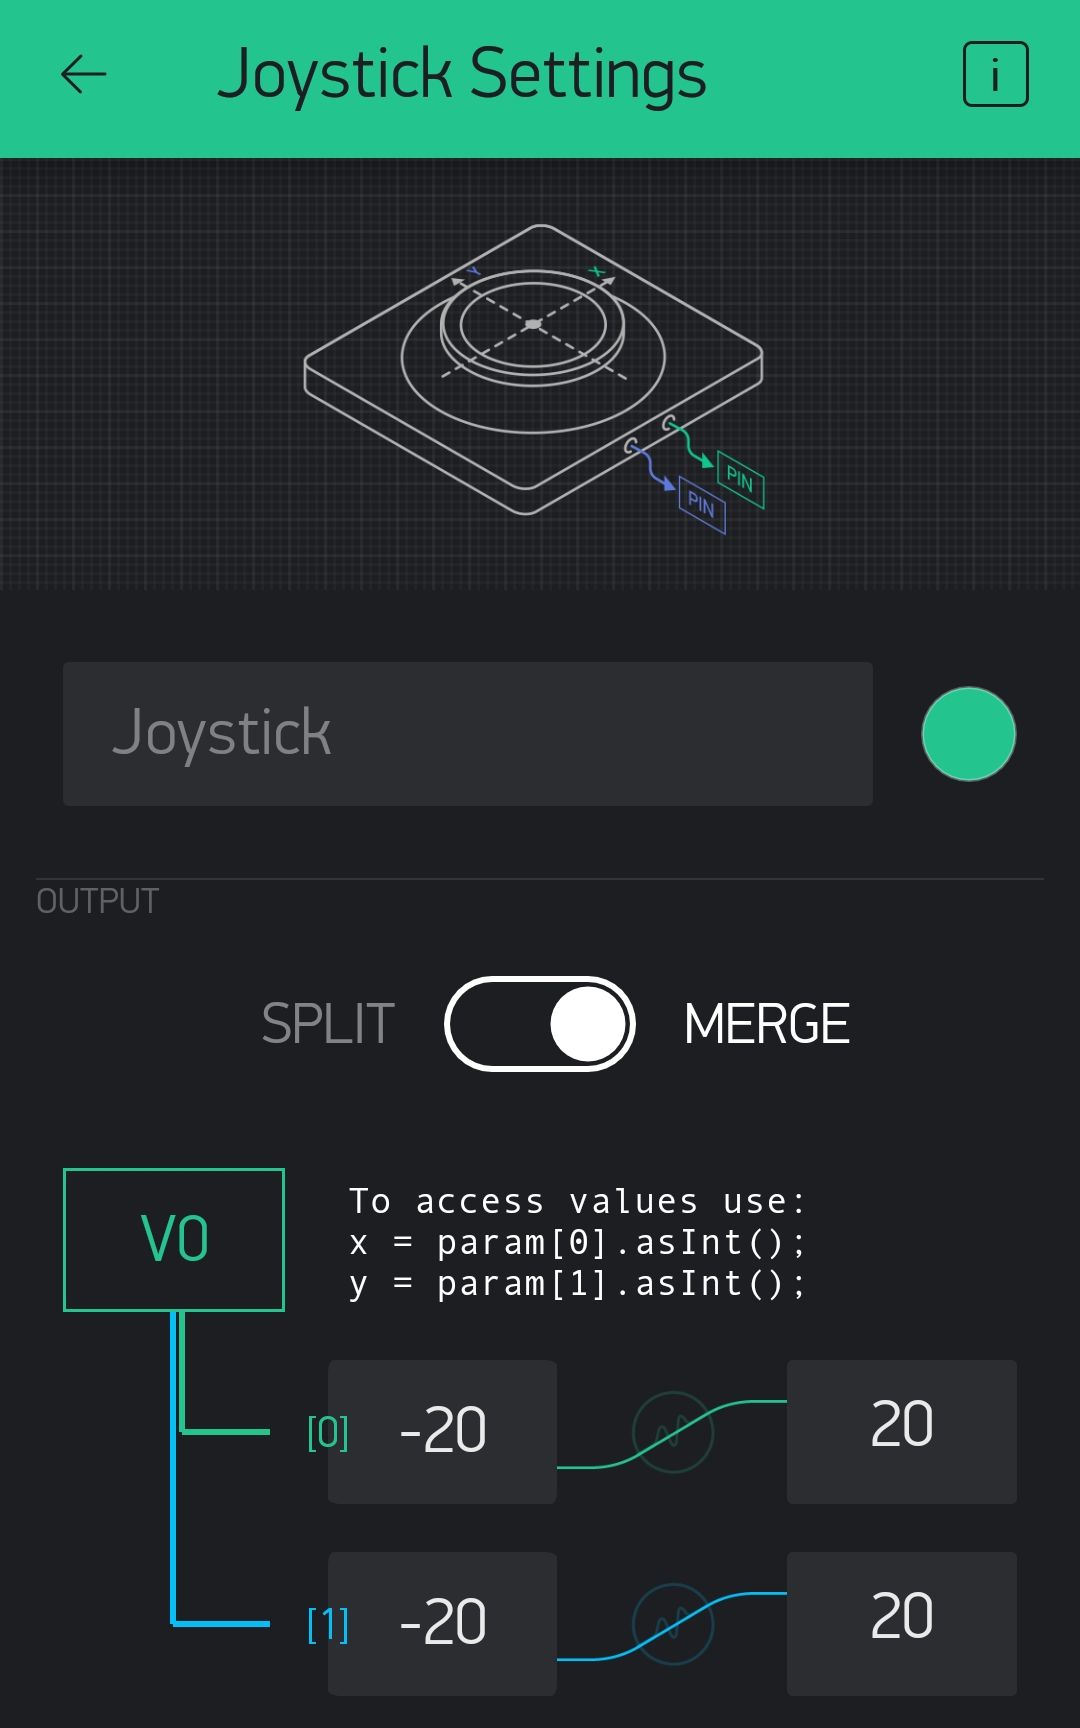
The joystick settings are MERGE of the x-axis and y-axis outputs and output to virtual pin V0, and the value is set to -20 ~ 20 respectively.
I2C motor driver module DRV8830
The motor driver DRV88320 controls the motor supply voltage (speed) and the supply voltage direction (rotation direction) by the I2C input. Two modules were used to control the left and right motors. The details are as follows.
https://strawberry-linux.com/pub/drv8830-manual.pdf
I can change the I2C address by setting two jumpers on the module. This time I set both jumpers of left motor module to GND (address: 0x60) and jumpers of right motor module to both open (address: 0x64).
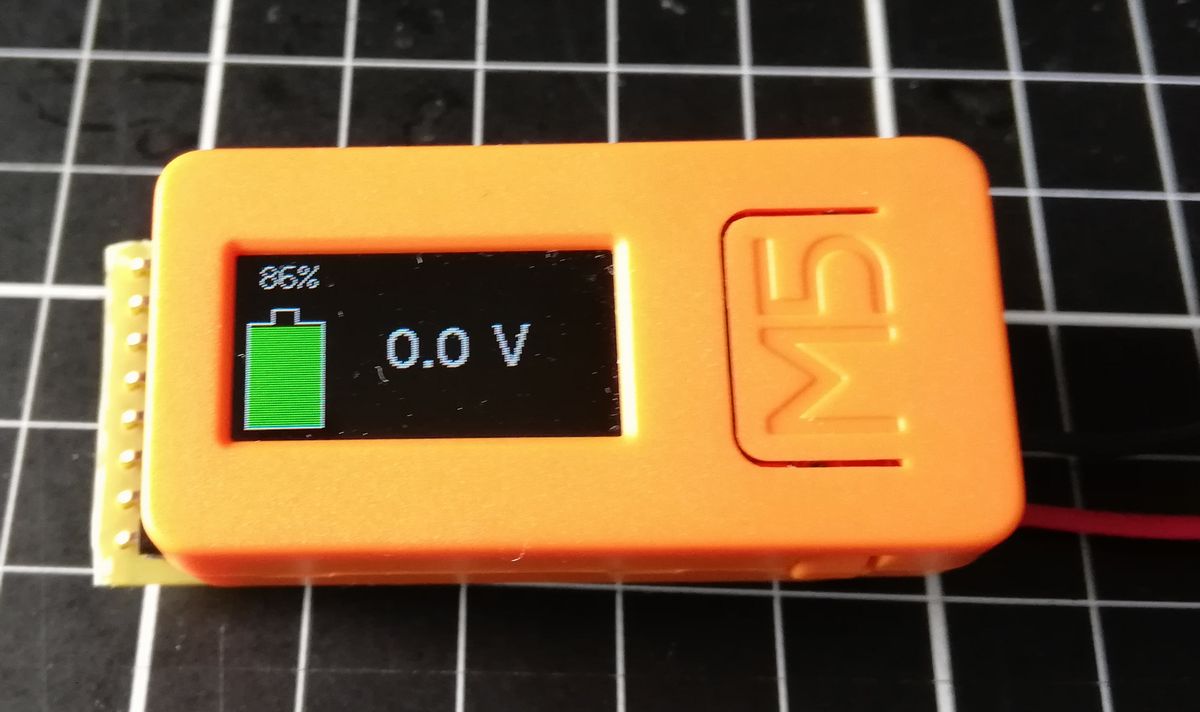
The left and right motors receive a voltage supply of 0 to 1.6 V in response to Blynk’s joystick value of 0 to 20.
Arduino IDE program
The following program was programmed using Blynk’s library for Arduino. The version is 0.6.1.
https://github.com/blynkkk/blynk-library
It was programmed using the library code example ESP32_WiFi.ino as a reference.
|
1 2 3 4 5 6 7 8 9 10 11 12 13 14 15 16 17 18 19 20 21 22 23 24 25 26 27 28 29 30 31 32 33 34 35 36 37 38 39 40 41 42 43 44 45 46 47 48 49 50 51 52 53 54 55 56 57 58 59 60 61 62 63 64 65 66 67 68 69 70 71 72 73 74 75 76 77 78 79 80 |
#define BLYNK_PRINT Serial #include <WiFi.h> #include <WiFiClient.h> #include <BlynkSimpleEsp32.h> #include <Wire.h> // You should get Auth Token in the Blynk App. char auth[] = "YourAuthToken"; // Your WiFi credentials. char ssid[] = "WiFi SSID"; char pass[] = "WiFi Password"; const int motorL = 0x60; const int motorR = 0x64; long Speed; long SpeedL, SpeedR; //motor driver I2C void writeMotorResister(int motor, byte vset, byte data1){ int vdata = vset << 2 | data1; Wire.beginTransmission(motor); Wire.write(0x00); Wire.write(vdata); Wire.endTransmission(true); } //Joystick data reception BLYNK_WRITE(V0) { long x = param[0].asInt(); long y = param[1].asInt(); Serial.print("x: "); Serial.print(x); Serial.print(" y: "); Serial.print(y); Speed = sqrt(x*x+y*y); if(Speed > 20){ Speed = 20; } Serial.print(" Speed: "); Serial.println(Speed); //Motor control if(y >= 0){ if(x >= 0){ SpeedL = 0; SpeedR = abs(x); }else{ SpeedL = abs(x); SpeedR = 0; } writeMotorResister(motorL, byte(Speed - SpeedL), 0x01); writeMotorResister(motorR, byte(Speed - SpeedR), 0x01); }else{ if(x >= 0){ SpeedL = 0; SpeedR = abs(x); }else{ SpeedL = abs(x); SpeedR = 0; } writeMotorResister(motorL, byte(Speed - SpeedL), 0x02); writeMotorResister(motorR, byte(Speed - SpeedR), 0x02); } } void setup() { Serial.begin(115200); Blynk.begin(auth, ssid, pass); Wire.begin(0, 26, 10000); //SDA, SCL delay(500); writeMotorResister(motorL, 0x00, 0x00); writeMotorResister(motorR, 0x00, 0x00); } void loop() { Blynk.run(); } |
Operation
このオレンジのにはいろんなものが詰まっているのでスマホで制御もおてのもの。#Blynk #M5StickC #M5stack #ESP32 pic.twitter.com/WZvzeURQDh
— HomeMadeGarbage (@H0meMadeGarbage) 2019年6月15日
Run coolly! The color is also cool!

「M5Stick-Car」への1件のフィードバック